


AWS integration
Supported platforms:
You can connect your AWS account(s) to Gremlin for stronger integration with services running in AWS. Connecting your AWS account lets you:
- Create services from AWS Elastic Load Balancers (ELBs).
- Automatically prepare your Auto Scaling Groups (ASGs) for testing with external actions.
- Add Intelligent Health Checks, which use your services’ load balancers to automatically create Health Checks based on latency, throughput, and error rate.
- Create Health Checks using CloudWatch data.
Adding an AWS account
Before creating an AWS Health Check, you’ll need to grant Gremlin permission to read your CloudWatch environment. Gremlin supports two methods of authenticating to AWS: using an IAM role, or using a service account. IAM roles are the recommended method, as they allow you to grant access without sharing your AWS credentials. We’ll explain both methods below, starting with IAM.
Authenticating Gremlin to AWS using an IAM role
Gremlin can authenticate using IAM in one of two ways:
- Automatically by deploying a Cloud Formation template. This is the easiest and fastest way to create the necessary permissions.
- Manually creating IAM policies and roles for Gremlin. This is slower, but gives you greater control over the created resources.
To authenticate Gremlin using an IAM role:
- Log into the AWS Console and navigate to IAM (or click on this link). Keep this screen open in a separate browser window or tab.
- In a different browser window or tab, open the Health Checks page in the Gremlin web app, click + Health Check, then select AWS from the Integrations drop-down.
- Under Authentication, select IAM Role.
- Choose the method you want to use to grant Gremlin permissions.
- If you want to let Gremlin create the permissions for you using Cloud Formation, select Cloud Formation, then click Launch Stack. Follow the instructions, then continue after the "configure the IAM role manually" section.
- If you want to configure the IAM role manually, select Manual.
- In the AWS Console, click on Policies in the left-hand navigation menu.
- Click Create policy.
- Change the Policy editor type from Visual to JSON.
- Enter the JSON shown under the "Policy JSON" heading below, then click Next:
- Give the policy a name, such as “gremlin-policy”. Review the changes, then click Create policy.
- After creating the policy, click Roles in the left-hand navigation menu, then click Create role.
- Select Custom trust policy, then enter the text shown under the "Custom trust policy JSON" heading below.
- Click Next.
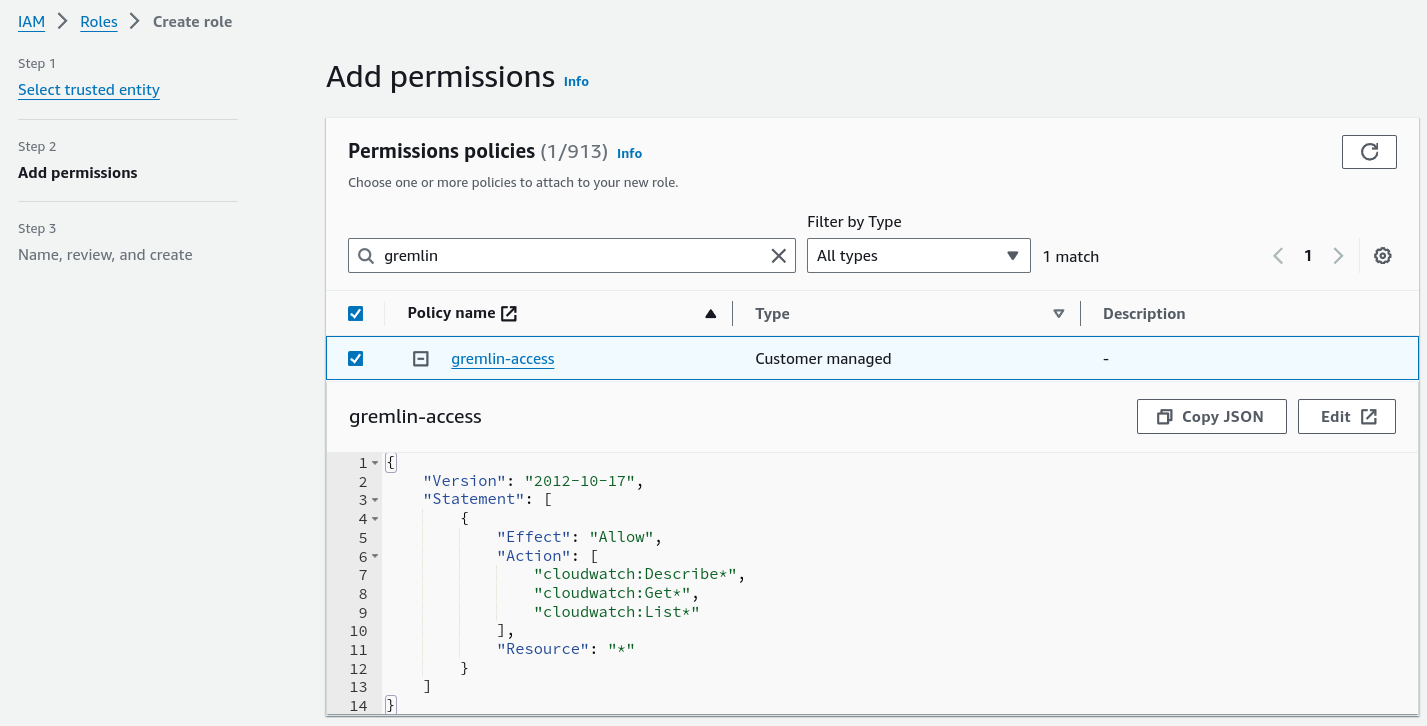
- On the Permissions policies screen, search for the policy you just created. Click on the checkbox next to its name to select it, then click Next.
- Click Next.
- Enter a name for your role, such as “gremlin-role”. Review the changes, then click Create role.
- Select your newly created IAM role from the list and look for the ARN field. You’ll see an alphanumeric string starting with “arn:aws:iam”. Copy this string and paste it into the AWS IAM Role ARN field in the Gremlin web app.
- In the Gremlin web app, click Save to finish creating your authentication.

Policy JSON
Custom trust policy JSON
Authenticating Gremlin to AWS using a Service Account
To authenticate Gremlin using a service account:
- Open the AWS Console and log into your AWS account.
- Navigate to Identity and Access Management (IAM), or click this link.
- Select Users from the left-hand navigation menu.
- Select the user you want to use as the service account, or create a new user. This user must have access to read CloudWatch alarms.
- On the user’s account page, select the Security credentials tab.
- Under Access keys, click Create access key.
- Select Third-party service as the use case.
- Read the Confirmation, then check the box and click Next.
- Enter a Description for the key, such as “Gremlin service account”.
- Click Create access key. Keep this screen open.
- In the Gremlin web app, enter your AWS account ID in the AWS Account ID field. You can find this by clicking on your organization name in the top-right corner of the AWS console.
- Copy the value from the Access key field in AWS to the AWS Access Key ID field in Gremlin.
- Copy the value from the Secret access key field in AWS to the AWS Secret Access Key field in Gremlin.
- Click Save to validate and save your new AWS authentication.
Mapping Elastic Load Balancers (ELBs) to services
Gremlin can automatically detect Elastic Load Balancers (ELBs) running in your AWS environment and use them to create new services. Mapping ELBs to services also lets you use Intelligent Health Checks to monitor your service’s health during testing.
To map an ELB to a service:
- Select your service from the service list in the Gremlin web app.
- Select Settings, then Integrations.
- Under the AWS heading and the Elastic Load Balancer (ELB) subheading, click Define.
- Select the AWS Account ID that you want to use to access the ELB, then click Next.
- Select the ELB you want to map to your service and click Next. You can use the search box to look up ELBs by name, DNS, region, or tag.
- Optionally, if you want Gremlin to create Intelligent Health Checks, check the box to Use Intelligent Health Checks for this service.
- Click Save.
Mapping Auto Scaling Groups (ASGs) to services
Mapping Auto Scaling Groups (ASGs) to your services allows Gremlin to automatically disable ASG autoscaling during a Disaster Recovery Test, resulting in a more accurate reproduction of a zone outage.
To map an ASG to a service:
- Select your service from the service list in the Gremlin web app.
- Select Settings, then Integrations.
- Under the AWS heading and the Auto Scaling Group (ASG) subheading, click Define.
- Select the AWS Account ID that you want to use to access the ASG, then click Next.
- Using the drop-down list, select the ASG you want to map to your service and click Save.
Removing an ELB or ASG from a service
To remove (unmap) an ELB or ASG from a service:
- Select your service from the service list in the Gremlin web app.
- Select Settings, then Integrations.
Under the AWS heading, click Remove next to the ELB or ASG you want to remove.