


Targets
Supported platforms:
A target is any infrastructure or application resource that you can run experiments on. This can include Amazon EC2 instances, Kubernetes cluster resources, DigitalOcean droplets, serverless functions, and bare metal servers in your own data center. You can view all targets in the Agents section of the web app.
Hosts
Hosts are bare metal or virtualized systems (including cluster nodes) that are available for experiments. In the Web UI, users can filter selected hosts based on their tags, and select individual hosts by their <span class="code-class-custom">Identifier</span>, when creating experiments.
In a containerized environment like Kubernetes or Docker, running experiments on hosts can potentially impact containers and processes running in those environments. To limit the scope of your experiments, you can also use container or Kubernetes-based targeting in those environments.
Host states
After installation, the Gremlin agent will create an outbound network connection to <span class="code-class-custom">api.gremlin.com</span> over port 443. When the agent authenticates, its host will appear on the hosts page in the <span class="code-class-custom">Active</span> state. It will remain in this state for as long as the agent can reach the Gremlin API. If the agent can't reach the Gremlin API for five minutes, the host will enter the <span class="code-class-custom">Idle</span> state. If the host does not reconnect in the next twelve hours, the host will be automatically deleted from our systems. If the agent reconnects after this happens, the host will be recreated as if it was a new host.
Users also have the option to manually revoke a host. In this case, the host will be put into a <span class="code-class-custom">Revoked</span> state and will not be able to run experiments. This action can be reversed.
Cloud tagging
As of version <span class="code-class-custom">2.11.6</span> the Gremlin Agent supports automatic tagging of all hosts running in the three major cloud providers. If the Gremlin Agent is able to detect and parse cloud metadata it will automatically append specific attributes to the host in the form of tags. This allows users to easily utilize cloud metadata to target particular sections of their infrastructure out of the box.
AWS
The following AWS metadata attributes are supported for automatic tagging.
- <span class="code-class-custom">azid</span>
- <span class="code-class-custom">image-id</span>
- <span class="code-class-custom">instance-id</span>
- <span class="code-class-custom">instance-type</span>
- <span class="code-class-custom">local-hostname</span>
- <span class="code-class-custom">local-ip</span>
- <span class="code-class-custom">public-hostname</span>
- <span class="code-class-custom">public-ip</span>
- <span class="code-class-custom">region</span>
- <span class="code-class-custom">zone</span>
To include custom AWS tags, ensure the DescribeTags policy is granted to your EC2 instances. For the case of RPM and DEB installations, you will also need to install the aws CLI. Some details are available here and here.
NOTE: Update Gremlin to at least Linux 2.15.9 or Windows 1.0.11 to use azid or AWS tags.
Azure
The following Azure metadata attributes are supported for automatic tagging.
- <span class="code-class-custom">azEnvironment</span>
- <span class="code-class-custom">location</span>
- <span class="code-class-custom">name</span>
- <span class="code-class-custom">osType</span>
- <span class="code-class-custom">privateIpAddress</span>
- <span class="code-class-custom">publicIpAddress</span>
- <span class="code-class-custom">sku</span>
- <span class="code-class-custom">vmId</span>
- <span class="code-class-custom">vmScaleSetName</span>
- <span class="code-class-custom">zone</span>
GCP
The following GCP metadata attributes are supported for automatic tagging.
- <span class="code-class-custom">hostname</span>
- <span class="code-class-custom">id</span>
- <span class="code-class-custom">image</span>
- <span class="code-class-custom">local-ip</span>
- <span class="code-class-custom">name</span>
- <span class="code-class-custom">public-ip</span>
- <span class="code-class-custom">zone</span>
Containers
Container and pod labels are automatically detected by the Gremlin agent and displayed in the Web UI. Users can individually select the container they wish to target, or use selectors to select a group of containers.
By definition, containers of a Kubernetes Pod all share a namespace and cgroup. This means when Gremlin applies a network impact to one container within a Kubernetes pod, the impact will be observed for all containers in the Pod. Note that this does not apply to containers in Pod replicas. If you target a specific Pod replica, the effect applies to containers within that replica only, and does not apply to the rest of the replicas.
It is always recommended to target only a single container of a Pod. If you wish to exclude some containers from the network impact, reduce your blast radius by specifying ports relevant to the containers you wish to see impacted.
Kubernetes
Selectors
For Kubernetes targets, labels and selectors are used in place of tags. Functionally, these work the same way as tags, just using the Kubernetes syntax.
Zone and region targeting
Gremlin will automatically detect region and zone selectors if they are provided by Kubernetes. Gremlin retrieves the zone and region from the container, unless both a region and zone label exist on the Kubernetes object.
Containers and resource experiments
What are cgroups?
Control Groups (cgroups) are used by the Linux kernel to limit access to a host's hardware resources among a group of processes. Container run times like Docker use cgroups to establish Memory, CPU, Disk, and IOPS limits.
Multiple containers can run within the same cgroup. When an experiment is started, the Gremlin agent attaches a Gremlin sidecar to the target container(s). The sidecar operates within the same cgroup as the target so that it shares the same resource limits and namespace. When the experiment is finished, any resources used by the Gremlin sidecar are freed and the sidecar is removed.
Gremlin and cgroups
With Cgroup integration, Gremlin resource consumption is designed to behave as if it were running inside the containers it targets. Gremlin accomplishes this by running under the cgroup of its target container so that any limits enforced on the target are also enforced on Gremlin. Kernel protections like Out-of-Memory killers (OOMKillers) can terminate container processes when they compete for all of the resources available to them, including Gremlin.
For example, when running a memory experiment, Gremlin queries the cgroup for limits and the current memory usage of the target container(s). From those values, we derive how much additional memory to consume. Likewise, the CPU experiment identifies the total system capacity allocated to the container(s) and adjusts the size of the CPU experiment accordingly.
Kubernetes pod eviction and failed experiments
On Gremlin versions 2.13 and later, Kubernetes may evict pods targeted by Gremlin resource experiments when they exhaust their resource limits. When this happens, the Kubernetes scheduler deletes Gremlin and all targeted pod resources. Sometimes Gremlin displays this as a <span class="code-class-custom">Failed</span> experiment. Gremlin will show some warning messages when targets are potential candidates for eviction.
Updates to the Gremlin Agent regularly improve the observability around pod eviction, and the effect Gremlin made on the Kubernetes targets.
Supported cgroup drivers
Container runtimes generally provide support for two cgroup drivers: <span class="code-class-custom">cgroupfs</span>, and <span class="code-class-custom">systemd</span>. If your system is running the systemd cgroup driver, and you are running Gremlin's legacy docker container driver, you may observe the following:
- Experiments against Kubernetes pods will abide by the resource limits of the pods targeted in the experiment, but the resulting resource usage Gremlin generates will not be reflected in cAdvisor metrics (like from <span class="code-class-custom">metrics-server</span>) and may not impact autoscaling group triggers
- Experiments against Docker containers (not running within Kubernetes) may not abide by container limits and instead abide by the <span class="code-class-custom">system.slice</span> root cgroup of the host machine
Container experiment examples
Here are some examples of infrastructure layer experiment options you can try that may be better suited to your intended experiment:
- Use a CPU, Memory, Disk, or IOPS experiment on the target container to test how your orchestrator handles the corresponding resource pressure
- Use a shutdown experiment to find out what happens when a container disappears, becomes uncommunicative, or is otherwise unusable.
- Use a blackhole experiment to find out what happens when communication between a container and the rest of your system is disrupted; make sure you target a single container within a pod here if that is what you are looking to test. If you target a pod it will impact all containers in the pod.
- Use a process killer experiment to kill specific processes on the underlying host machine to find out what happens as you simulate dependency crashes, for example. If you do, remember that it has the potential to impact all containers on that host.
Applications (Failure Flags)
Gremlin supports application-based fault injection through the use of Failure Flags. A Failure Flag is an entry point in application code where you can perform experiments, such as adding latency or triggering exceptions. You can select a Failure Flag as a Scenario target. However, Failure Flags have a different set of experiments than other target types and use a unique experiment creation workflow. To learn more, see Experiments and Effects.
Services
A service is a discrete unit of functionality provided by one or more systems in your environment. In Gremlin, services are composed of one or more hosts, containers, or Kubernetes resources, along with their replicas. When you run an experiment on a service, Gremlin impacts every resource defined in the service.
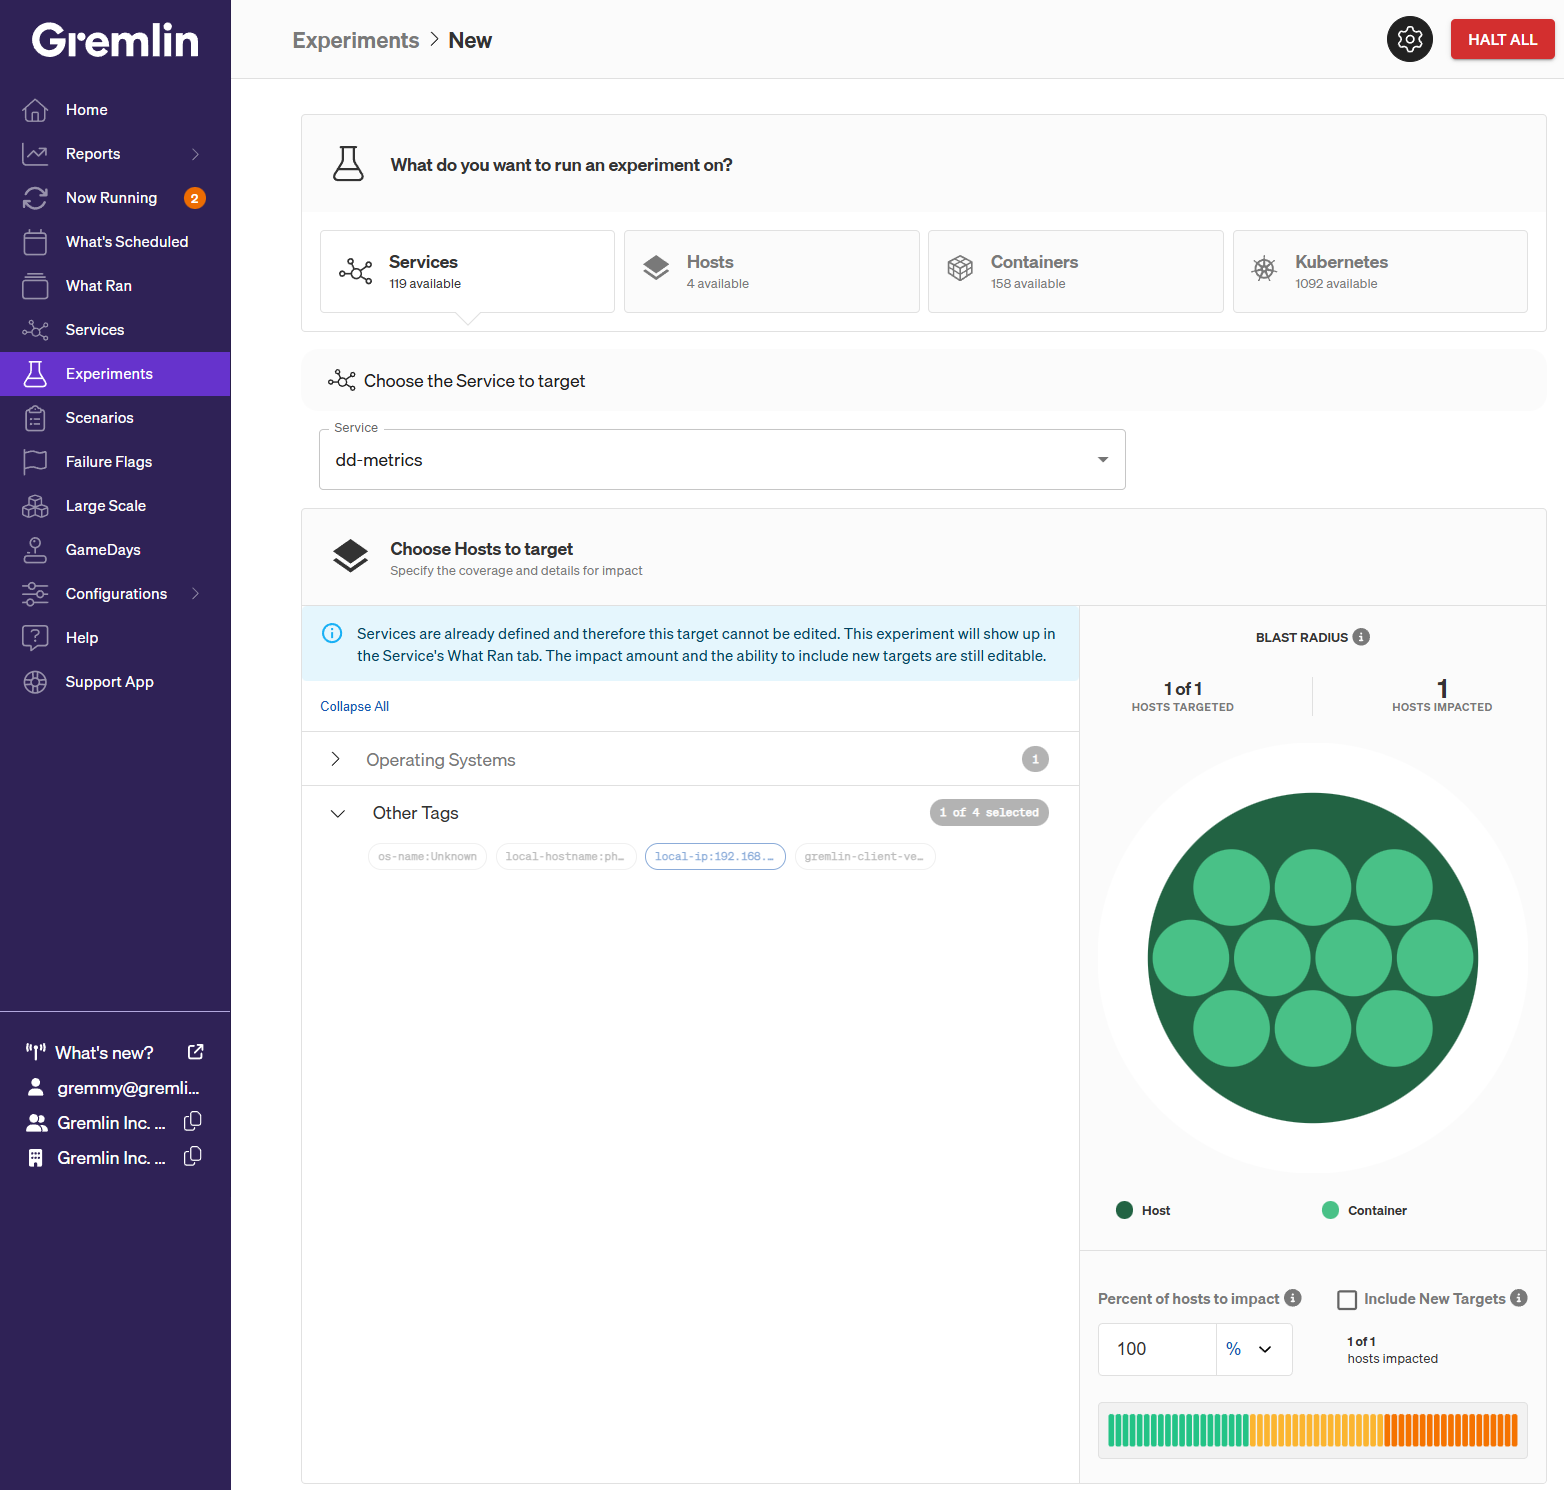
A service is a fixed target type: you cannot add or remove resources belonging to a service from the experiment creation screen. However, you can change the number or percentage of resources within the service to target using the Blast Radius graph. See How to run an experiment to learn more.
Exact vs. tag selection
There are two ways to select targets when you create an experiment: choosing the exact targets, or choosing a group of targets by their tags. “Exact” target selection uses the host or container’s unique identifier as the selection method. “Tag” selection takes advantage of tags that were detected on the host or container. Exact selection is useful for quick one-off experiments on a small number of targets. For running experiments in environments where targets are spun up and down dynamically (e.g. cloud platforms), we recommend using tag selection.
Exact
Exact selection lets you choose the individual targets that the experiment will impact. When creating a new experiment, select the Exact button, then click the checkbox next to each host or container you want to target. All selected targets will be included in the experiment.
Tag
Gremlin uses tags to group together multiple targets that share a common attribute. For example, Gremlin automatically detects IP addresses, operating systems, and agent versions. For targets running on cloud platforms like AWS, Gremlin also detects availability zones, regions, and more.
Tag-based selection has another benefit: randomness. When selecting by tag, you can optionally set a maximum number or percentage of hosts/containers to target using the Number of hosts/containers to impact field. When starting the experiment, Gremlin will randomly select targets within your selected tag(s) until it meets the maximum. This helps introduce entropy, and is a more realistic reproduction of partial and probabilistic failures.
For example, imagine you have four compute instances running on AWS: two in the us-east-1 zone, and two in the us-west-1 zone. Selecting both zone tags will target all four instances. However, reducing the number of hosts to impact to 50% (or 2) means Gremlin will randomly select two nodes to run the experiment on out of the four.
Target all hosts/containers
If you want to run experiments on every host or container in your environment, use the Target all hosts/containers toggle. This selects every tag, and by extension, every target. You can still use the Percent of hosts/containers to impact fields to reduce the number of targets that are randomly impacted by the experiment.