Running Chaos Engineering Experiments With Gremlin And Spinnaker

.svg)
.svg)

 This is an older tutorial
Introduction
Spinnaker is an open source cloud-based Continuous Delivery platform for releasing software, built by Netflix and backed by Google, Microsoft, and Oracle. Gremlin is a simple, safe and secure service for performing Chaos Engineering experiments through a SaaS-based platform.
Prerequisites
To complete this tutorial you will need:
- A Mac with a minimum of 16GB Memory running Java 8 to install Spinnaker on. We tested this tutorial running Spinnaker locally on a Mac running macOS Mojave, but it may work on other operating systems. You can get the Java 8 JDK from Oracle here. This host also needs a git client, yarn and node installed. We recommend installing them with Homebrew.
- A host running Ubuntu 16.04 to run the Chaos Engineering experiments on. This host will run the Gremlin agent. You need to be able to run commands as root with sudo on this host.
- A Gremlin account (request a free trial here).
Overview
This tutorial will walk you through the steps to install Spinnaker from source code, and set it up to run Gremlin attacks.
- Step 1 - Install the Gremlin agent
- Step 2 - Create a Gremlin API key
- Step 3 - Create a Target Template in Gremlin
- Step 4 - Create an Attack Template in Gremlin
- Step 5 - Install Redis on the Spinnaker host
- Step 6 - Install Spinnaker components from GitHub
- Step 7 - Add an application in Spinnaker
- Step 8 - Run a Gremlin attack using Spinnaker
Step 1 - Install the Gremlin Agent
On your Ubuntu host that we’ll be running experiments on, install the Gremlin agent using the instructions here.
Step 2 - Create a Gremlin API Key
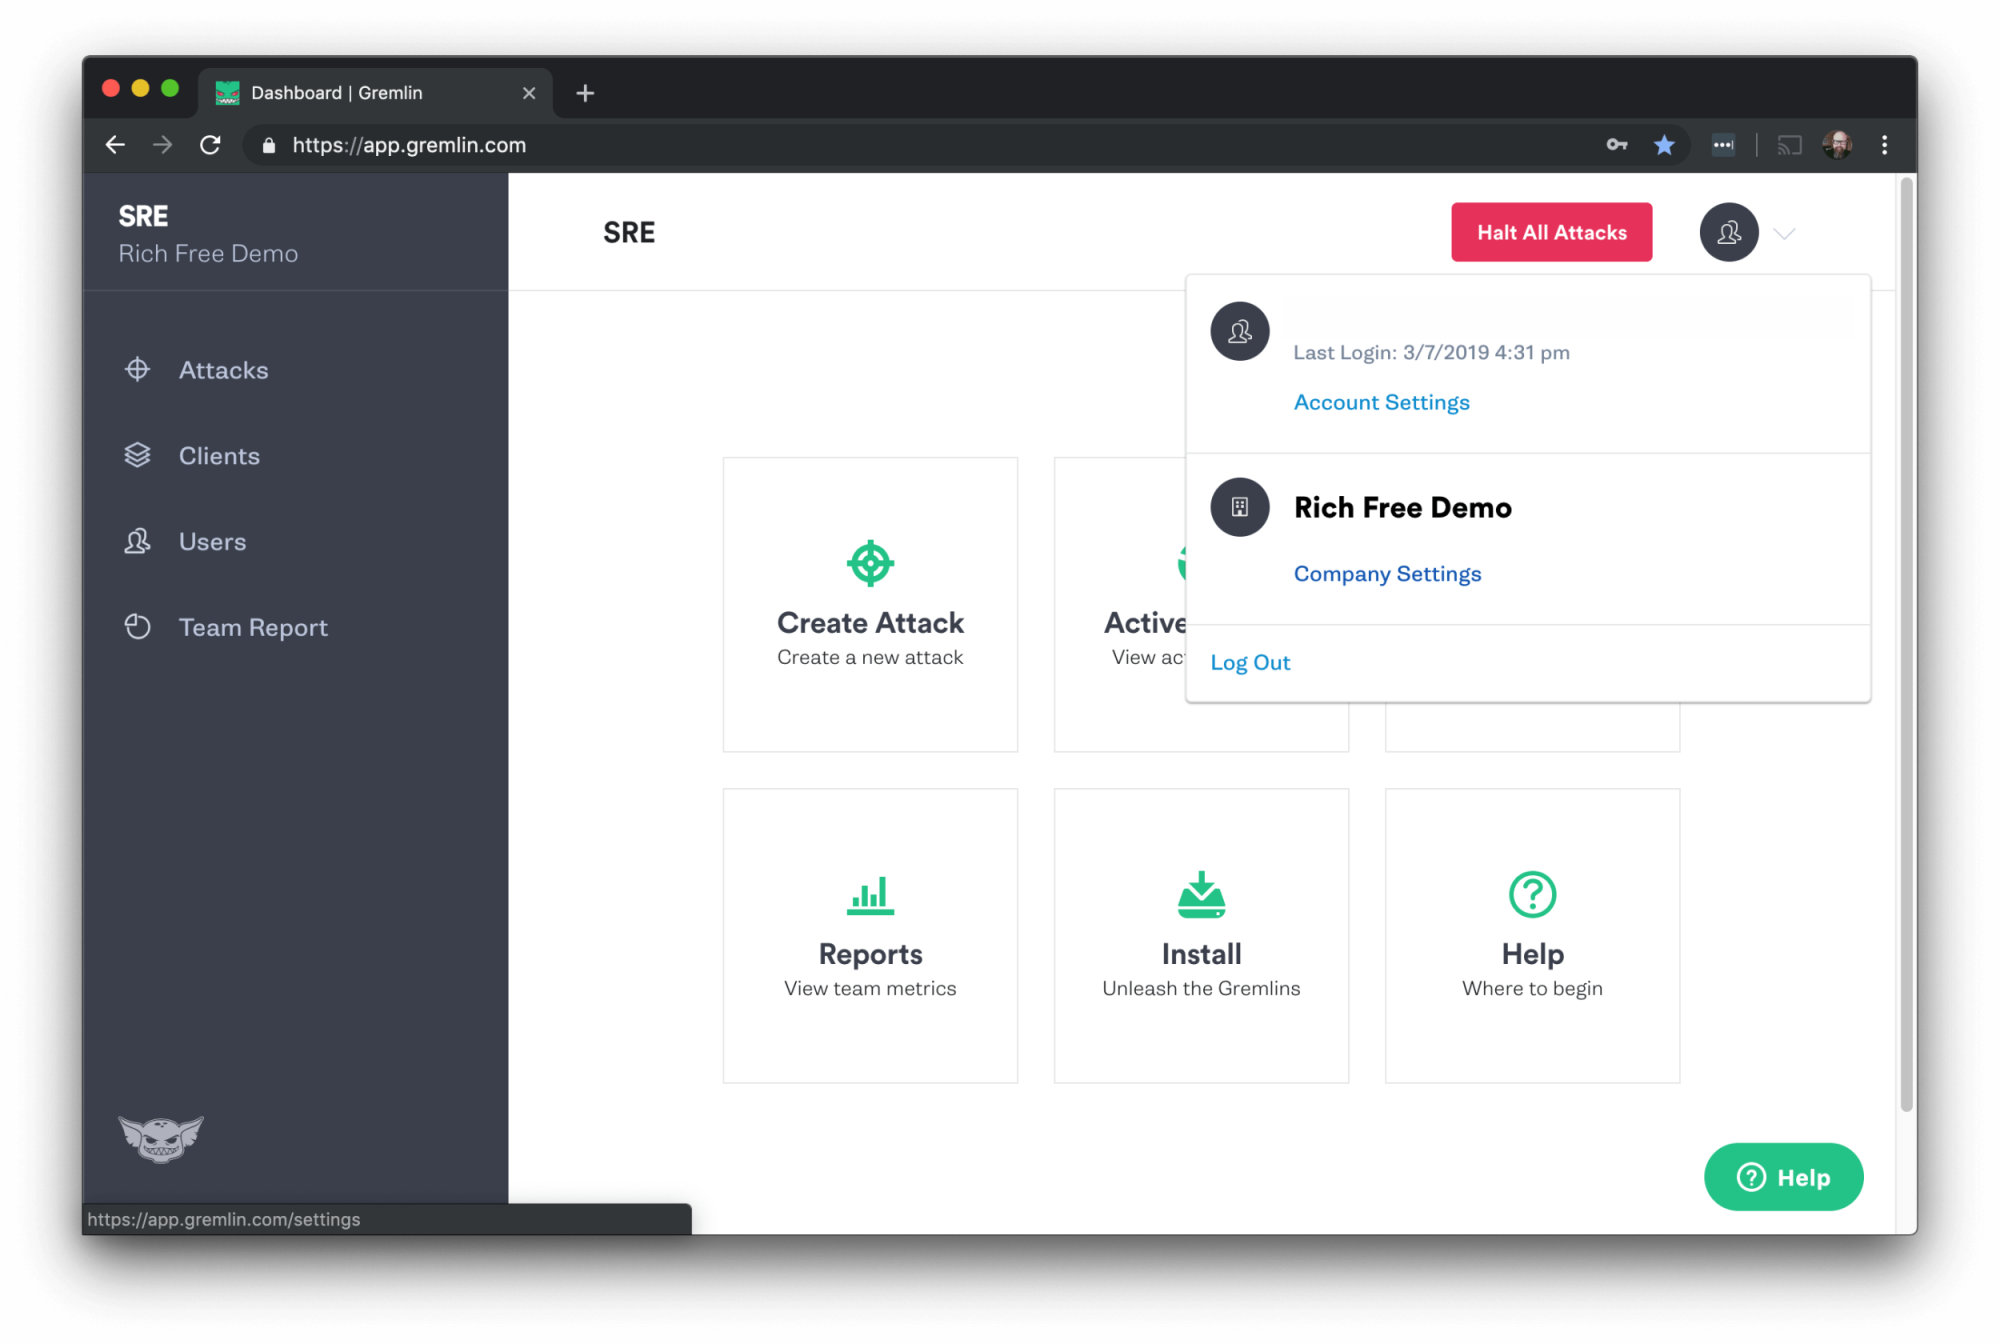
Sign into your Gremlin account. Go to the Company Settings menu:
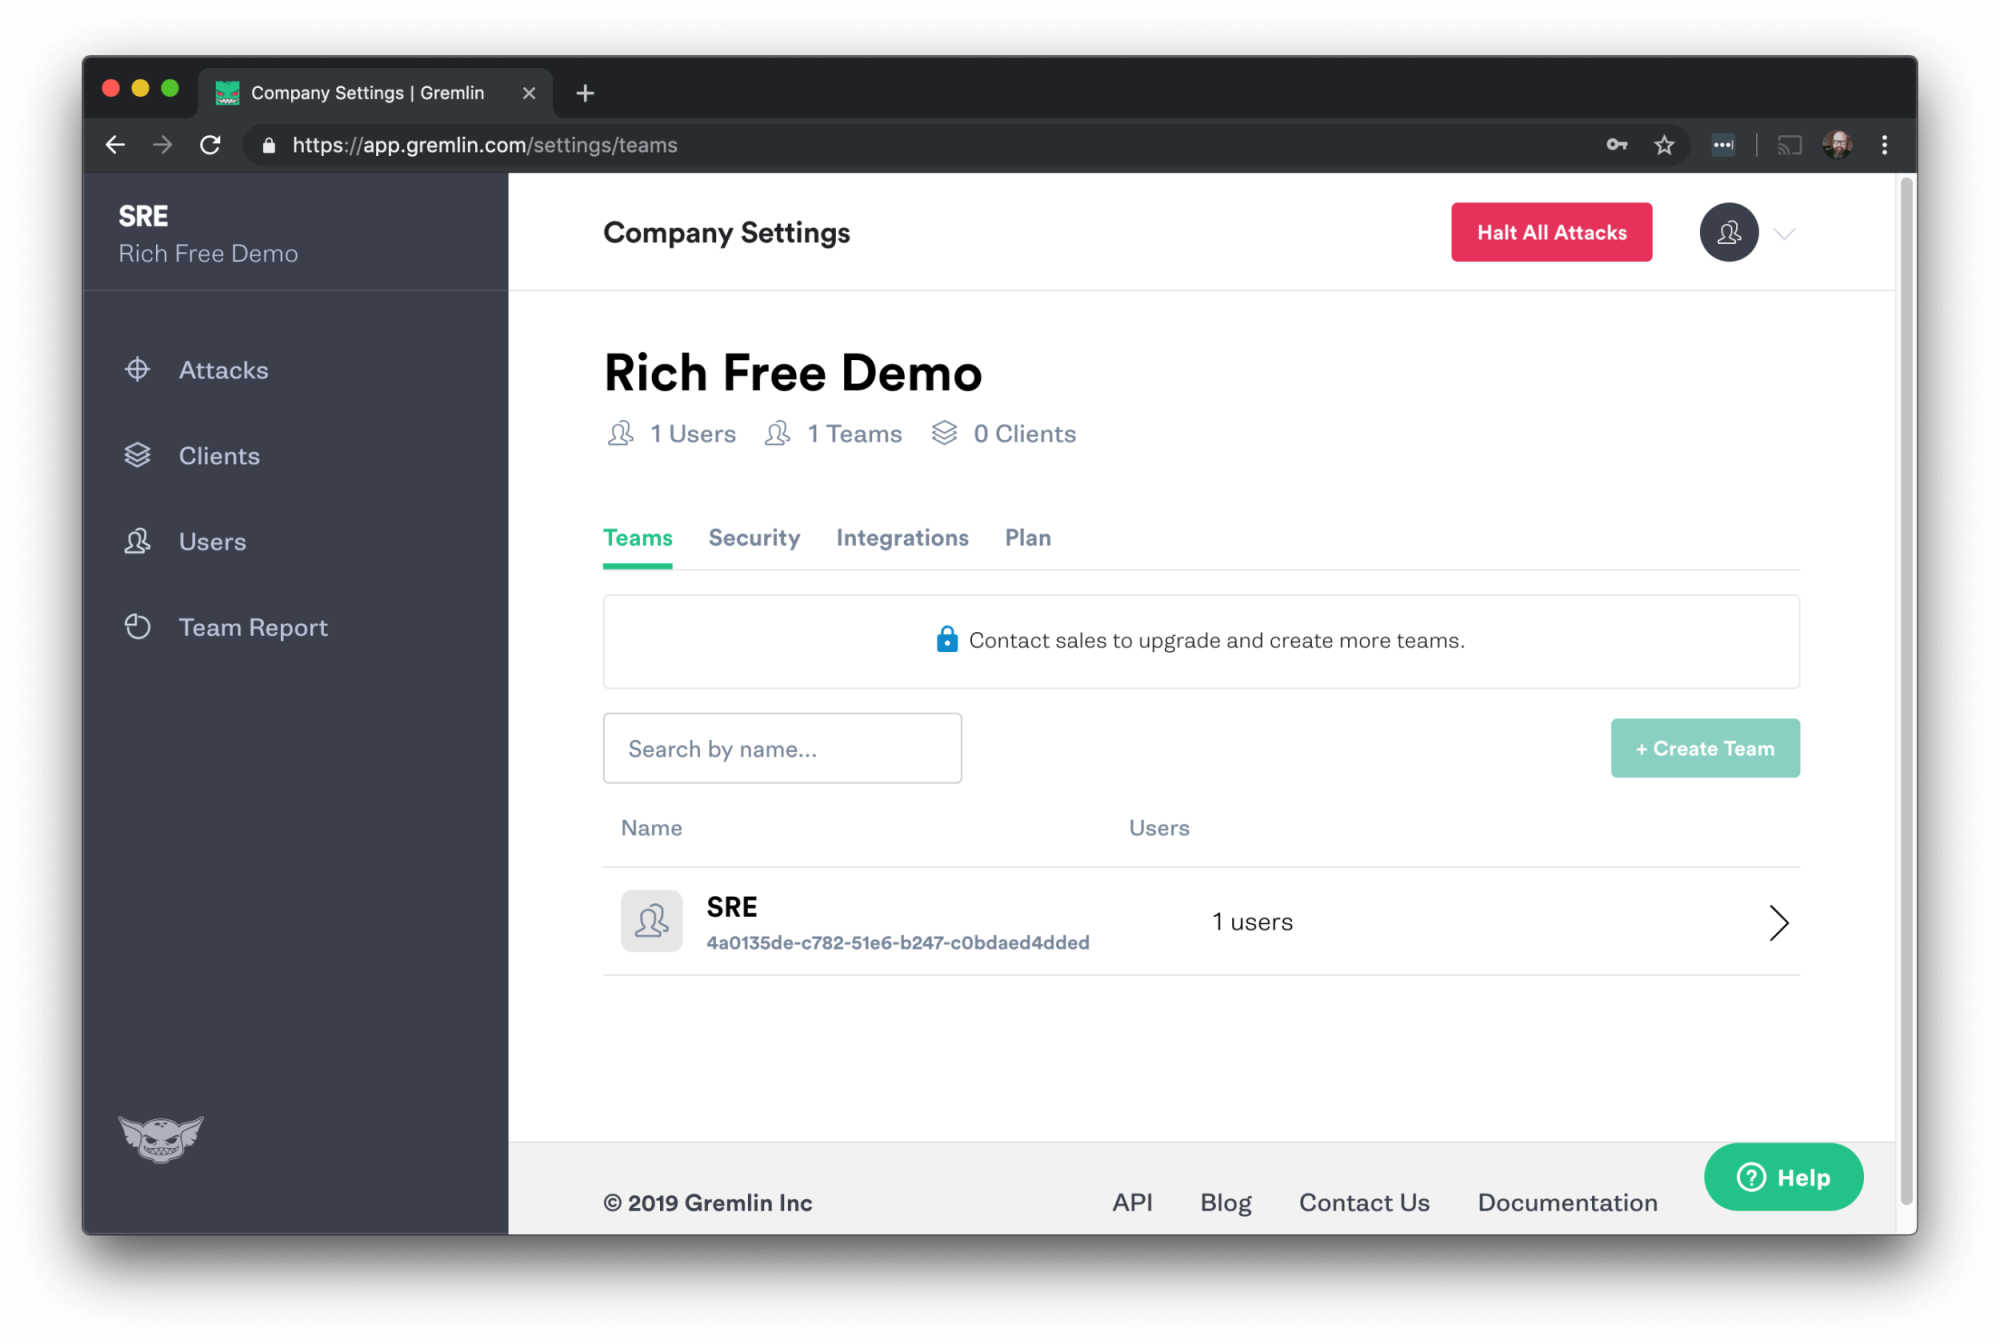
Click on the team name.
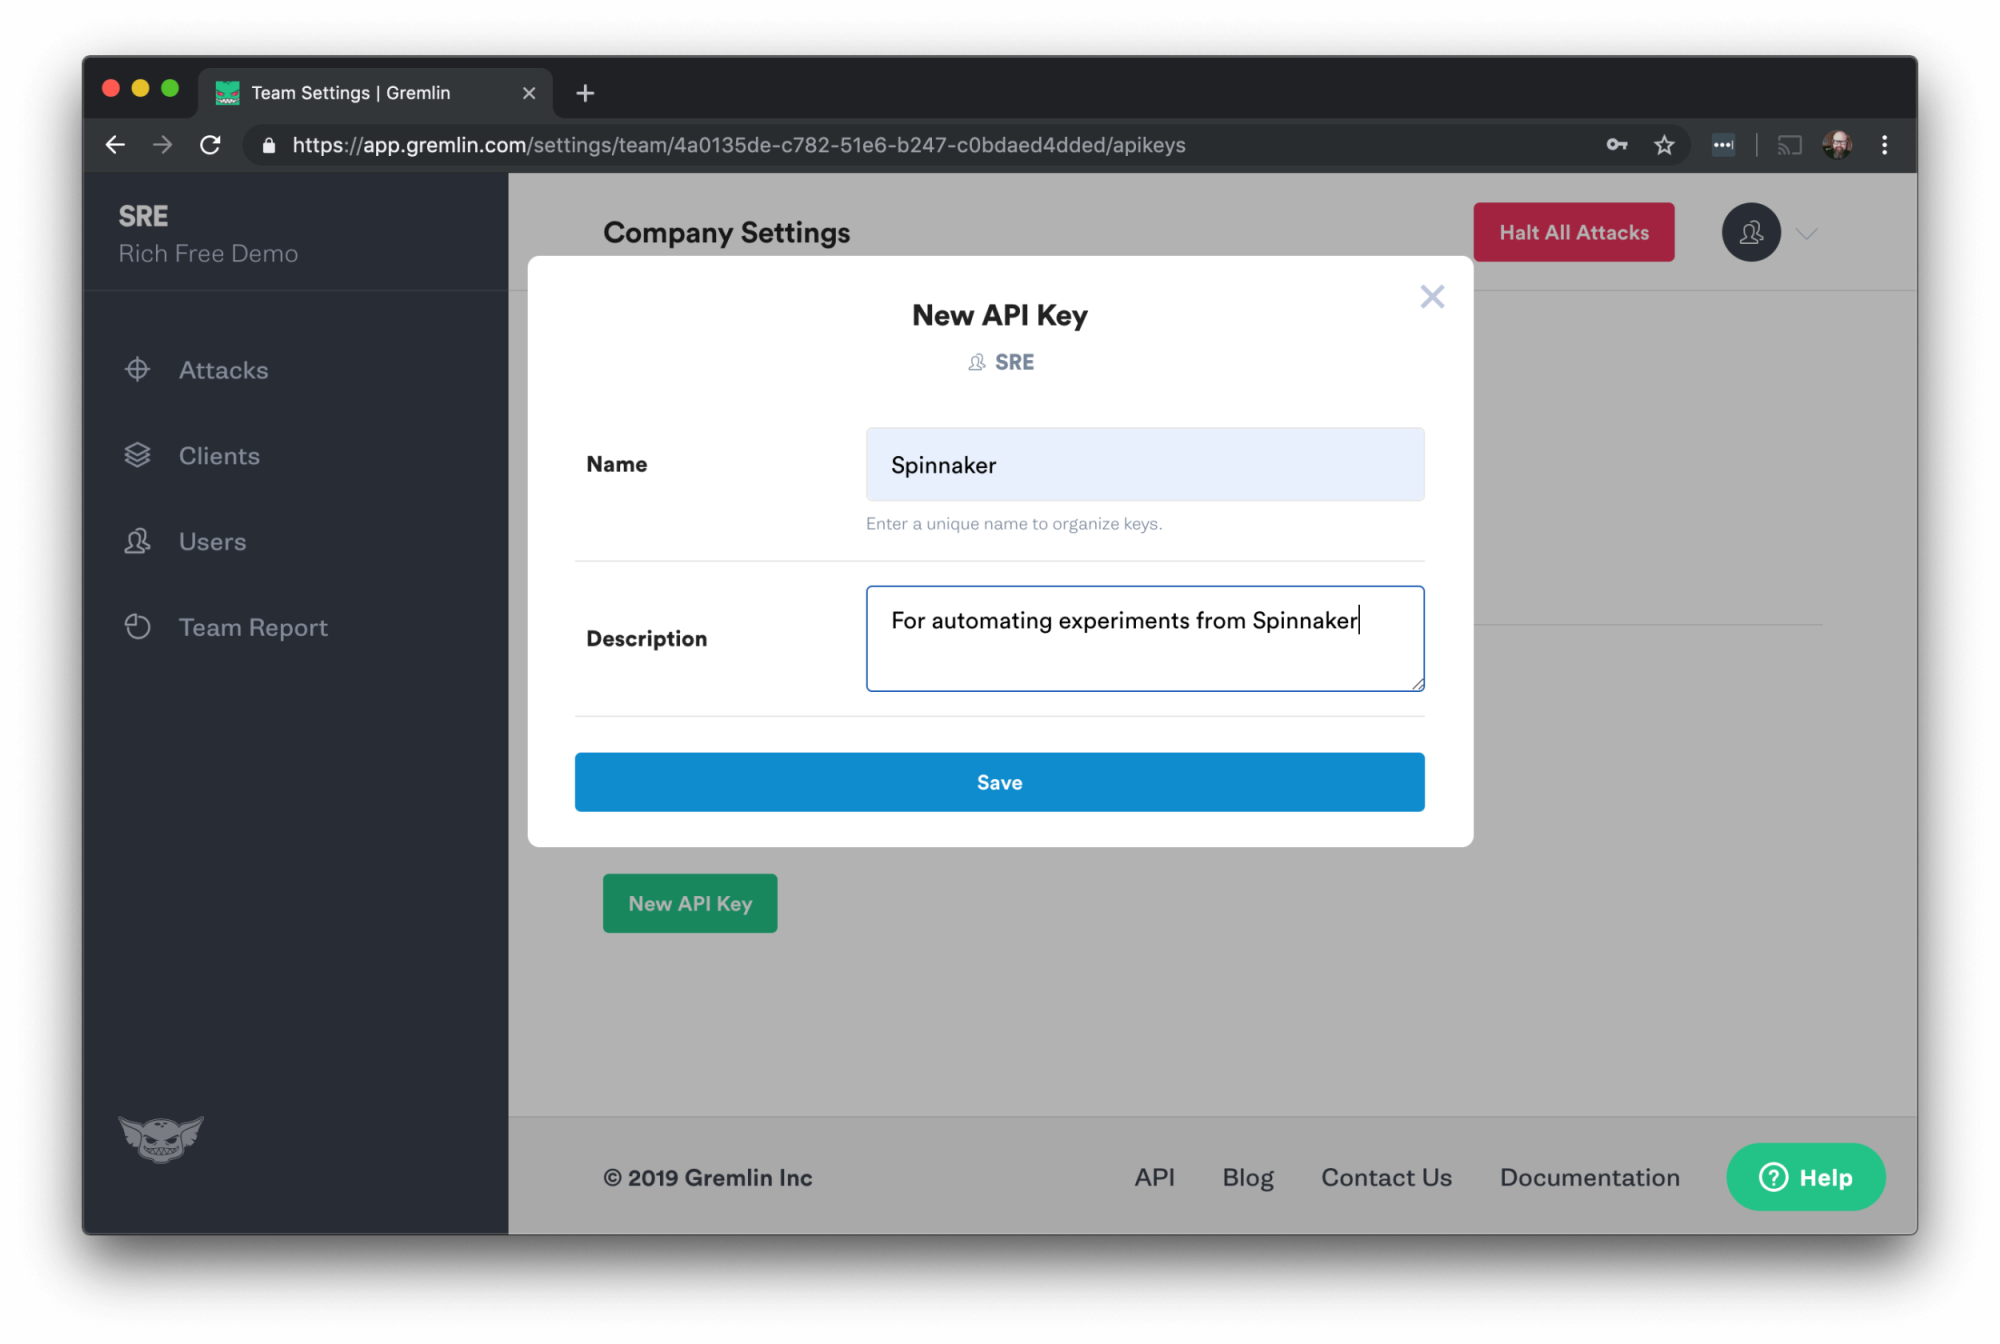
On the next screen click on the API Keys tab and New API Key.

Fill in the name and a description for the key and hit Save.
You should then see a screen that shows the API key that was created.
Step 3 - Create a Target Template in Gremlin
There are two types of templates in Gremlin, and we will need both to be able to run Chaos Engineering experiments from Spinnaker. Attack Templates defines the type of attack that will run. Target Templates define the hosts or containers those attacks will run on.
To create a Target Template, click Attacks in the upper left and New Attack. Select the Ubuntu host you installed the Gremlin agent on:
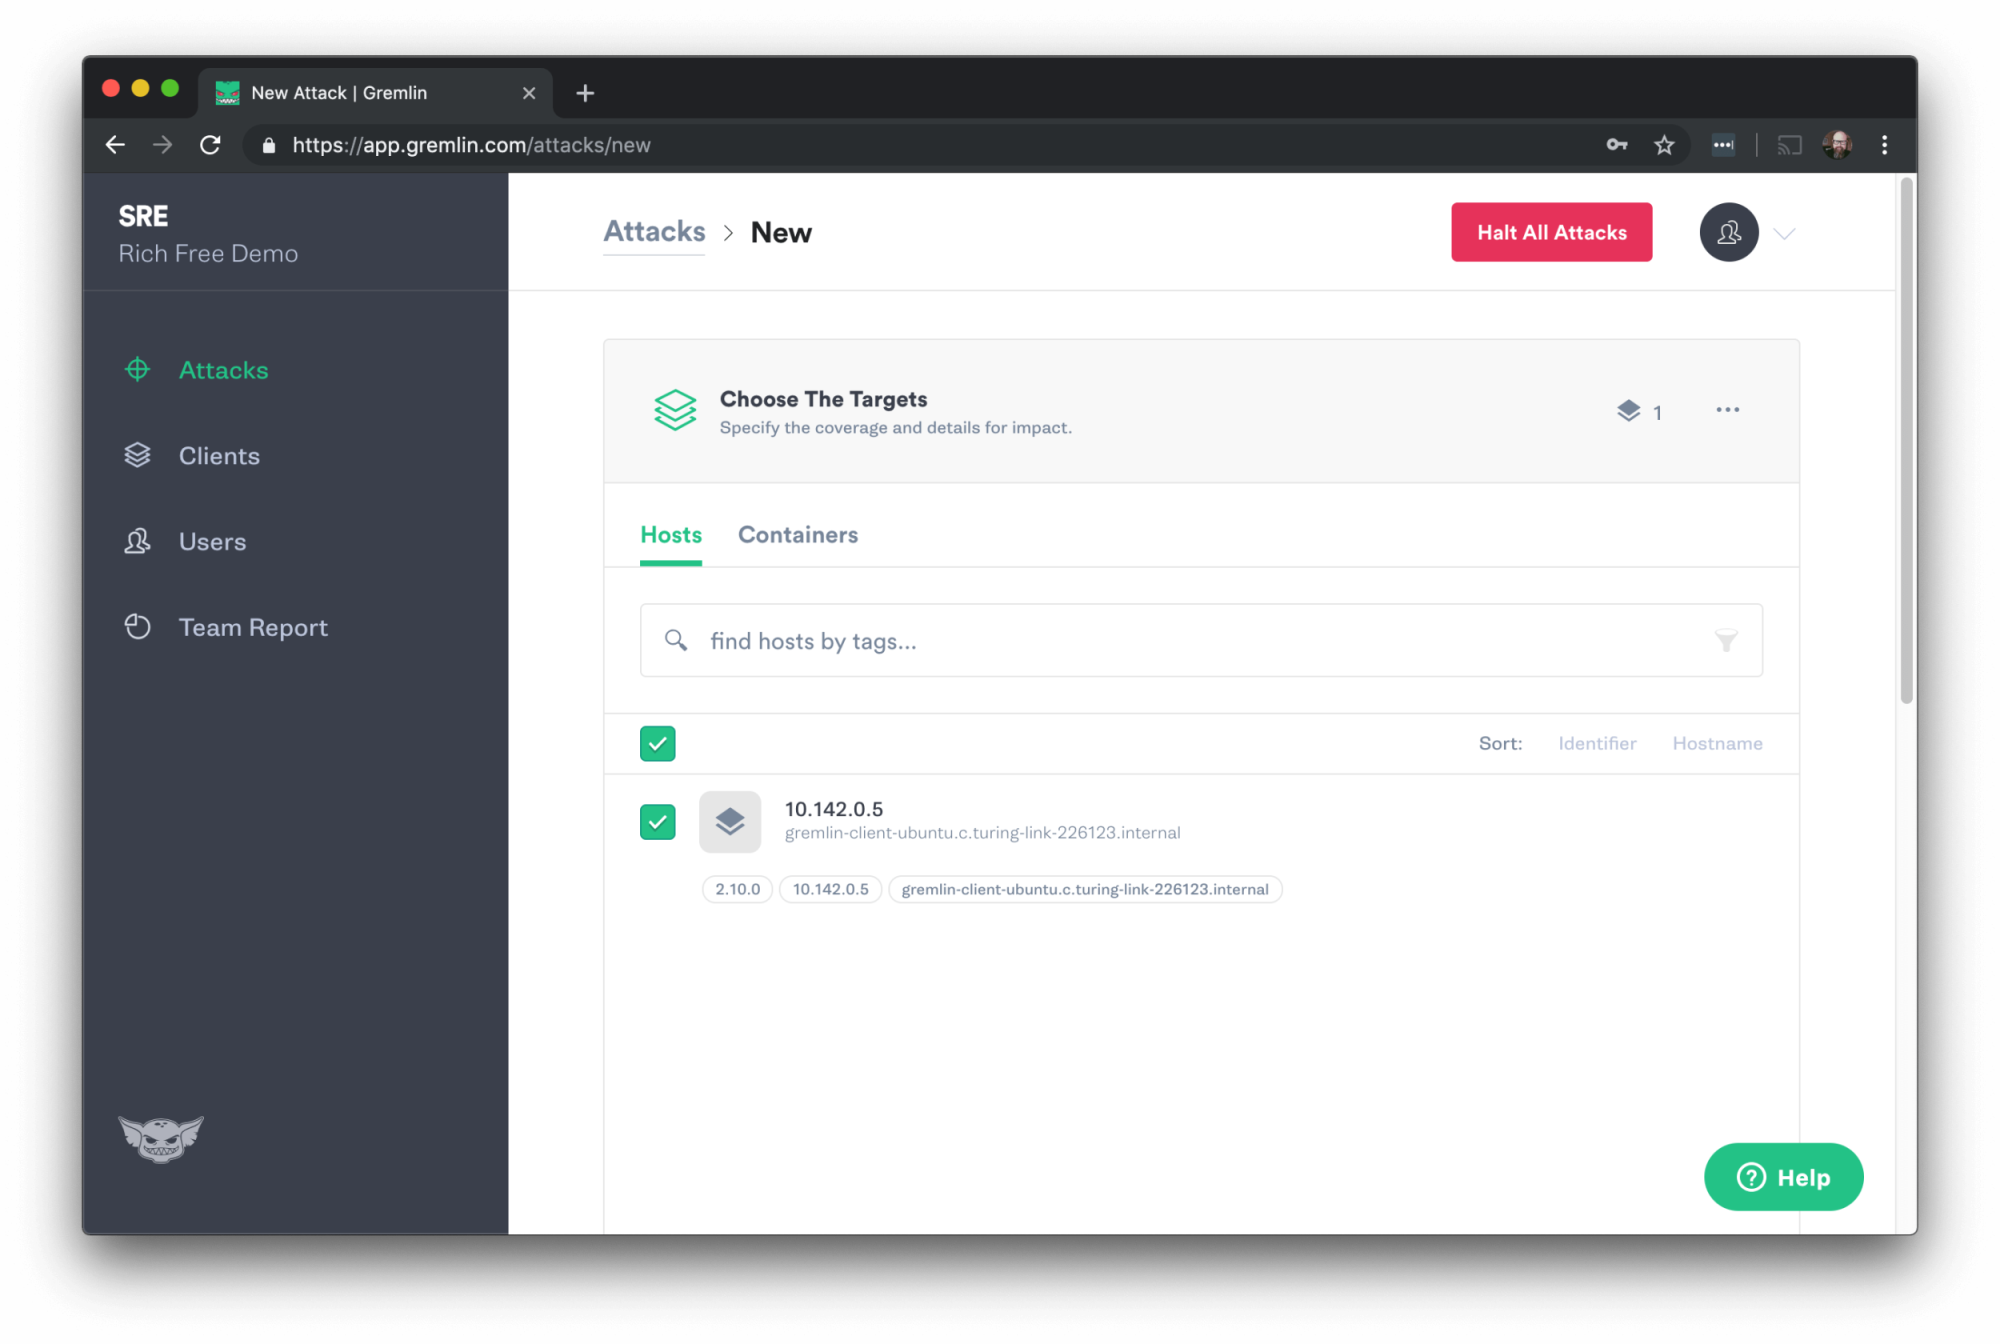
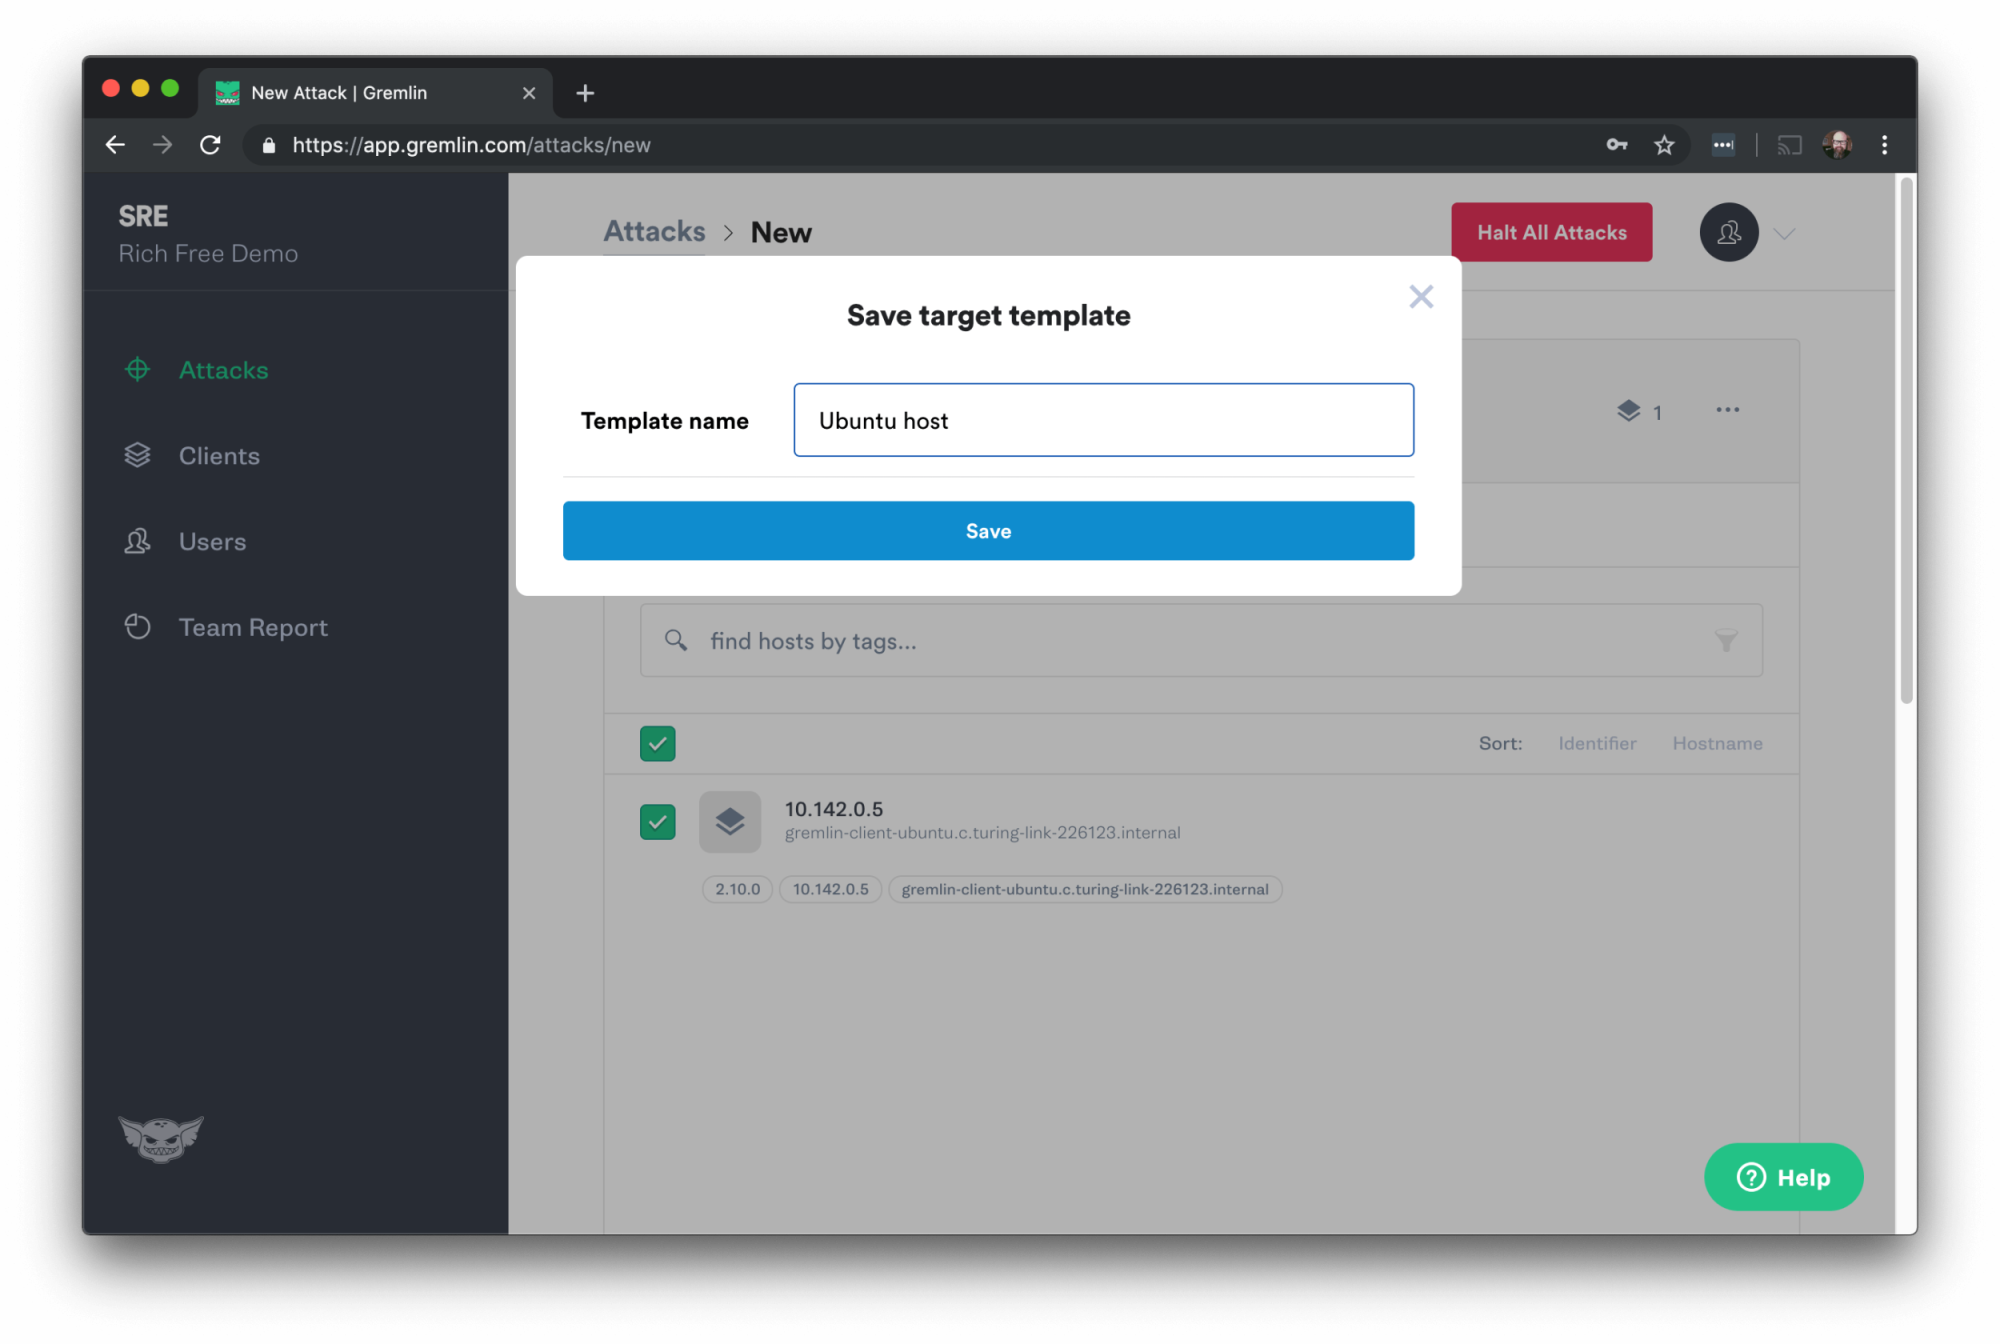
In the Choose The Targets section click the three dots on the right and select “Save as template…”

On the next screen fill in a name for the template and hit Done.
Step 4 - Create an Attack Template in Gremlin
Still on that same New Attack screen, scroll down to the part of the page that says Choose A Gremlin.
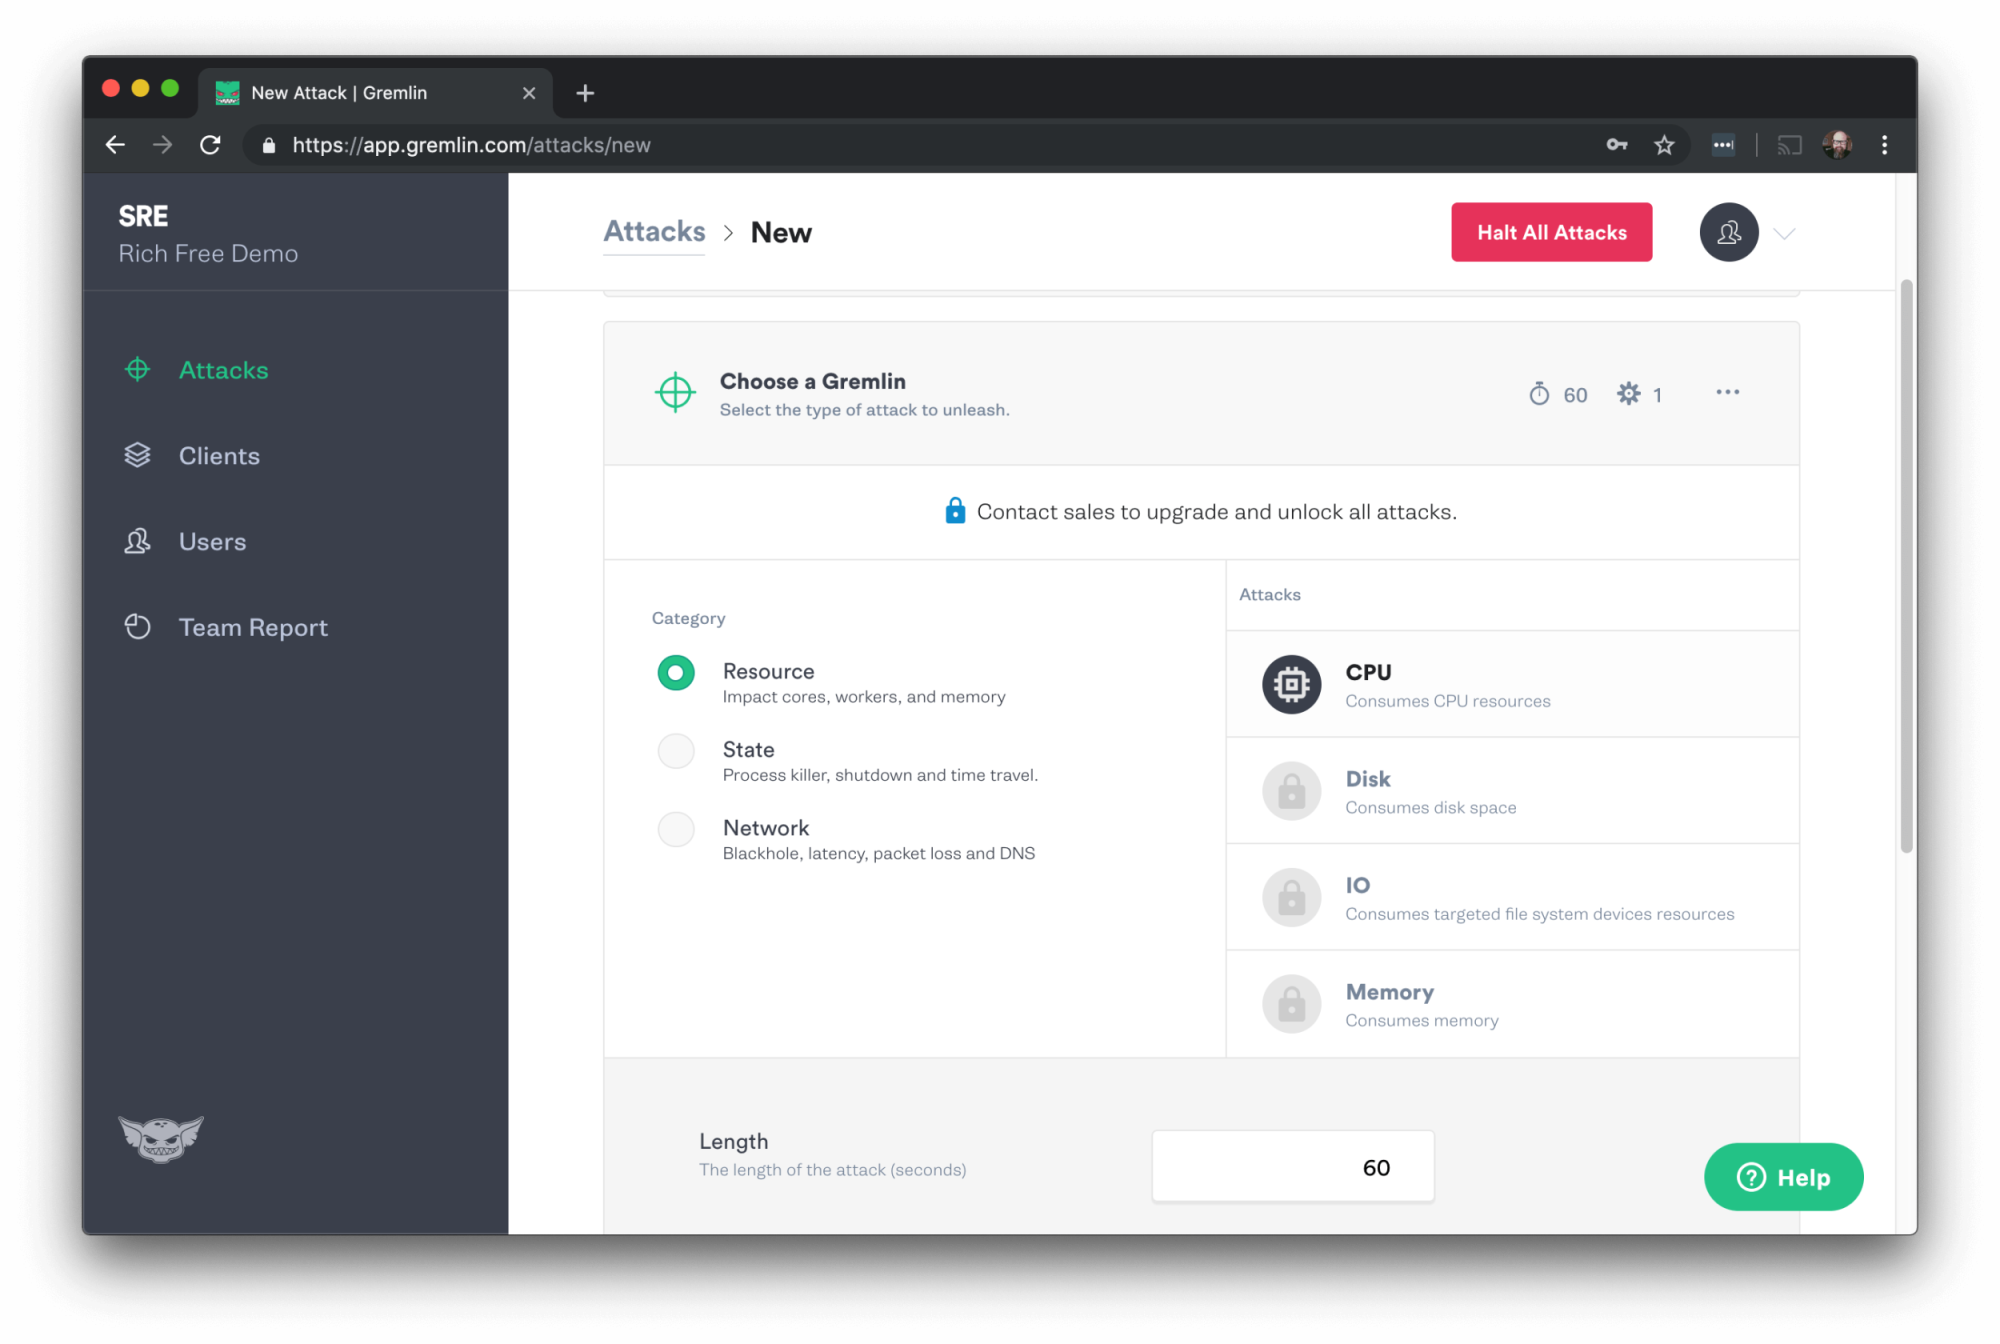
This is where we select the type of attack to run. CPU should be selected by default. If it’s not selected click on it and use the default settings.
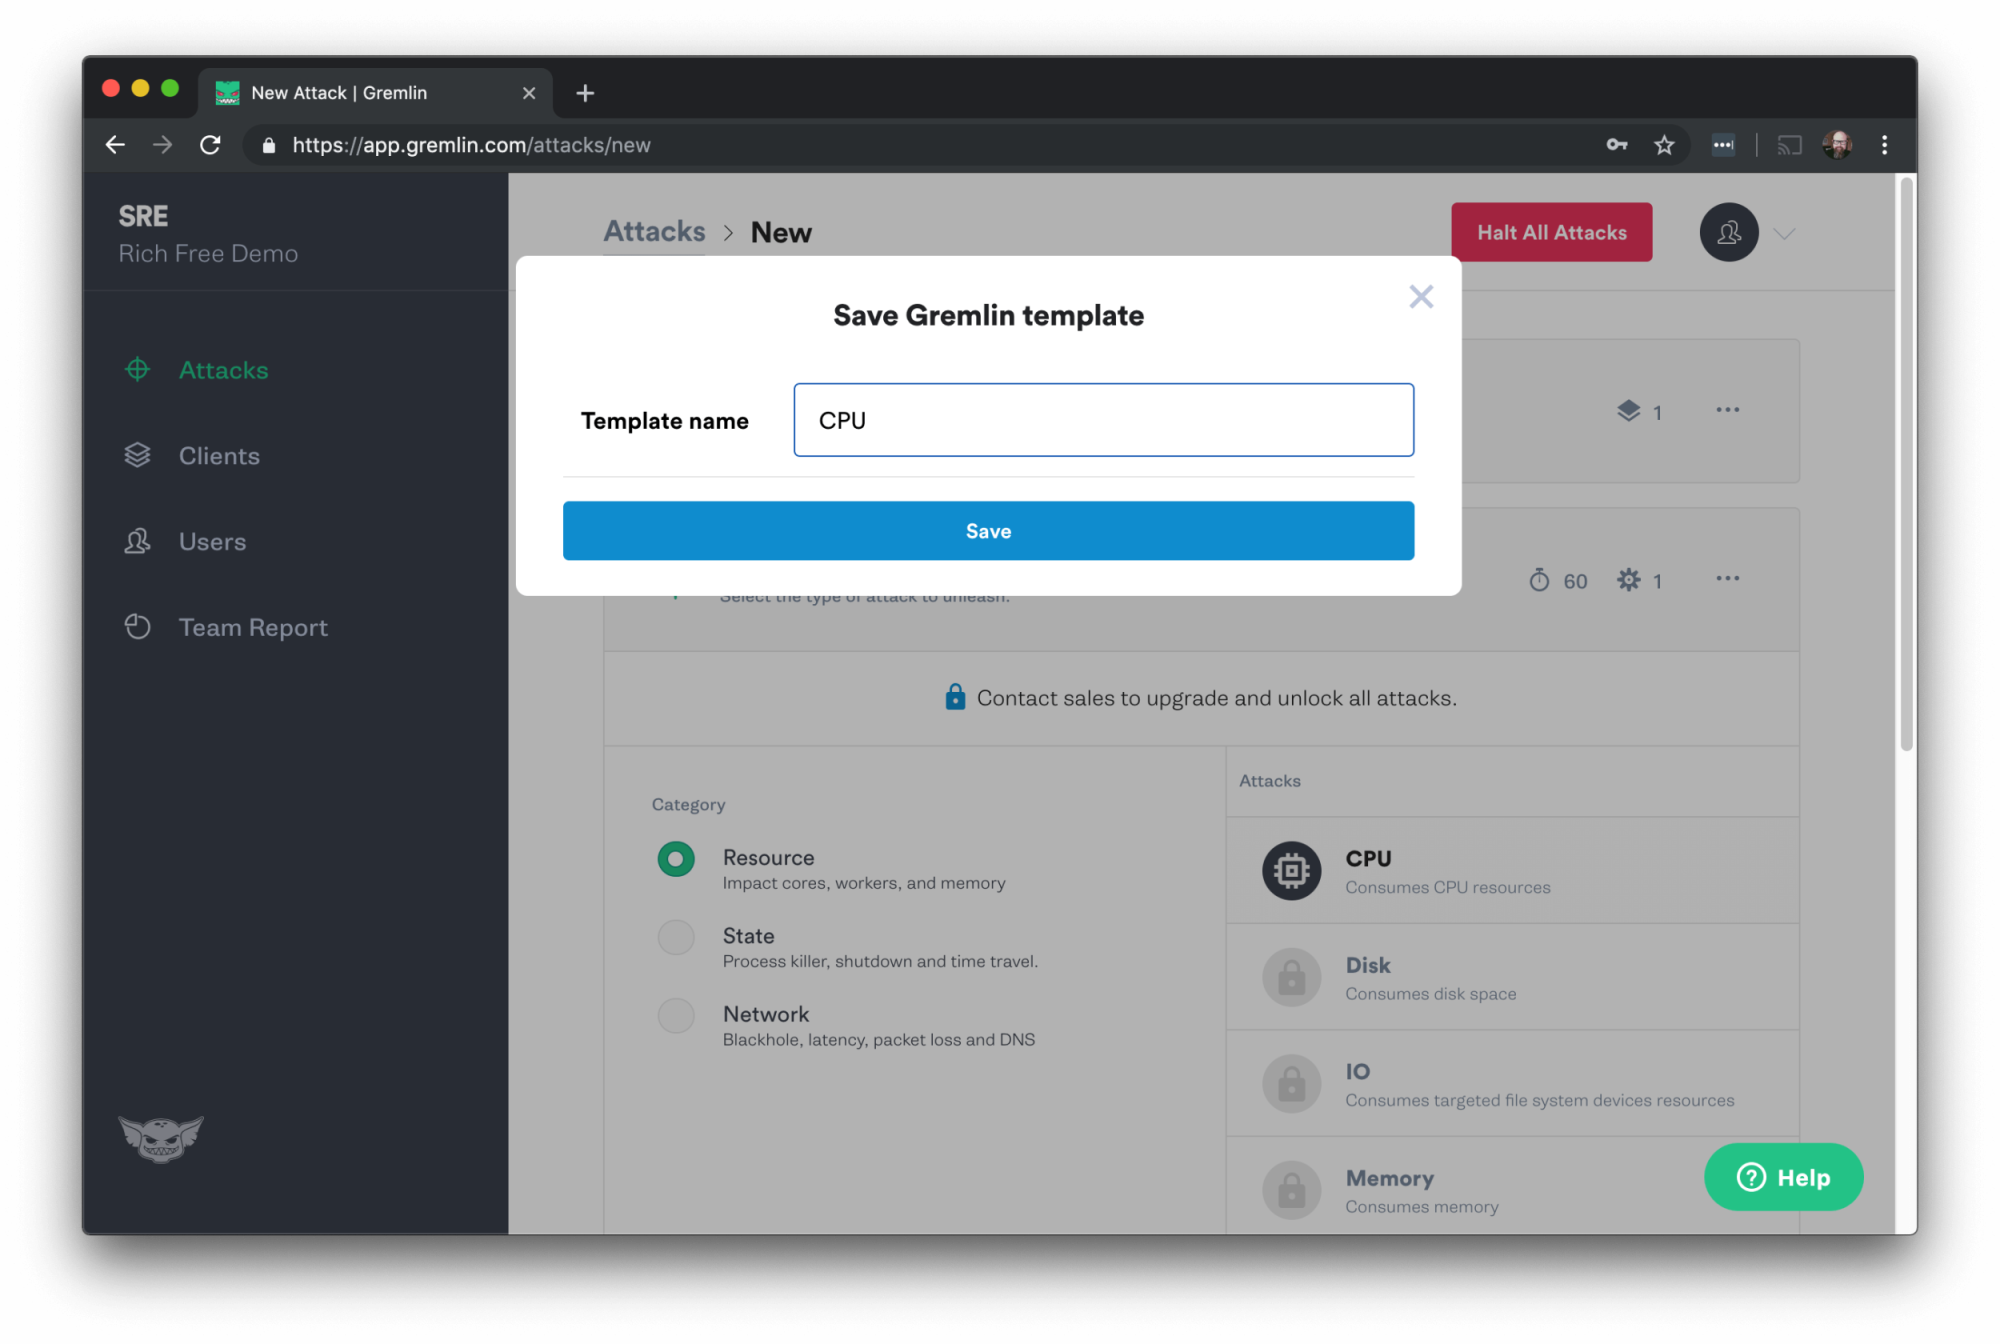
On the right of Choose A Gremlin you’ll see the three dots again. Click those and select “Save as template…”
Step 5 - Install Redis on the Spinnaker host
Install Redis using the package manager for the operating system of your Spinnaker host. If you’re using macOS you can install it with Homebrew (“brew install redis”).
Launch the redis-server process:
It will run by default on port 6379.
Step 6 - Install Spinnaker components from GitHub
We’re going to use git to clone repositories for the Spinnaker components from GithHub, as the changes to integrate with Gremlin are recent and may not be available if you install Spinnaker using another method.
Make a directory somewhere on the Spinnaker host to clone the files into, and cd to that directory.
Next we’ll clone the repo for each component and then run the corresponding server. We recommend running them each in their own terminal window or tab so you can see their output isolated. Note that you may see errors in the output of some of the services until you have them all running, as some of the Spinnaker services depend on each other.
Before your proceed to the next step check that you have Java 8 installed:
If you don’t yet have Java 8 installed you can install it from the Oracle Java Downloads website.
Clone and run Orca
Orca is the orchestration engine for Spinnaker. It is responsible for taking a pipeline or task definition and managing the stages and tasks, coordinating the other Spinnaker services. Orca pipelines are composed of stages which in turn are composed of tasks. The tasks of a stage share a common context and can publish to a global context shared across the entire pipeline allowing multiple stages to co-ordinate. For example a bake stage publishes details of the image it creates which is then used by a deploy stage. Orca persists a running execution to Redis.
Clone the repo:
Edit the file orca-web/config/orca.yml. Find the setting for gremlin.enabled and change it to true.
Run the Orca server:
It will run on port 8083.
Clone and run Deck
Deck is the management UI for Spinnaker.
You will need to make sure node and yarn are installed on your system to install and run Deck. We tested this tutorial with node version 11.12.0 and yarn version 1.15.2.
Clone the repo:
Install the dependencies with yarn:
Run the Deck server:
It will run on port 9000.
Clone and run Gate
Gate is the Spinnaker API Gateway. This service provides the Spinnaker REST API, servicing scripting clients as well as all actions from Deck.
Clone the repo:
Edit gate-web/config/gate.yml. Find the setting for gremlin.enabled and change it to true.
Run the Gate server:
It will run on port 8084.
Clone and run Front50
Front50 is a cross-application persistence service for Spinnaker. Front50 fronts a Spinnaker datastore and is written using Spring Boot.
Clone the repo:
Edit front50-web/config/front50.yml and set spinnaker.redis.enabled to true.
Run the Front50 server:
It will run on port 8080.
Clone and run Clouddriver
Clone the repo:
Run the Clouddriver server:
It will run on port 7002.
Clone and run Echo
Echo serves as a router for events that happen within Spinnaker.
Clone the repo:
Run the Echo server:
It will run on port 8089.
Echo is the last component to install. It may take a few minutes for all of the components to get running.
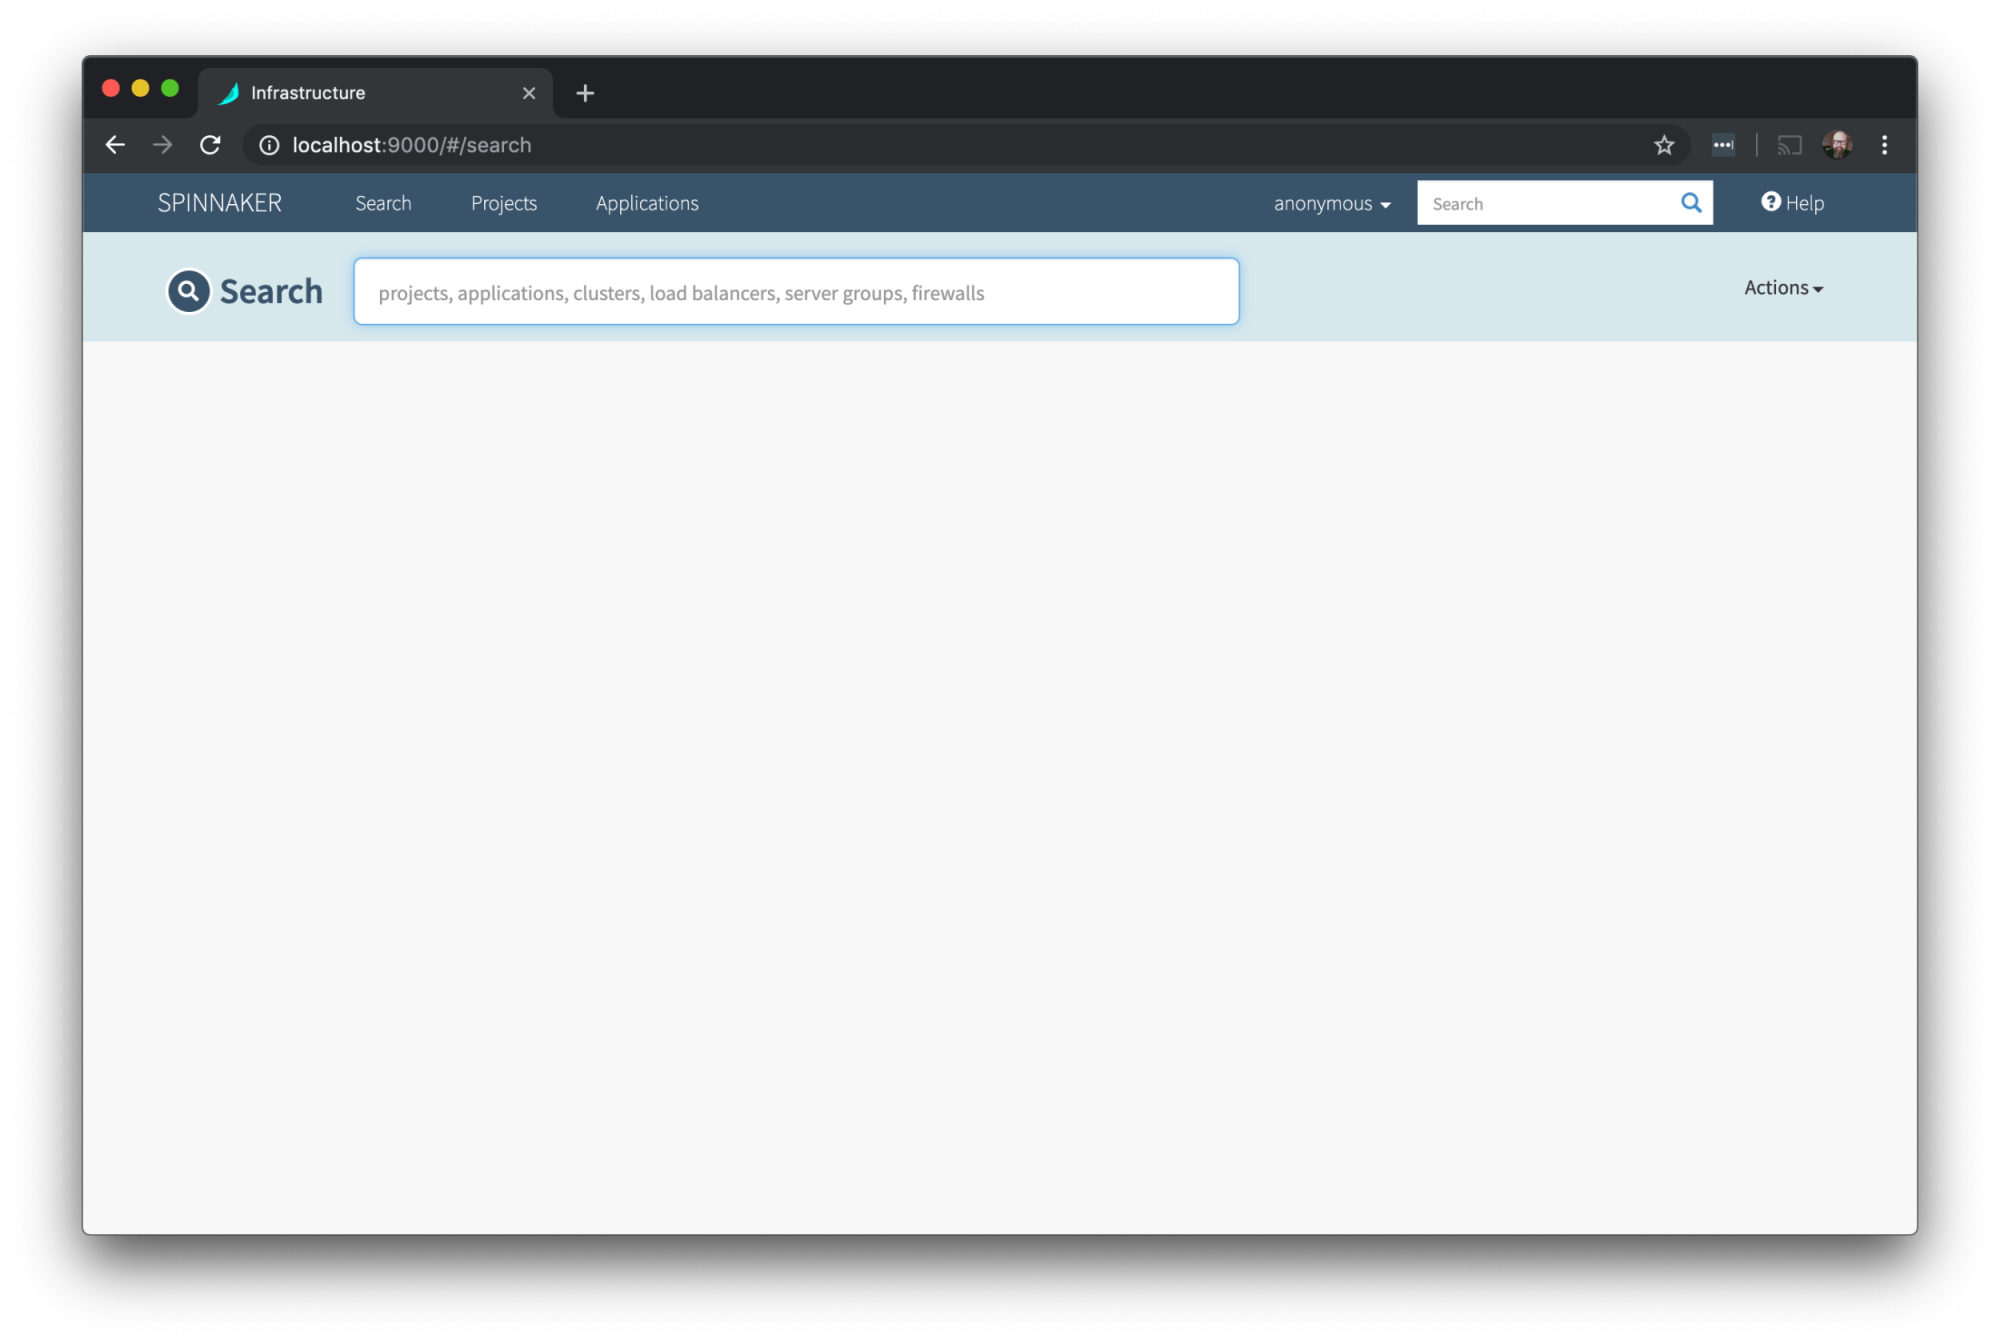
Accessing the Spinnaker UI
At this point you should have a working Spinnaker instance running on the host. It will run on port 9000.
Access it locally on your Mac at:
The UI will look like this:
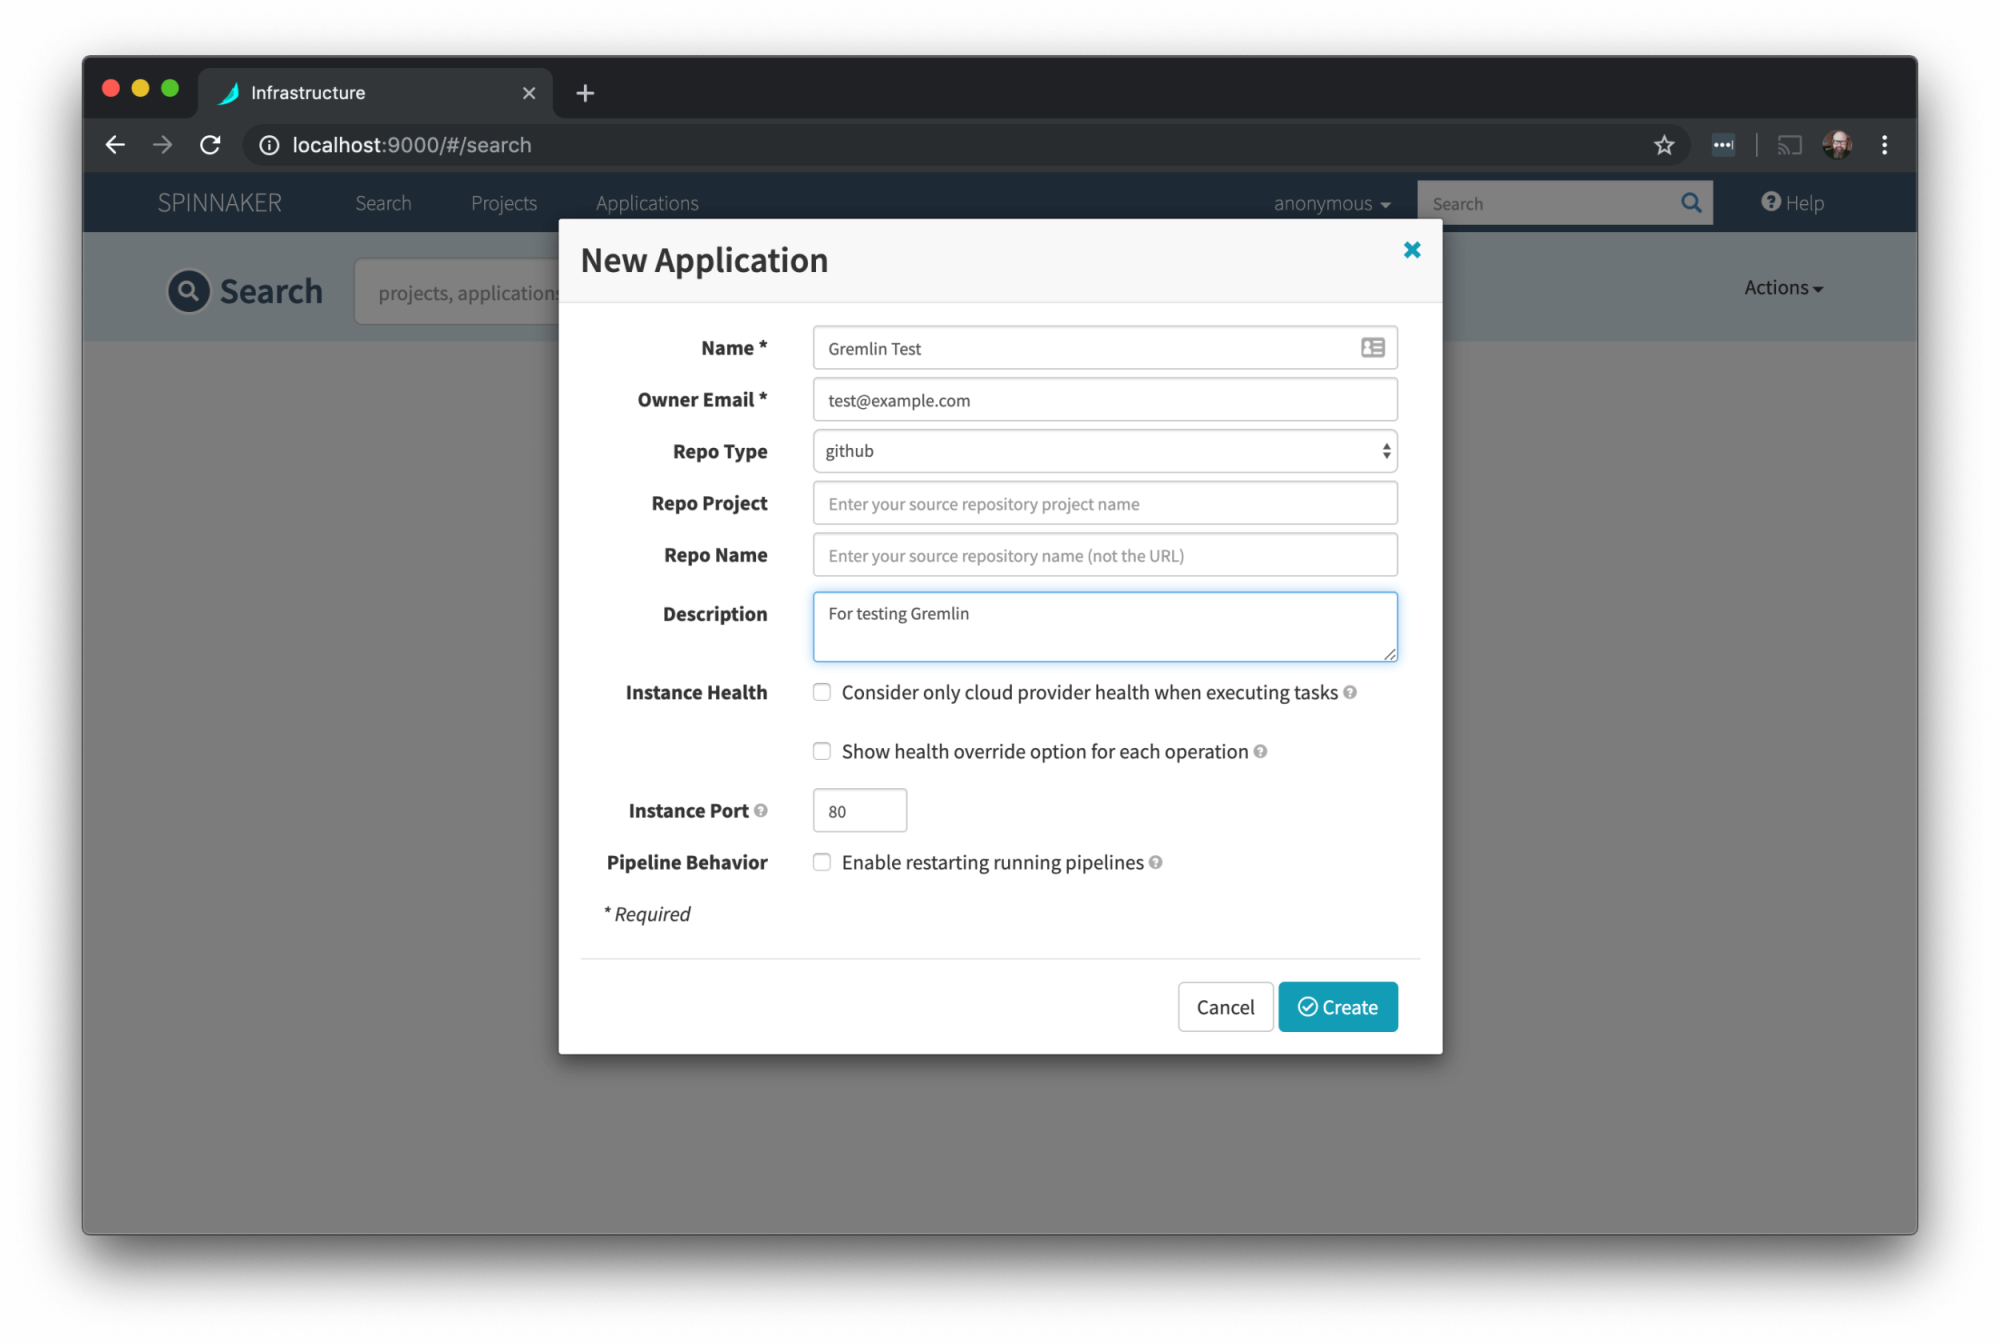
Step 7 - Create an application in Spinnaker
On the right side of the Spinnaker UI is a menu called Actions. Click on that and select Create Application.
You’ll then see a dialog box for the new application’s settings. Enter the application name and an email address, and select github as the repository type. You don’t need to enter the address for an actual GitHub repository in Repo Project, you can leave that blank. But you need to select the repository type for it to work, you’ll get an error otherwise. You can optionally add a description.
Then hit the Create button in the bottom right.
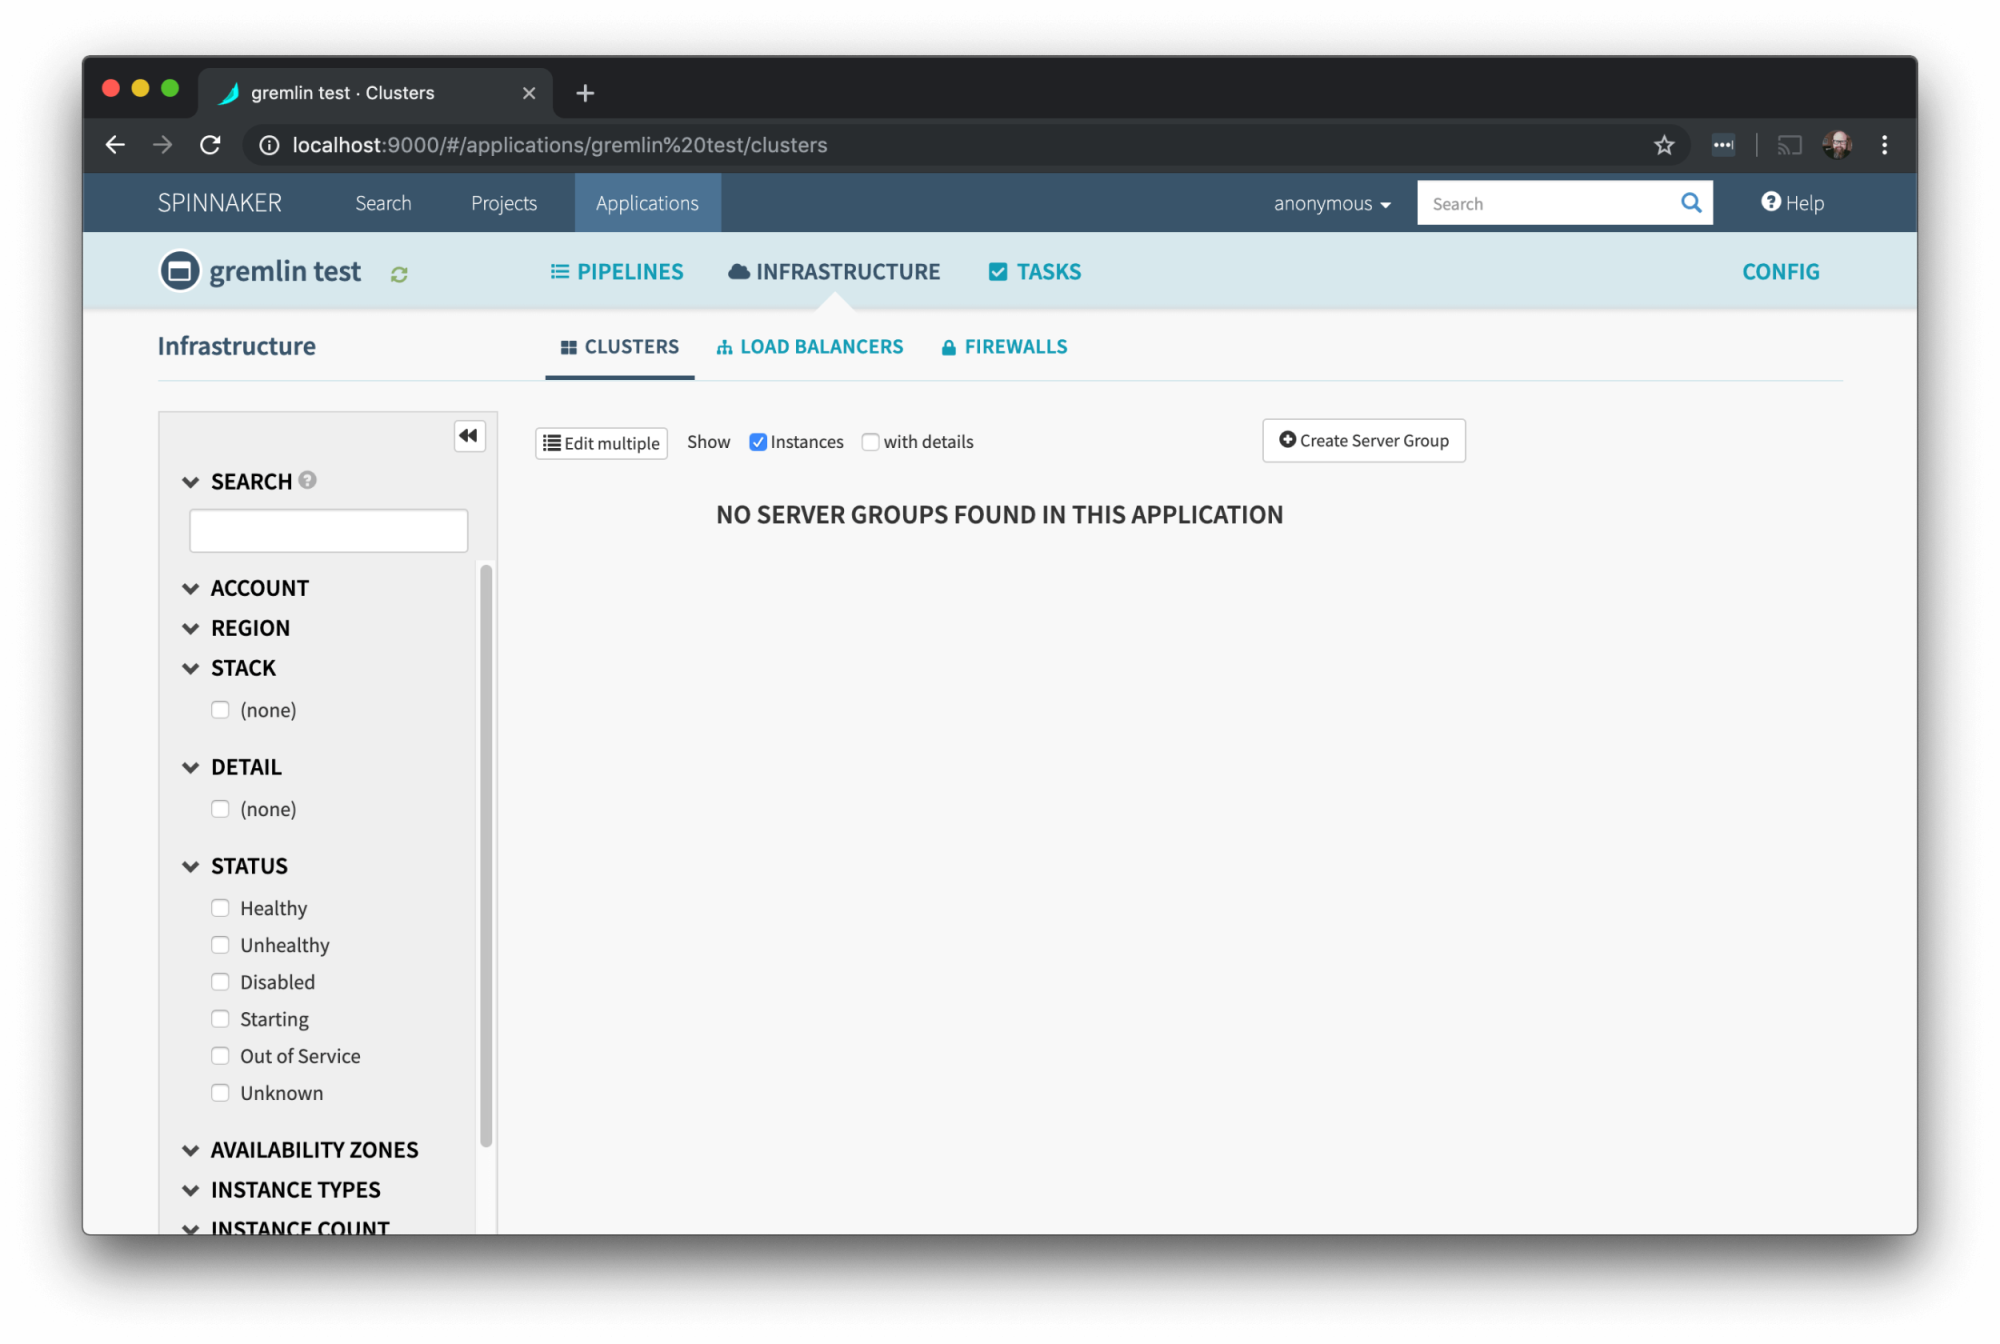
If it succeeds you should end up at this next screen:
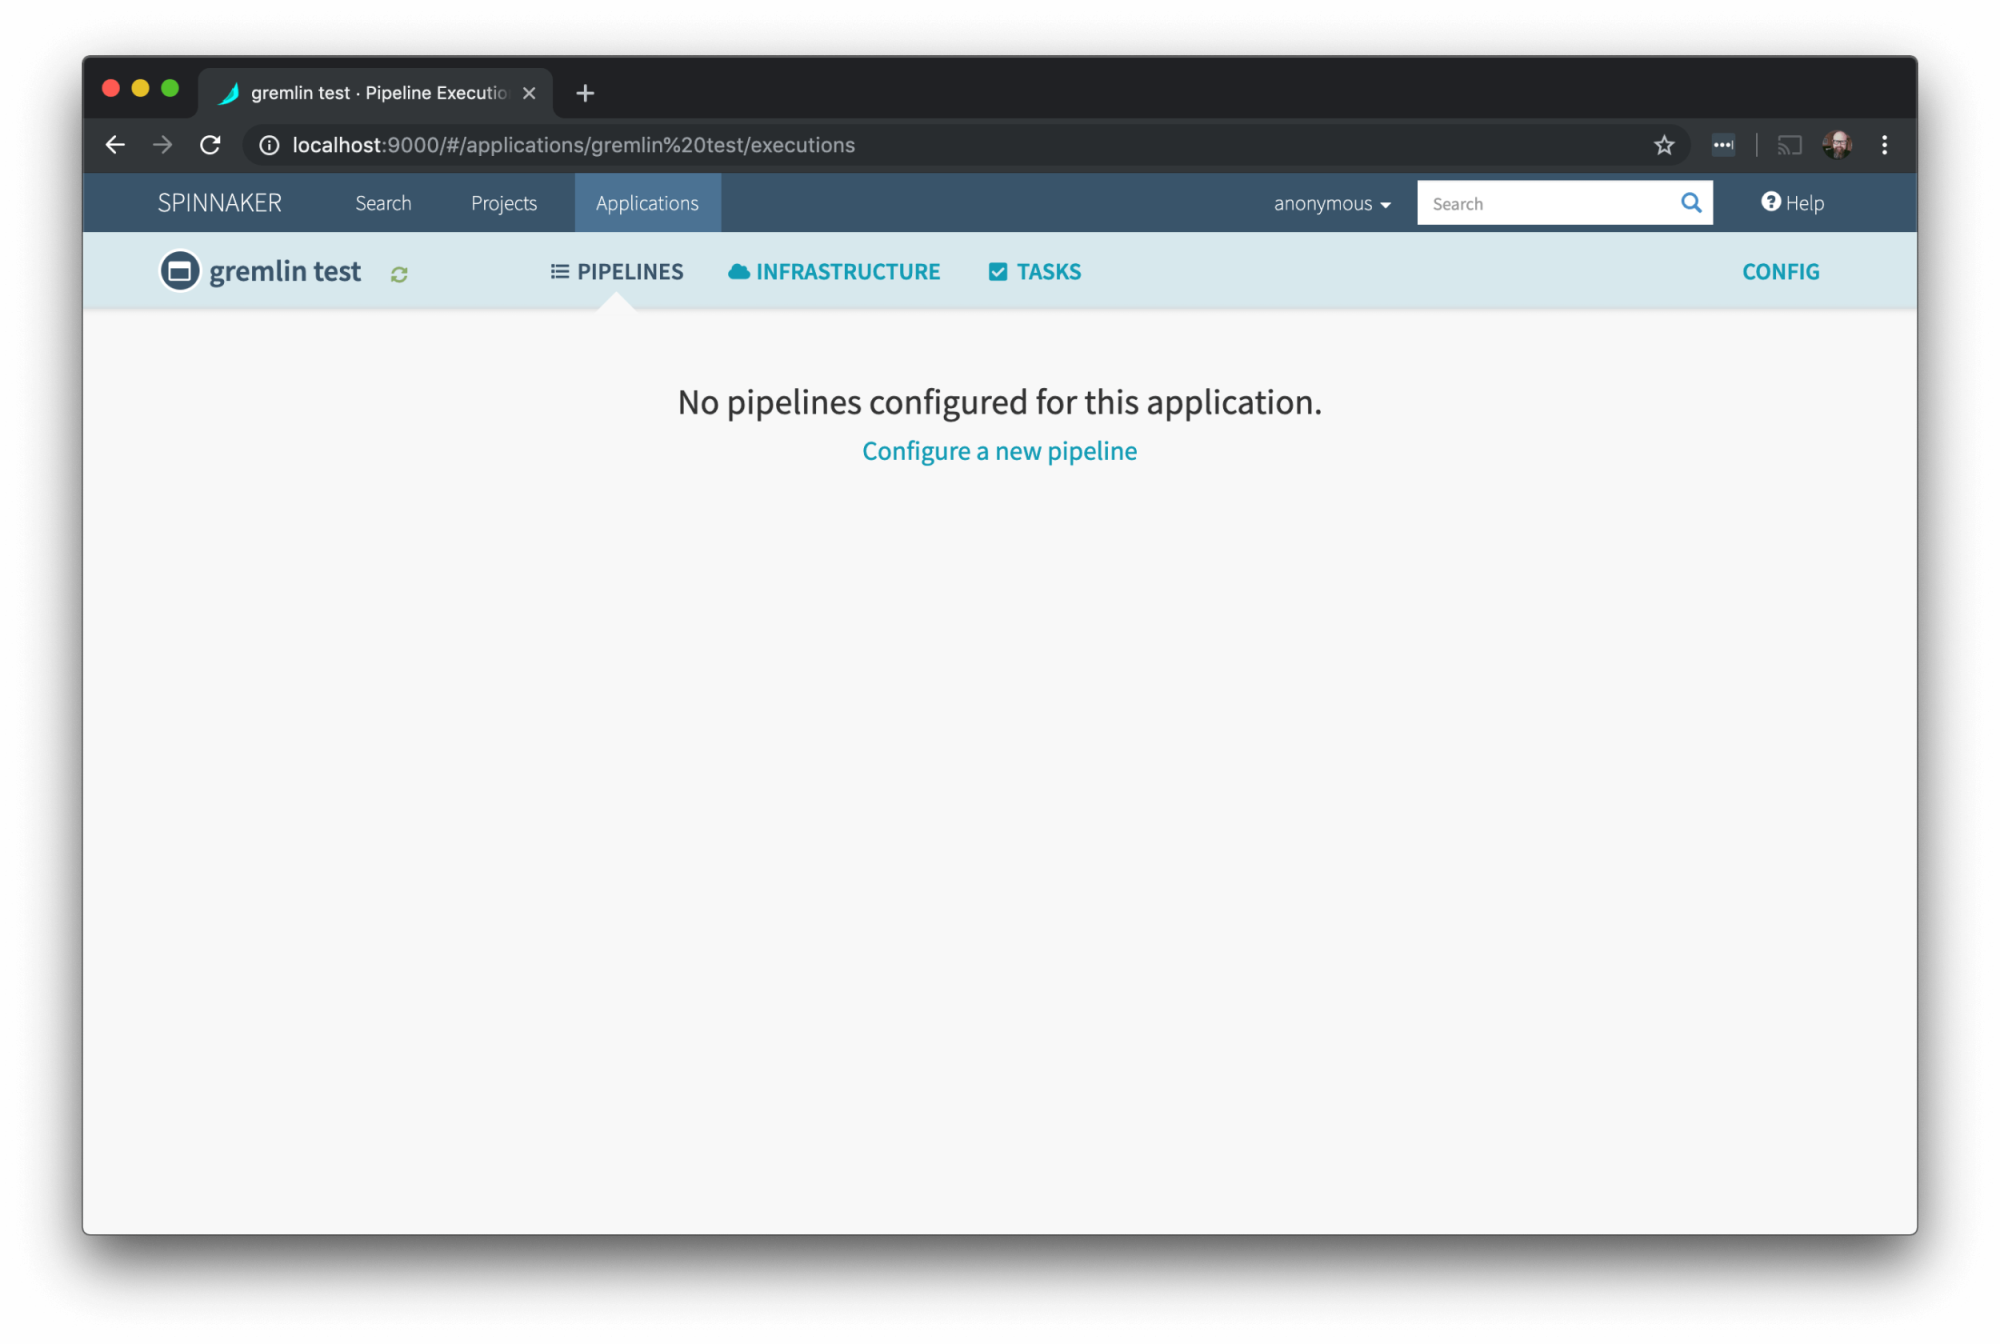
Click on Pipelines and "Configure a new pipeline."
Enter a Name for the Pipeline and click Create.
On the next screen we’ll add a Stage in the pipeline for the Gremlin experiment to run in. Click on “Add stage” under Configuration:
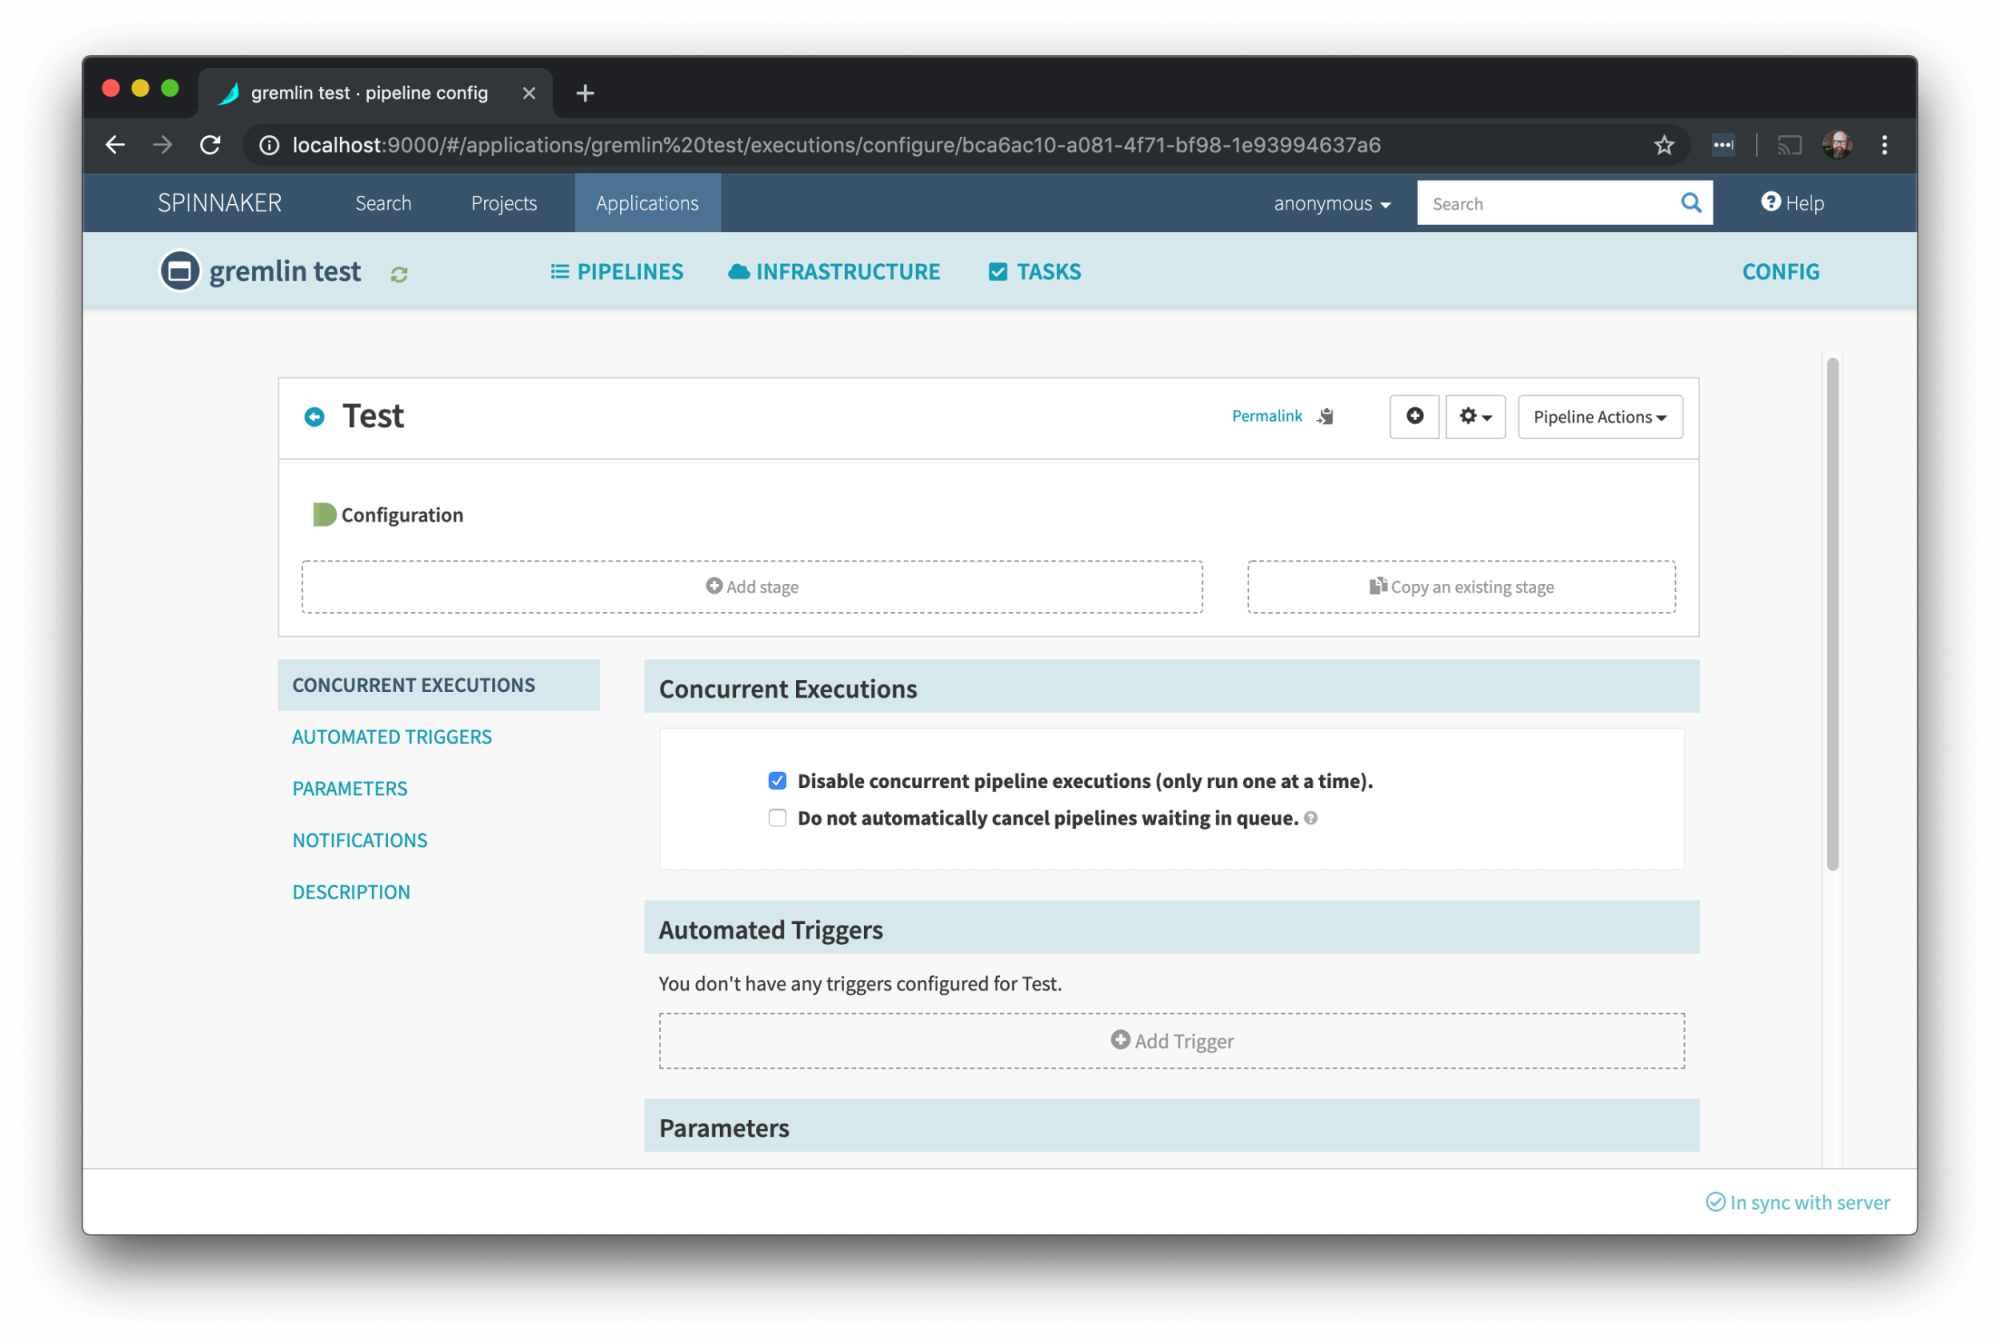
For Type select Gremlin:

The next screen is where we’ll enter the API key that we created earlier in the Gremlin UI. This will allow Spinnaker to access the templates we created and use them to launch experiments.
We’ll retrieve the API key that we created earlier using the Gremlin UI. In the Gremlin UI click Company Settings again and then your Team name. Click the API Keys tab and you’ll see the API Key that you created earlier.
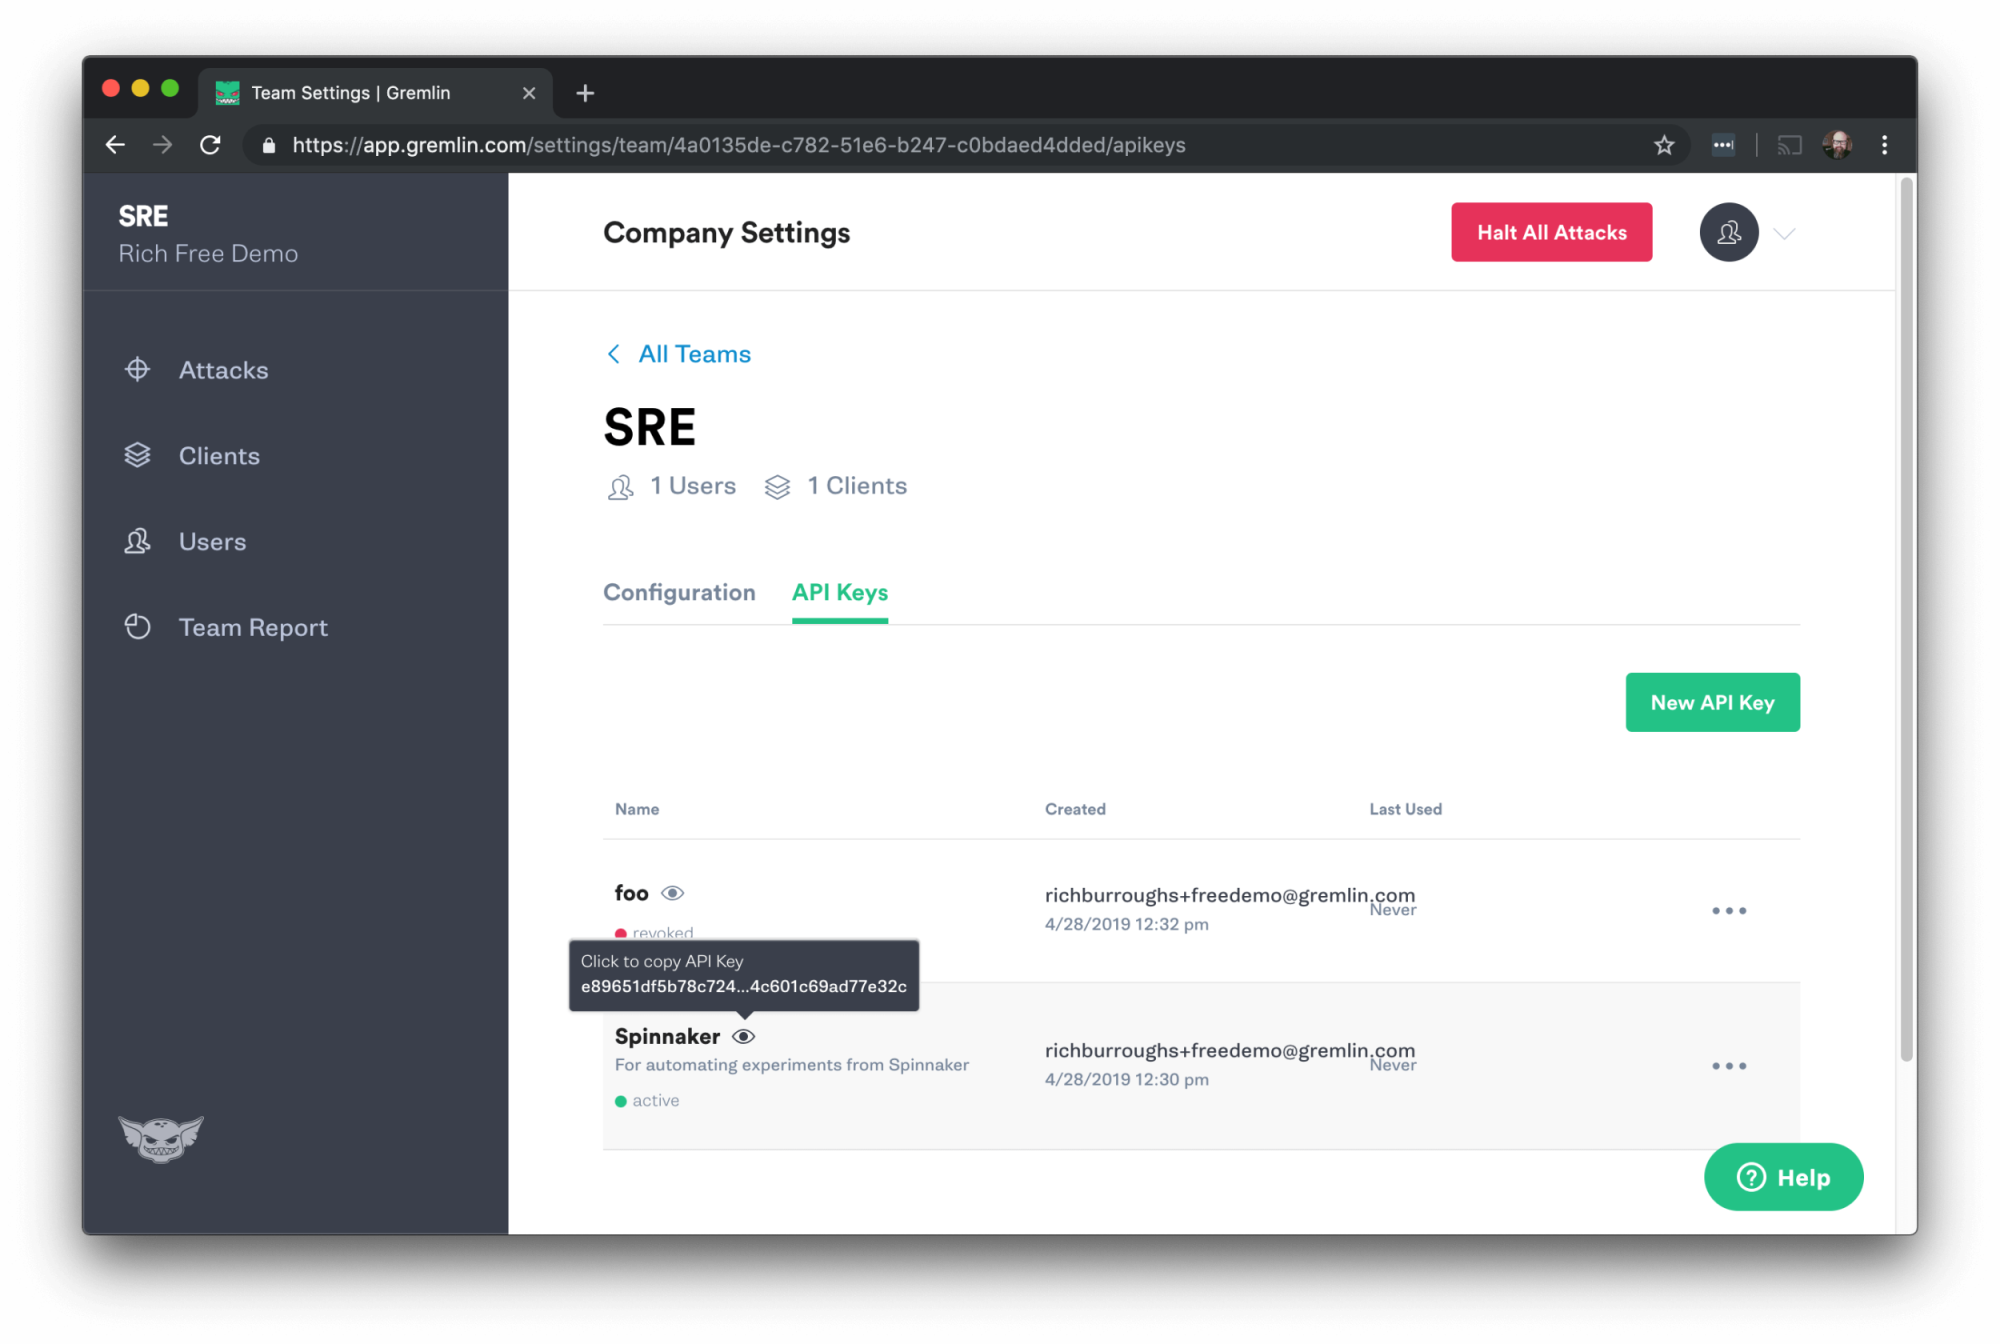
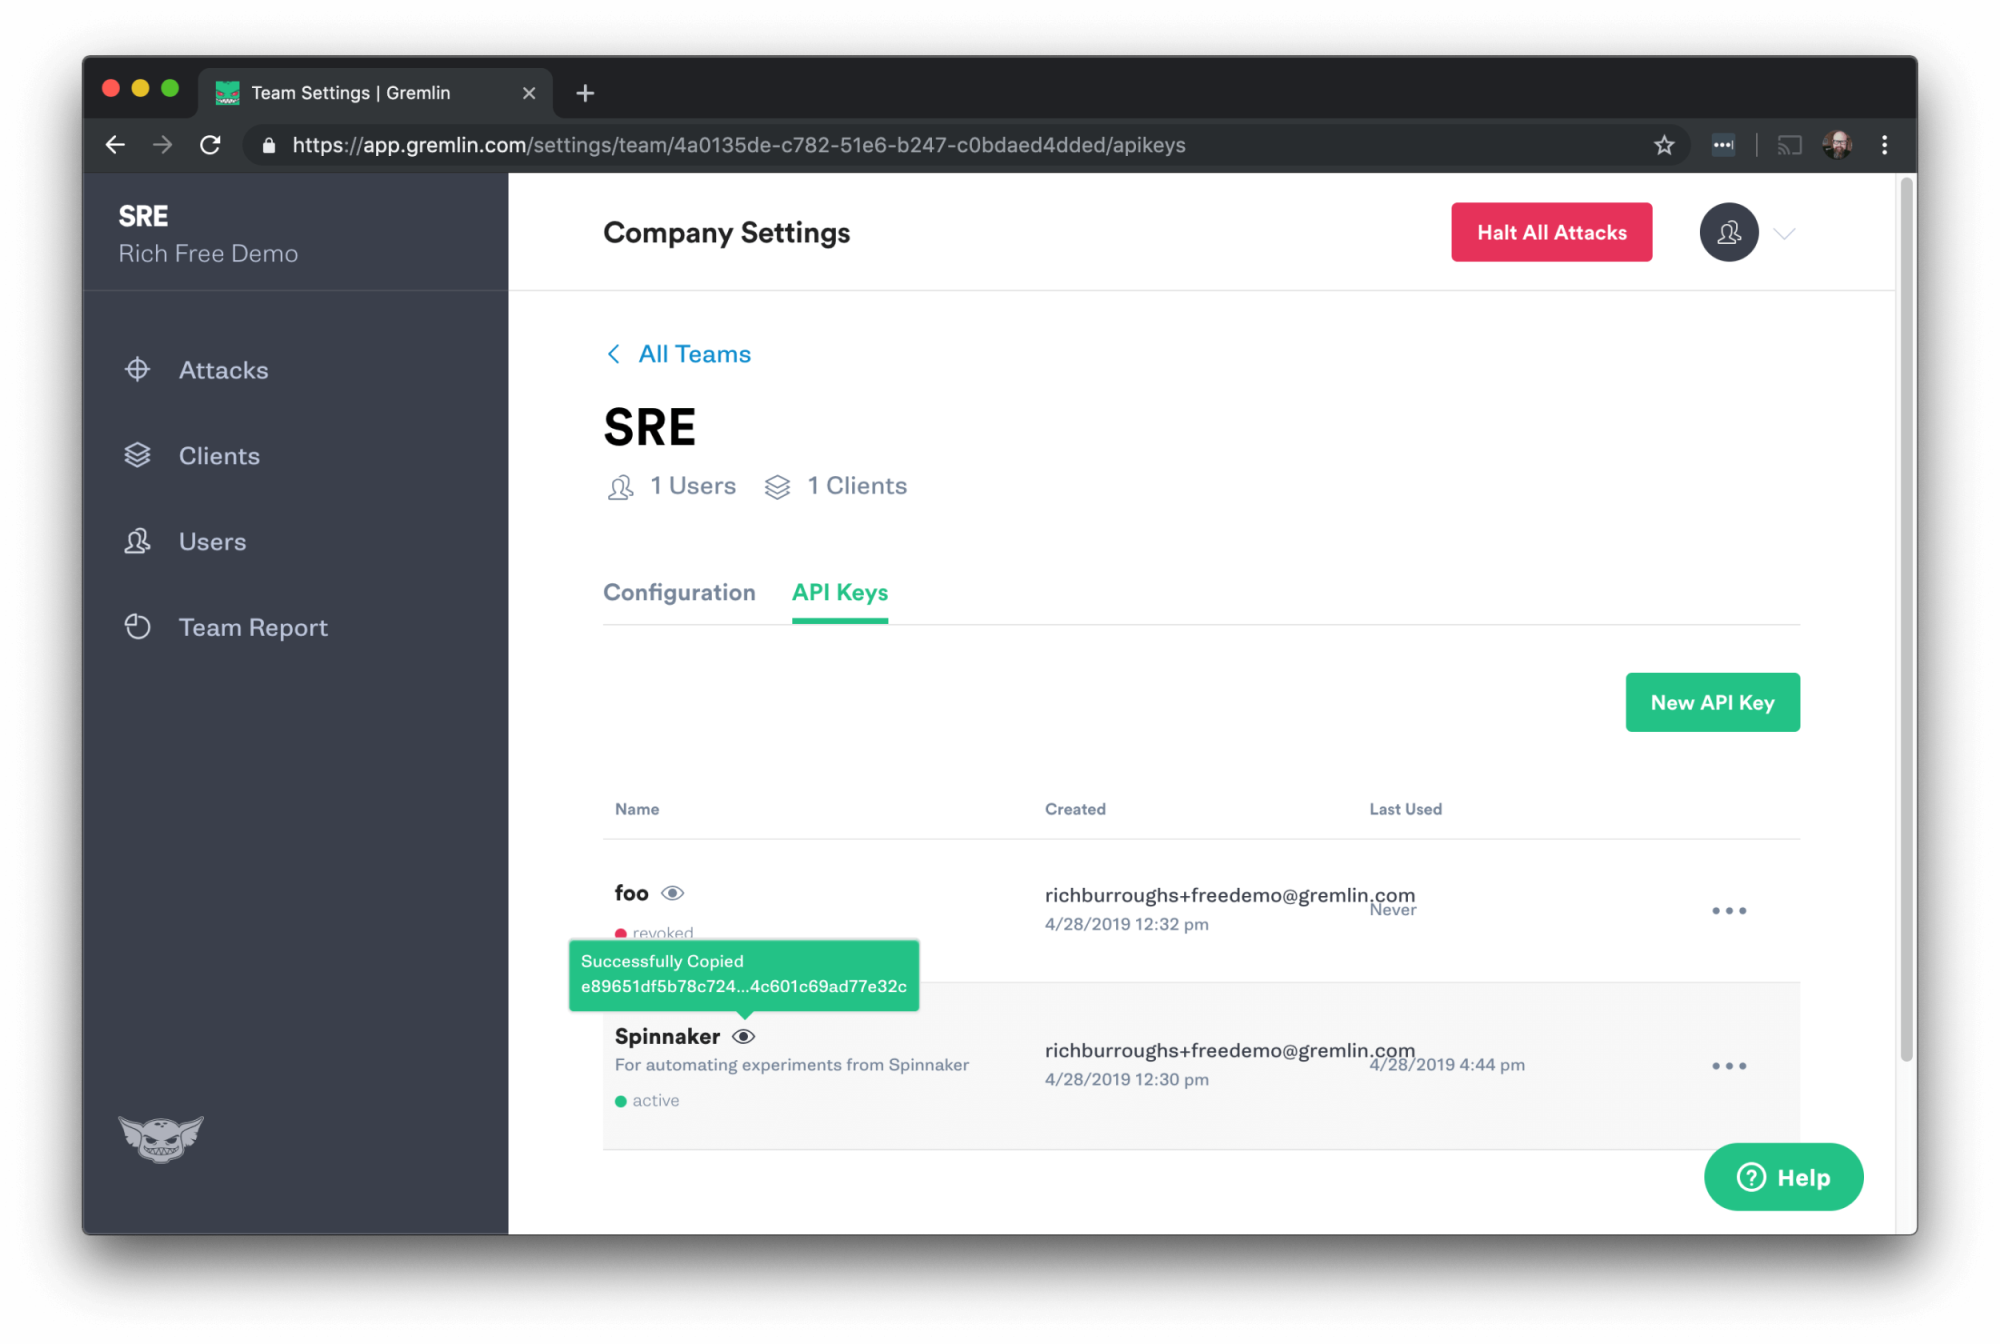
There will be an icon that looks like an eye. Hover your mouse over it and you’ll see a small popup with the instruction to click on it to copy the API key. Click on that popup. It will turn green and the text will change to say Successfully Copied.
Paste that API Key text into the API Key field in Spinnaker and hit the Fetch button below it.
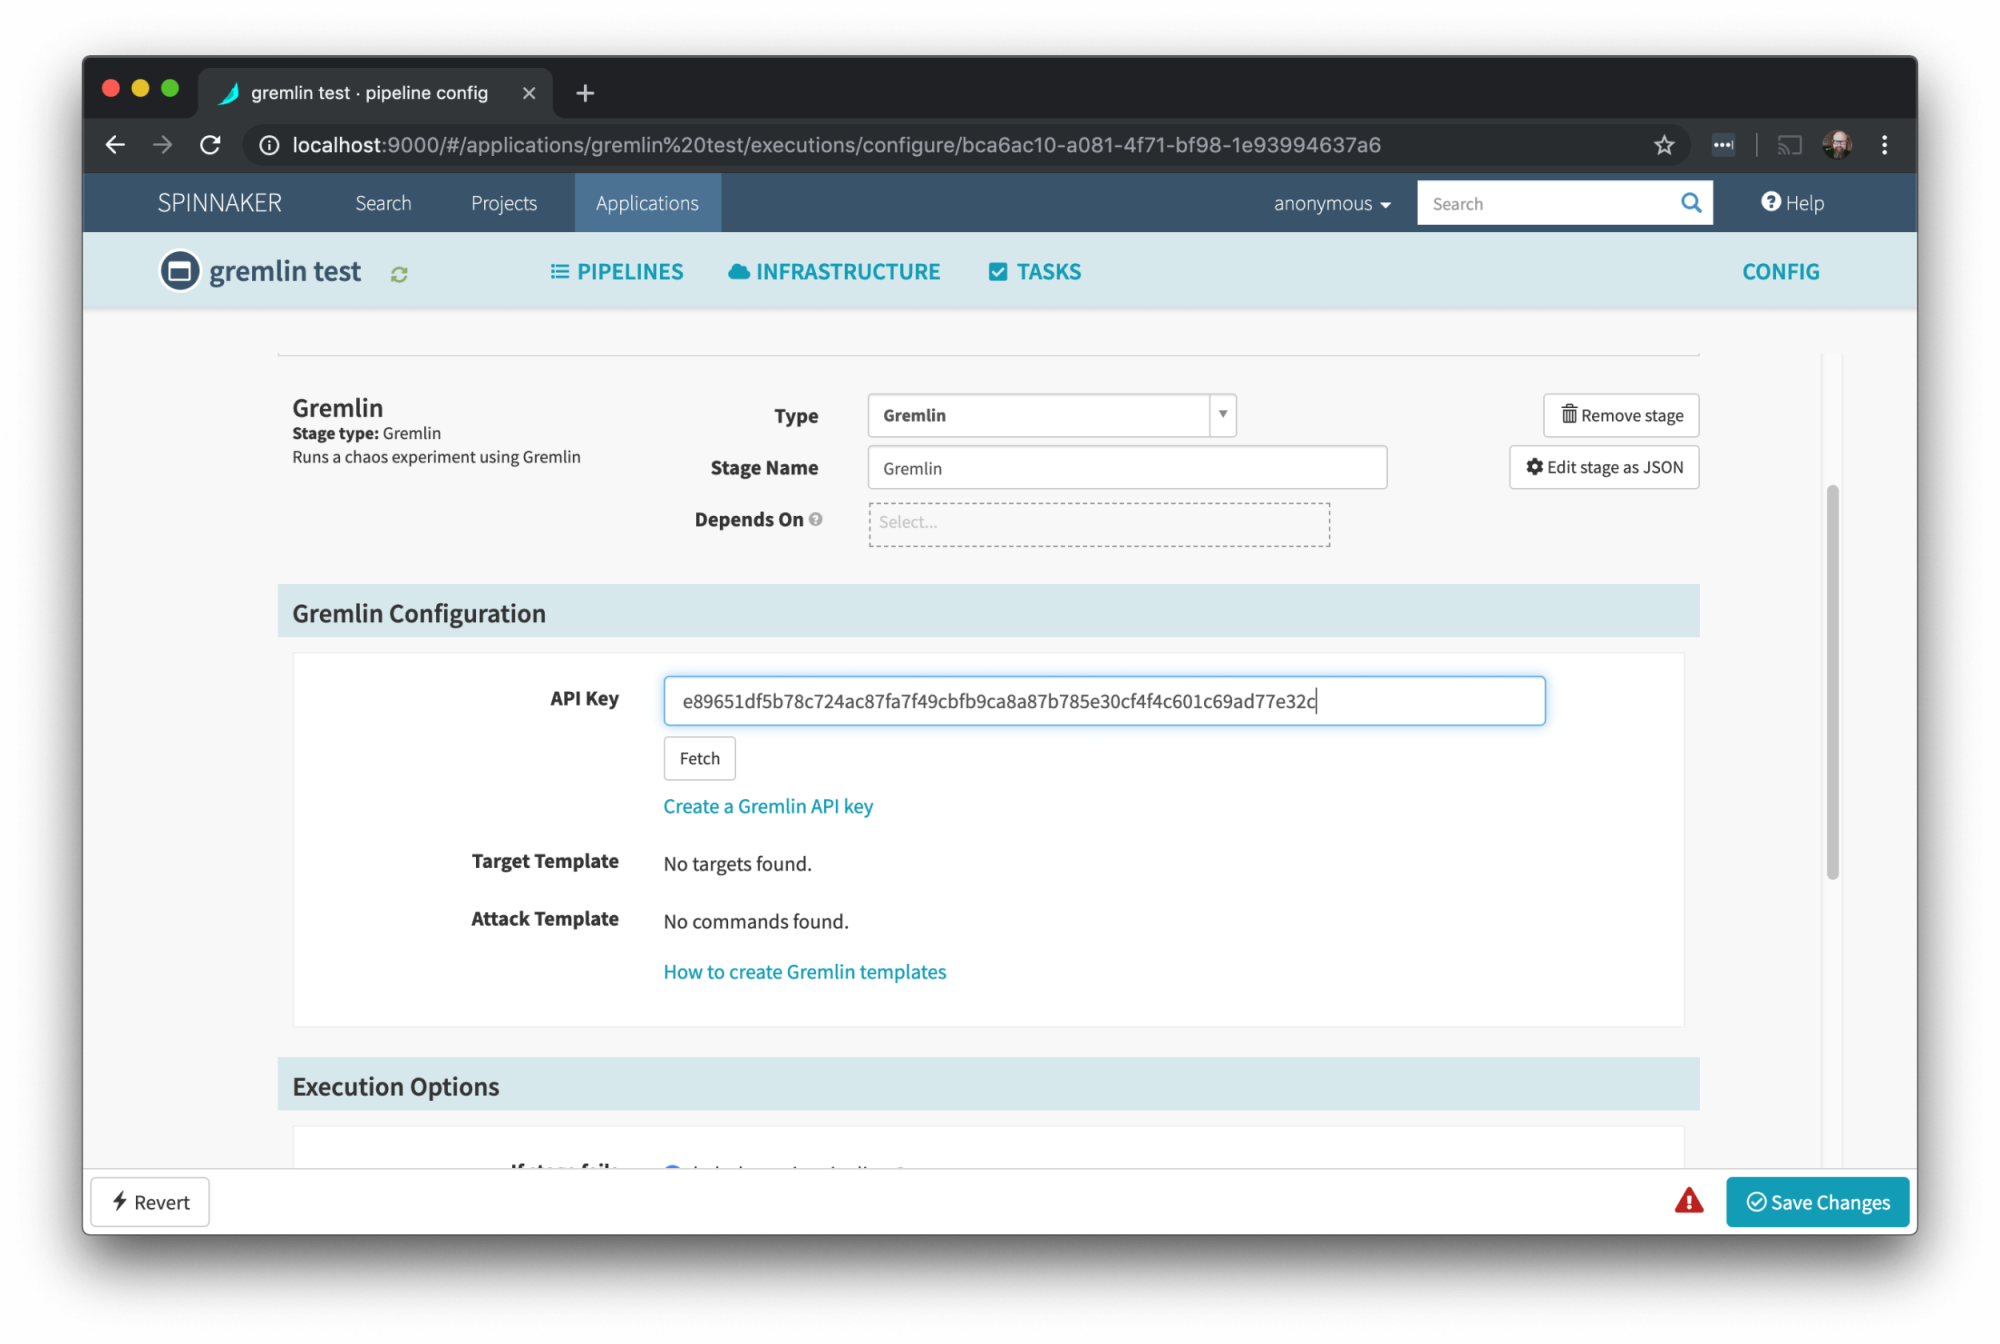
This will make an API call to Gremlin and retrieve the list of templates you have available. Select the names of the templates you created earlier under Target Template and Attack Template, and then hit the Save Changes button in the bottom right of the Spinnaker window. You can leave the other settings on that screen set to the defaults.
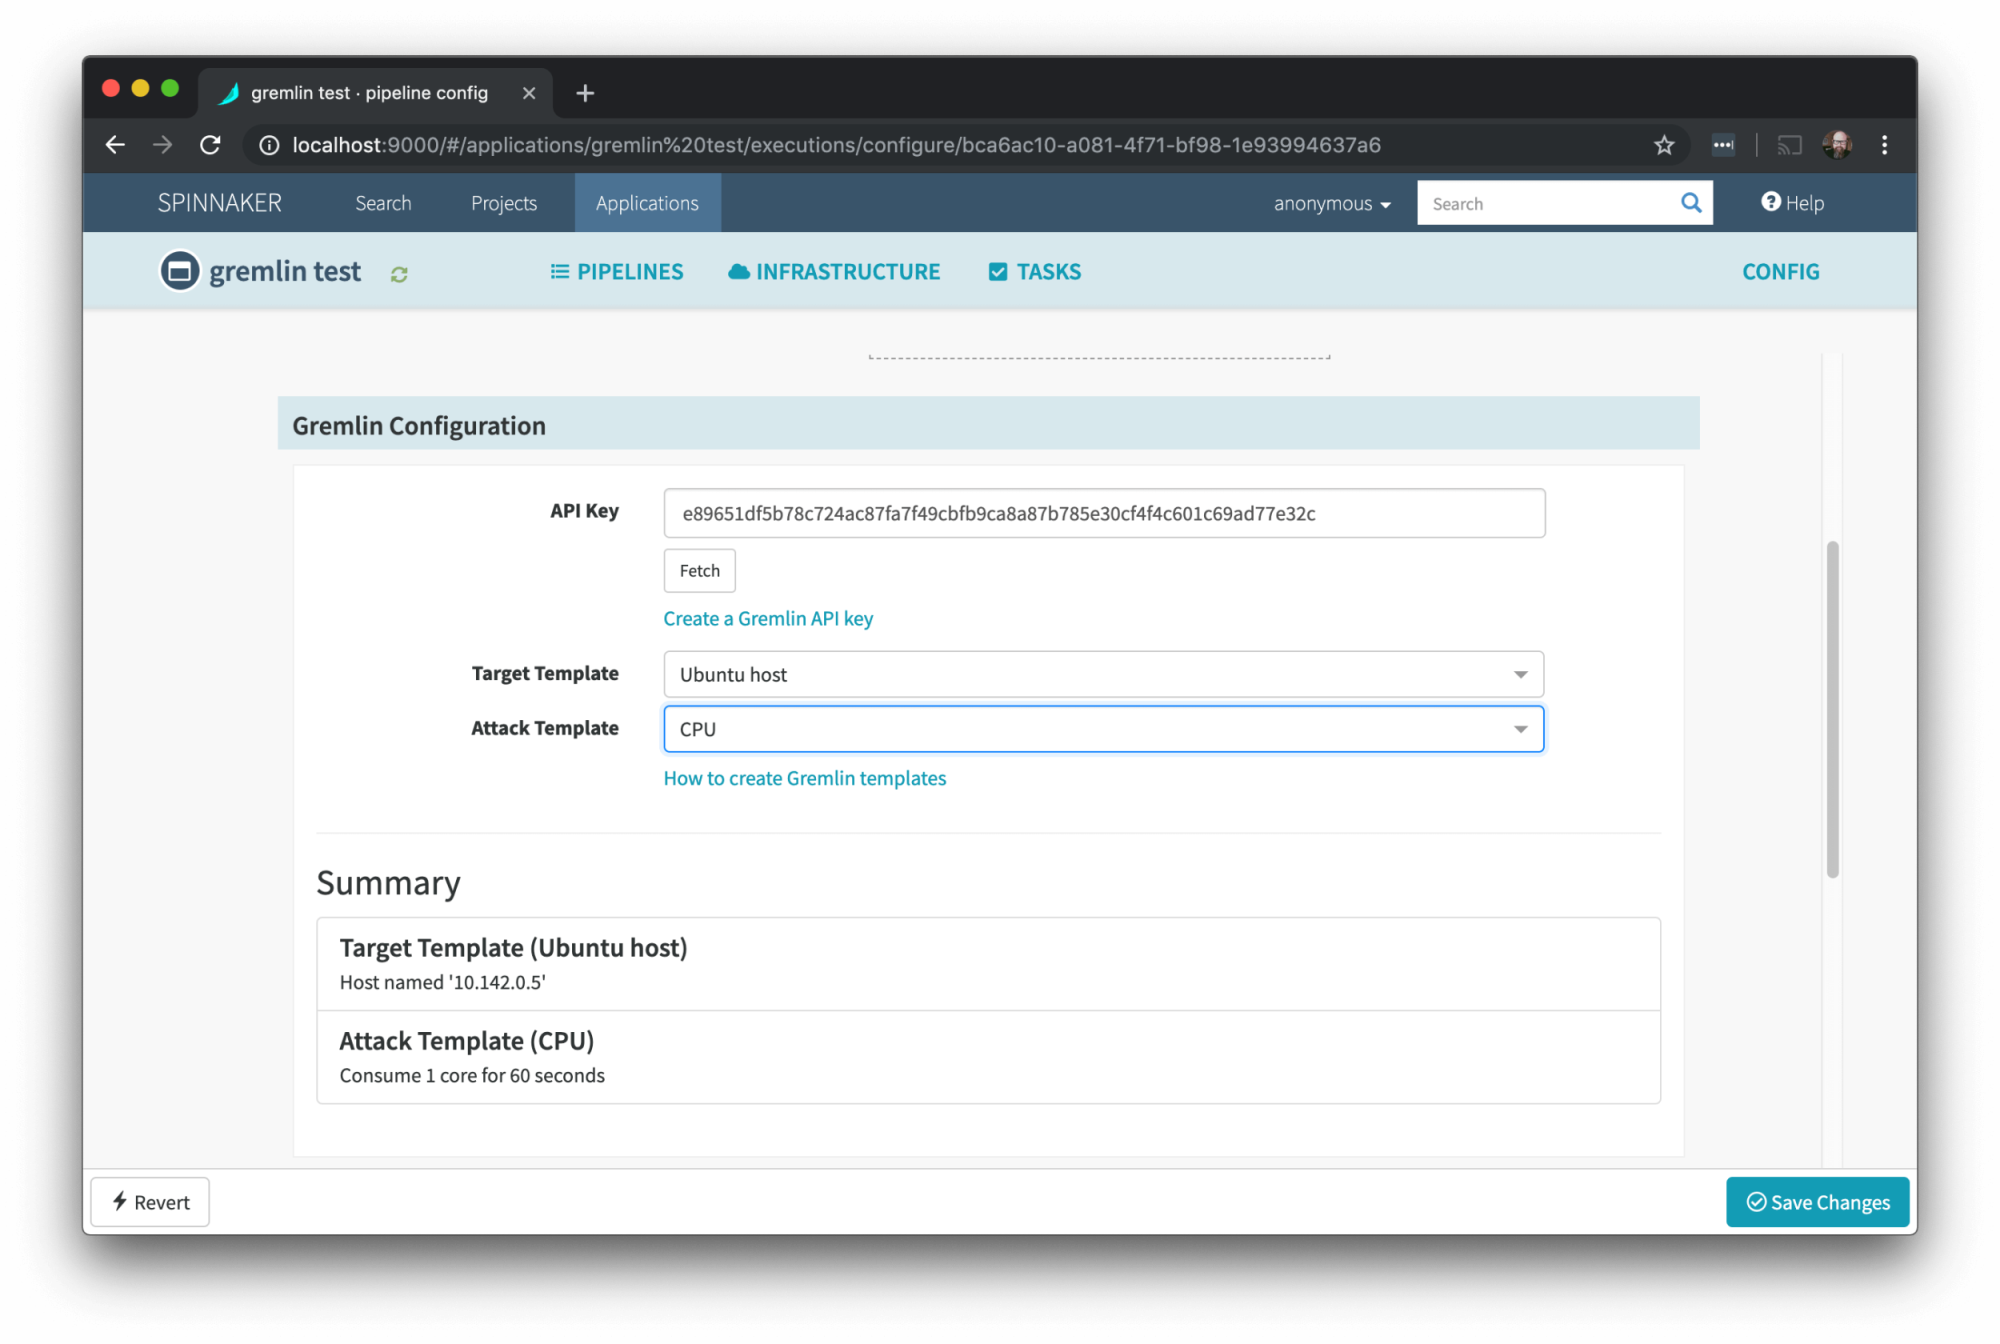
The Save Changes button should change to a checkmark and the text “In sync with server.”
You now have a pipeline for running your Gremlin experiment in Spinnaker!
Step 8 - Run a Gremlin attack using Spinnaker
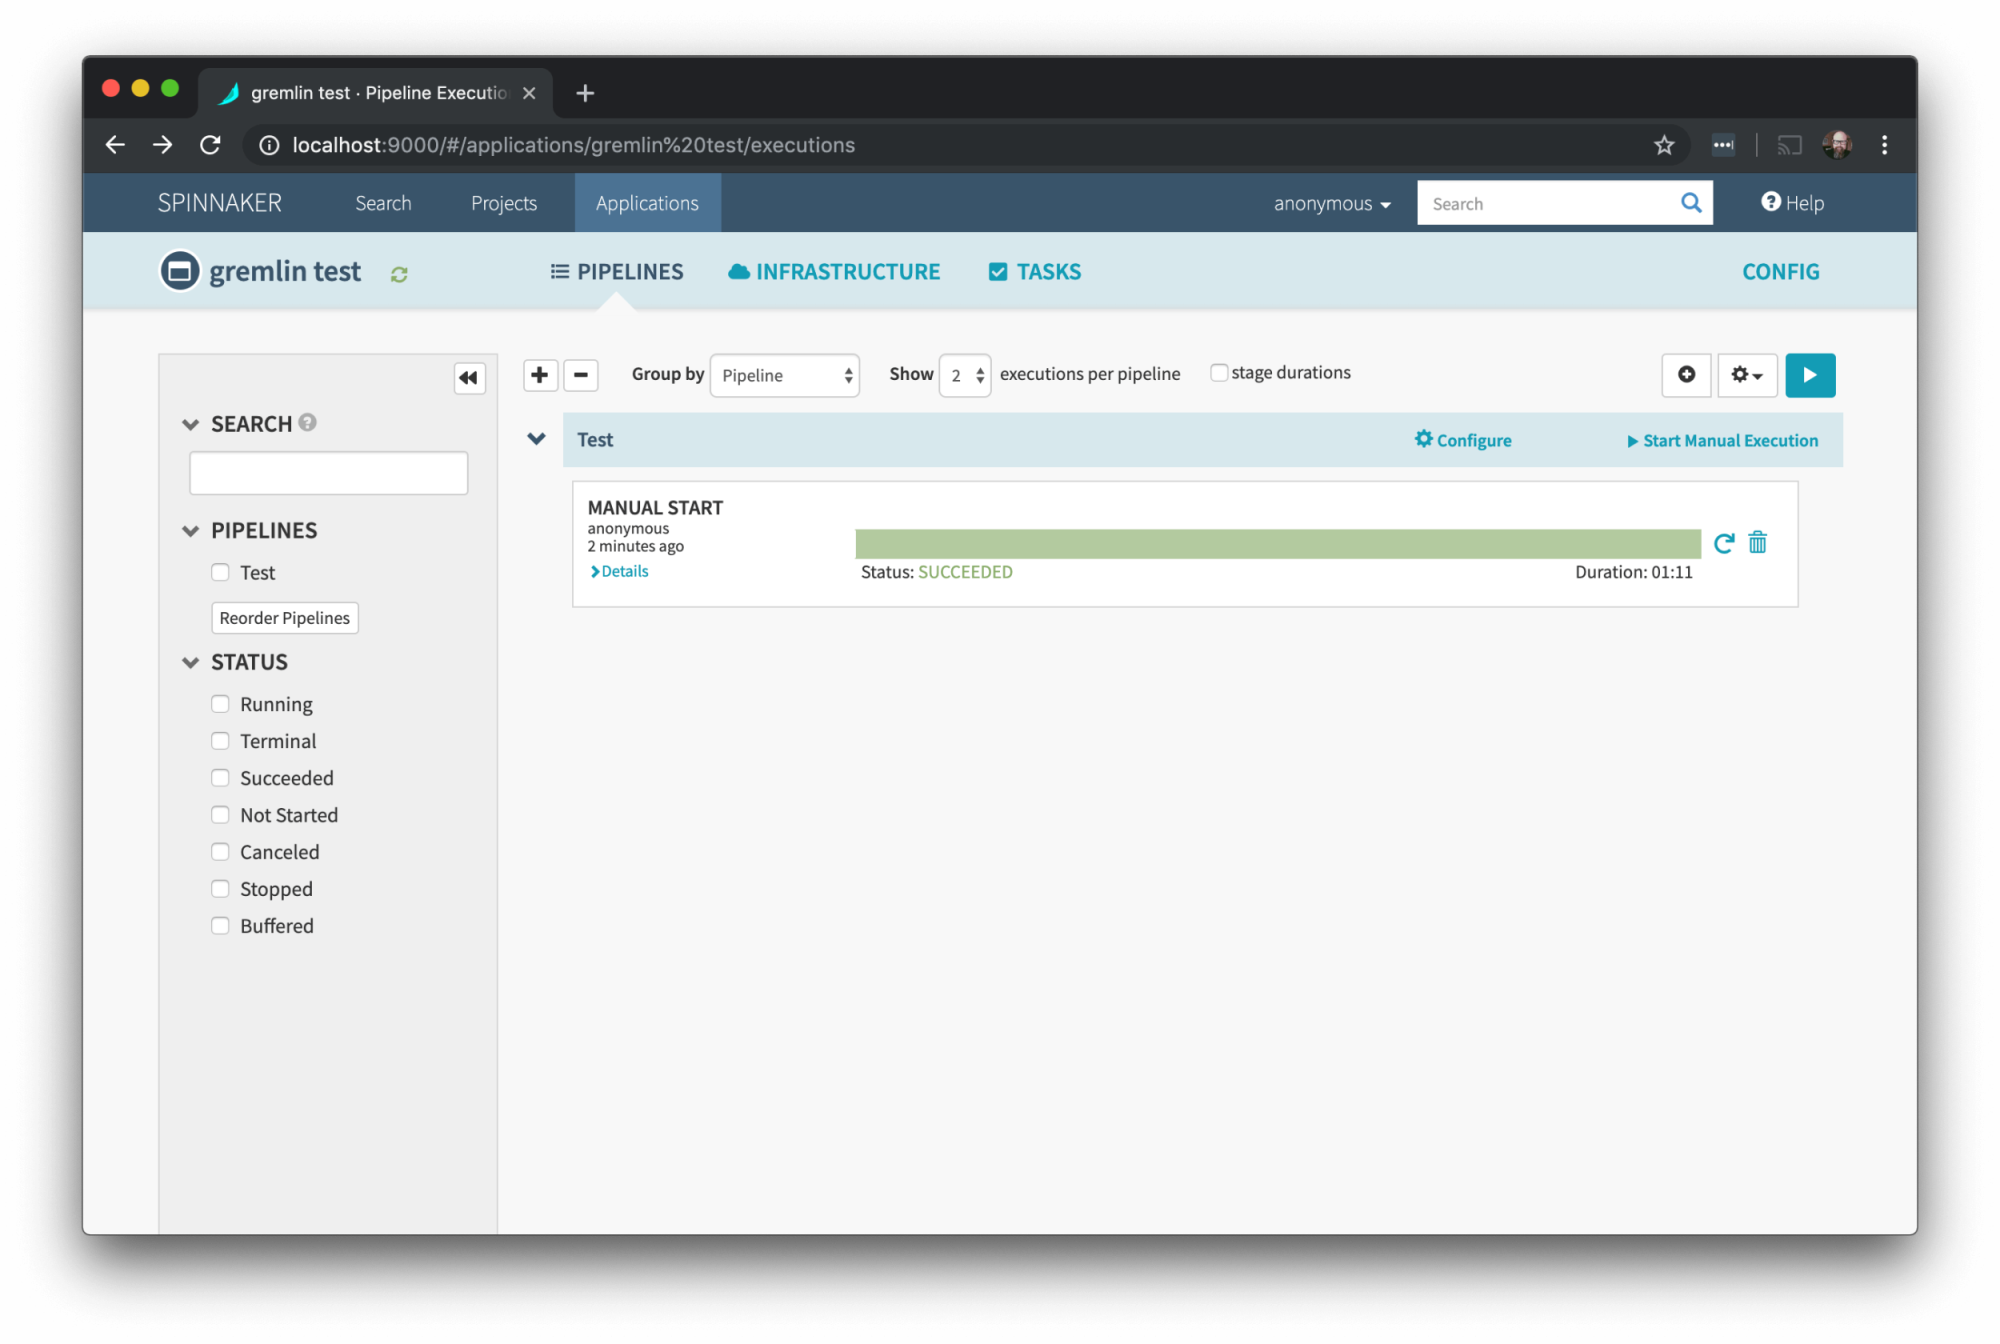
Click on Pipelines in the Spinnaker UI and you should see the pipeline you created listed. Click on the Start Manual Execution Link to the right and it will kick off a Gremlin attack using the templates you provided.

Once the attack has completed you should see the status in Spinnaker change to Succeeded.
You can verify that the attack actually ran in the Gremlin UI by going to the Attacks screen. The top entry in the list should be the attack you just ran.

Click it to see the details.
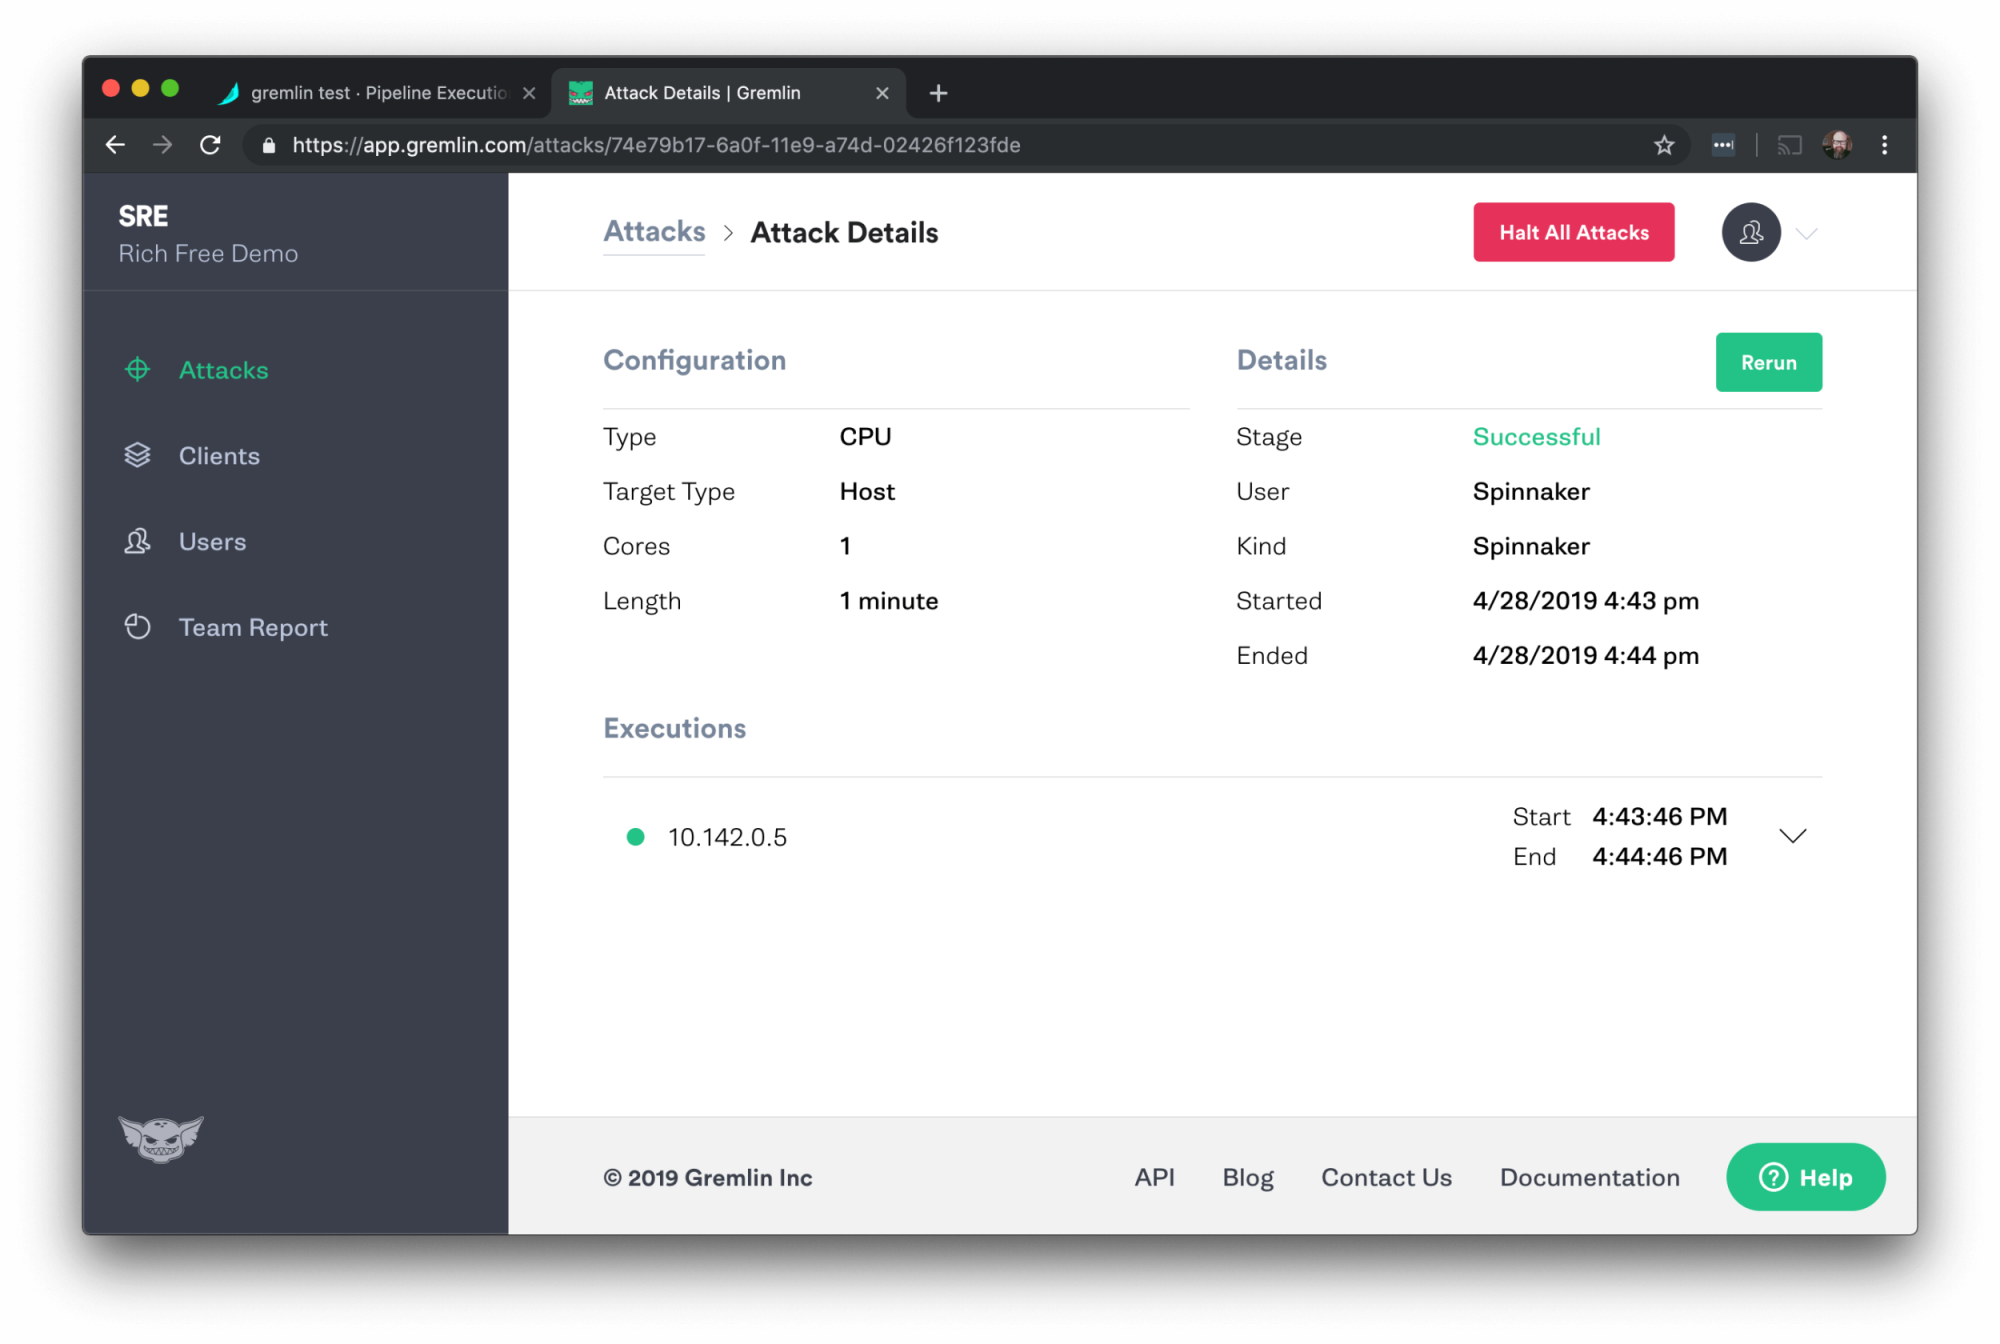
The User will correspond to the name of the API Key you used.
You’ve now successfully run a Gremlin attack from Spinnaker! At this point if you’d like to explore more, you can create additional templates and pipelines for more experiments to run from Spinnaker.
Conclusion
In this tutorial you’ve learned how to create API keys and templates in Gremlin, how to clone and run Spinnaker from source code, and how to run Chaos Engineering experiments using Gremlin from Spinnaker. If you have any questions, check out our documentation or get in touch on the #support channel in our community Chaos Engineering Slack.
Avoid downtime. Use Gremlin to turn failure into resilience.
Gremlin empowers you to proactively root out failure before it causes downtime. See how you can harness chaos to build resilient systems by requesting a demo of Gremlin.

.svg)