Getting started with Gremlin’s API

.svg)
.svg)

 This is an older tutorial
Introduction
Gremlin is a simple, safe and secure service for running chaos experiments on a SaaS platform. It has an intuitive web-based interface that makes it easy to view your systems, design and run experiments, and see the status of ongoing experiments.
Once you’ve had experience running experiments through the web app, the next step is to automate your experiments. With the Gremlin API, you can perform actions in Gremlin through a REST-based API. This makes it easy to initiate attacks from another application (such as a CI/CD service) and automate your experiments. This tutorial will show you how to get started with the Gremlin API, including authenticating and running your first attack.
Overview
This tutorial will show you how to:
- Step 1: Retrieve the authorization token for the API
- Step 2: Run a chaos experiment using the API
- Step 3: Run a chaos experiment using the Gremlin API Examples
- Step 4: Verify the status of a chaos experiment using the API
Prerequisites
Before you begin this tutorial, you’ll need:
- A Gremlin account (request a free trial)
- A host running the Gremlin agent. You can use the Gremlin Playground to quickly create a virtual machine instance with the Gremlin agent pre-installed. For other options, see our installation documentation.
Step 1: Retrieve the authorization token for the API
Before we can use the API, we’ll need to authenticate our session by including an Authorization Header in each API call. This header includes a token that we need in order to authenticate with Gremlin. There are two ways to obtain an authorization token: either by authenticating as our Gremlin user by using our Gremlin credentials, or by creating an API key. We’ll look at both methods.
Authenticating using credentials
To log in using user credentials, we'll run the following command in a terminal. We'll replace the <span class="code-class-custom">email,</span> <span class="code-class-custom">password</span>, and <span class="code-class-custom">companyName</span> fields with our login email, password, and Gremlin company:
If you have MFA enabled, you’ll need to change the endpoint to <span class="code-class-custom">/users/auth/mfa/auth</span> and include the token from your password authenticator:
This returns the following output. The <span class="code-class-custom">header</span> field contains the token that we’ll use. Since we belong to multiple teams, each team is included in the response. Each team uses a separate token, so we’ll need to find the right team by checking the <span class="code-class-custom">org_name </span>field. For example, here’s the output for the team "My Team":
This gives us our new token:
<span class="code-class-custom">Bearer MTZhY2RjZDEtMjIxYi01YjZjLThhN2EtYTgyOWFmN2ZjYmVhOmFuYW1tZWRpbmEyM
UBnbWFpbC5jb206NTZlYzNmZTYtYjNiMC0xMWU5LWJhMzctMDI0MmQyMzAyY2Yy</span>
We’ll need to format this as an HTTP Authorization header:
<span class="code-class-custom">Authorization: Bearer MTZhY2RjZDEtMjIxYi01YjZjLThhN2EtYTgyOWFmN2ZjYmVhOm
FuYW1tZWRpbmEyMUBnbWFpbC5jb206NTZlYzNmZTYtYjNiMC0xMWU5LWJhMzctMDI0MmQyMz
AyY2Yy</span>
We’ll also save the full header as an environment variable named $header for later use in this tutorial by running this command in a terminal:
Authenticating using API keys
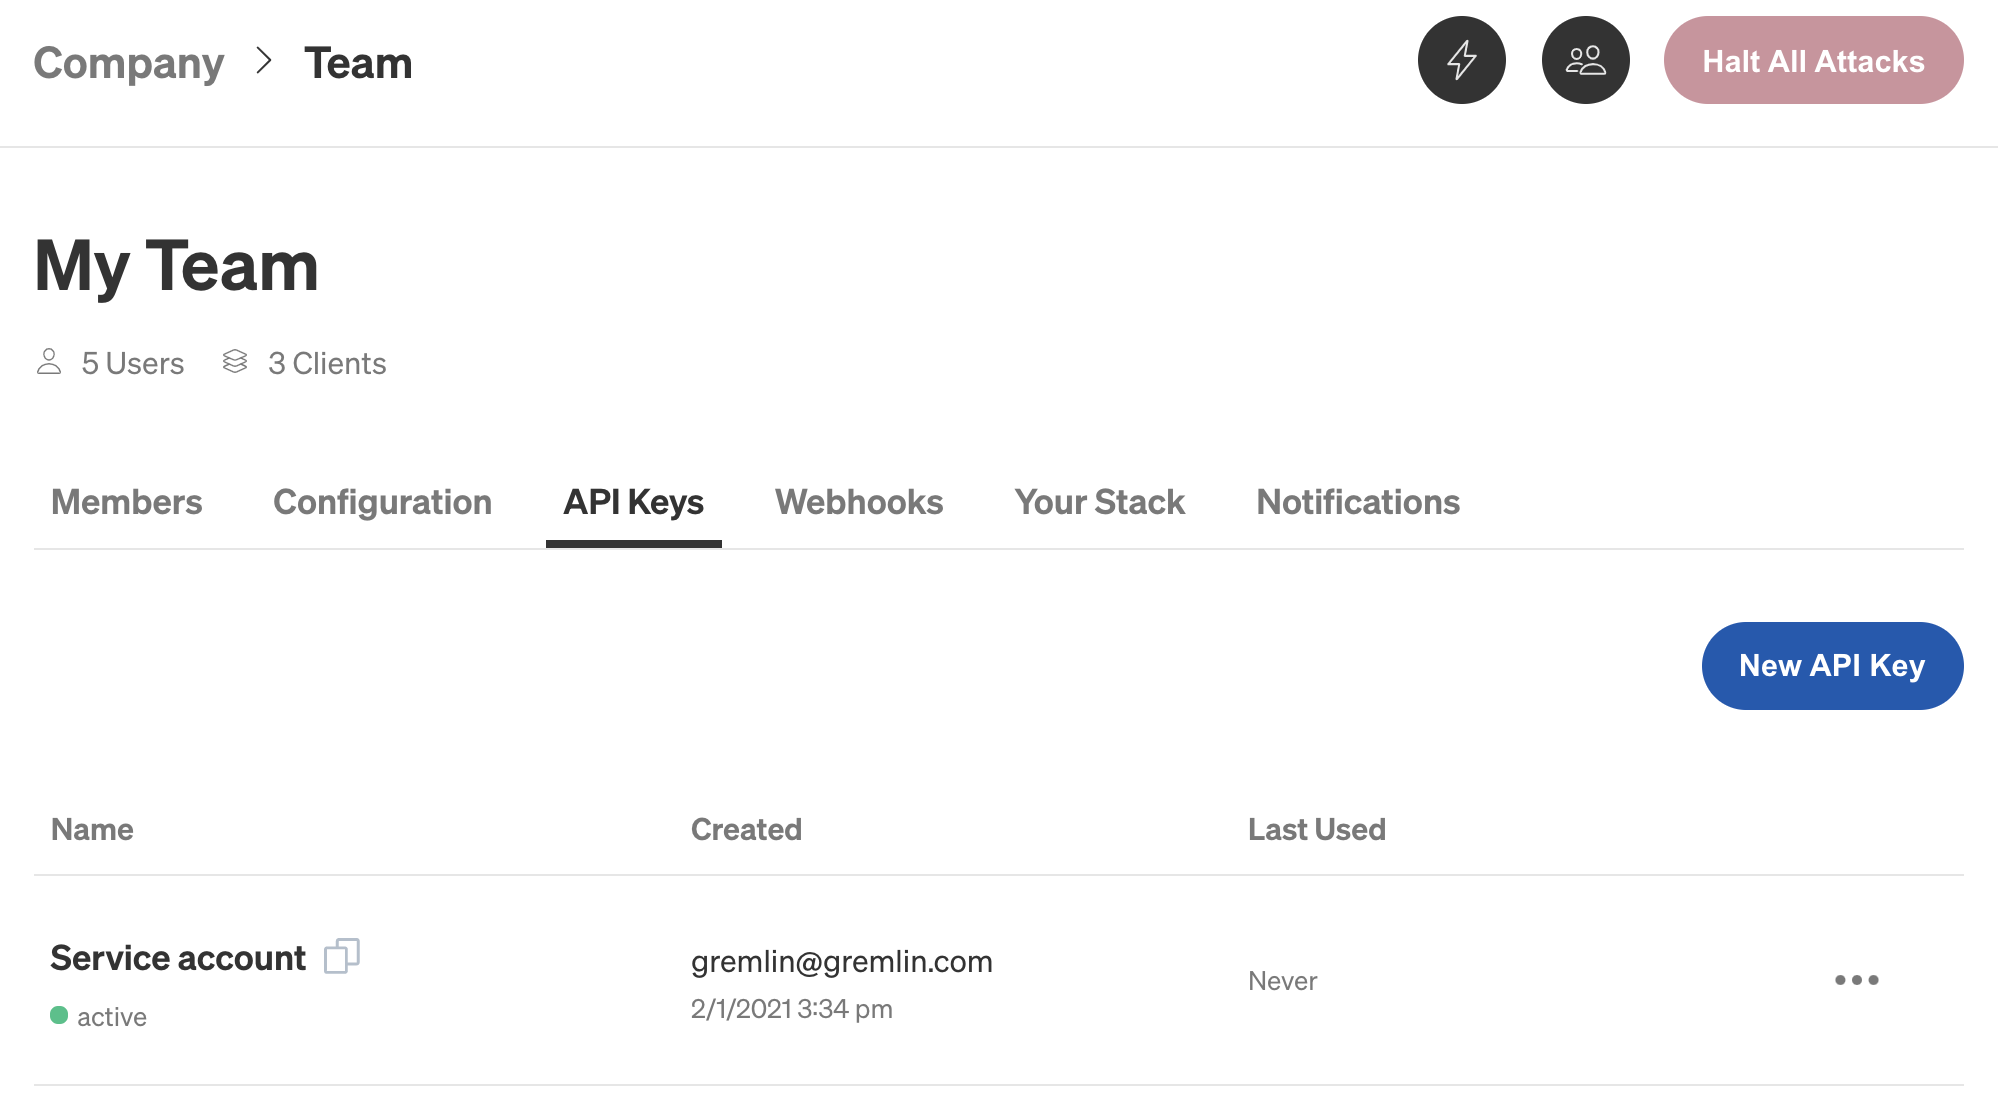
With API keys, we can authenticate using service accounts instead of our own user account. To create an API key, we’ll open the Gremlin web app and navigate to the team settings page, then click the API Keys tab. If we have an API key that we want to reuse, we can click on the copy icon next to the key’s name in the API key list to copy the key to our clipboard:
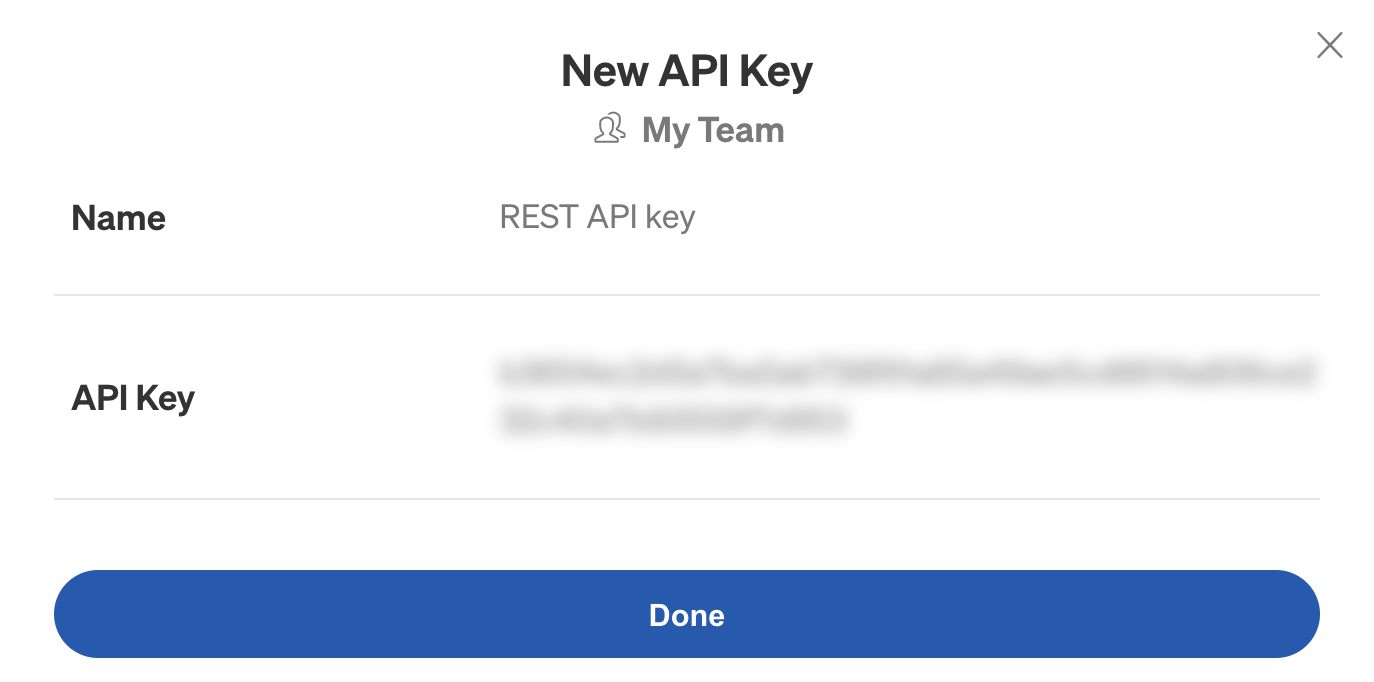
To create a new API key, we’ll click New API Key. We’ll enter a name for the API Key and an optional description, then click Save. Now we can copy the value shown in the “API Key” field.
This gives us our new token:
<span class="code-class-custom">f02868098b13e4f68da82b0c5e5c950ea750fce53c62d982cdab0c61099e5f98</span>
We’ll format the full header containing the token and save it as an environment variable named $header for later use in this tutorial:
Step 2: Run a chaos experiment using the API
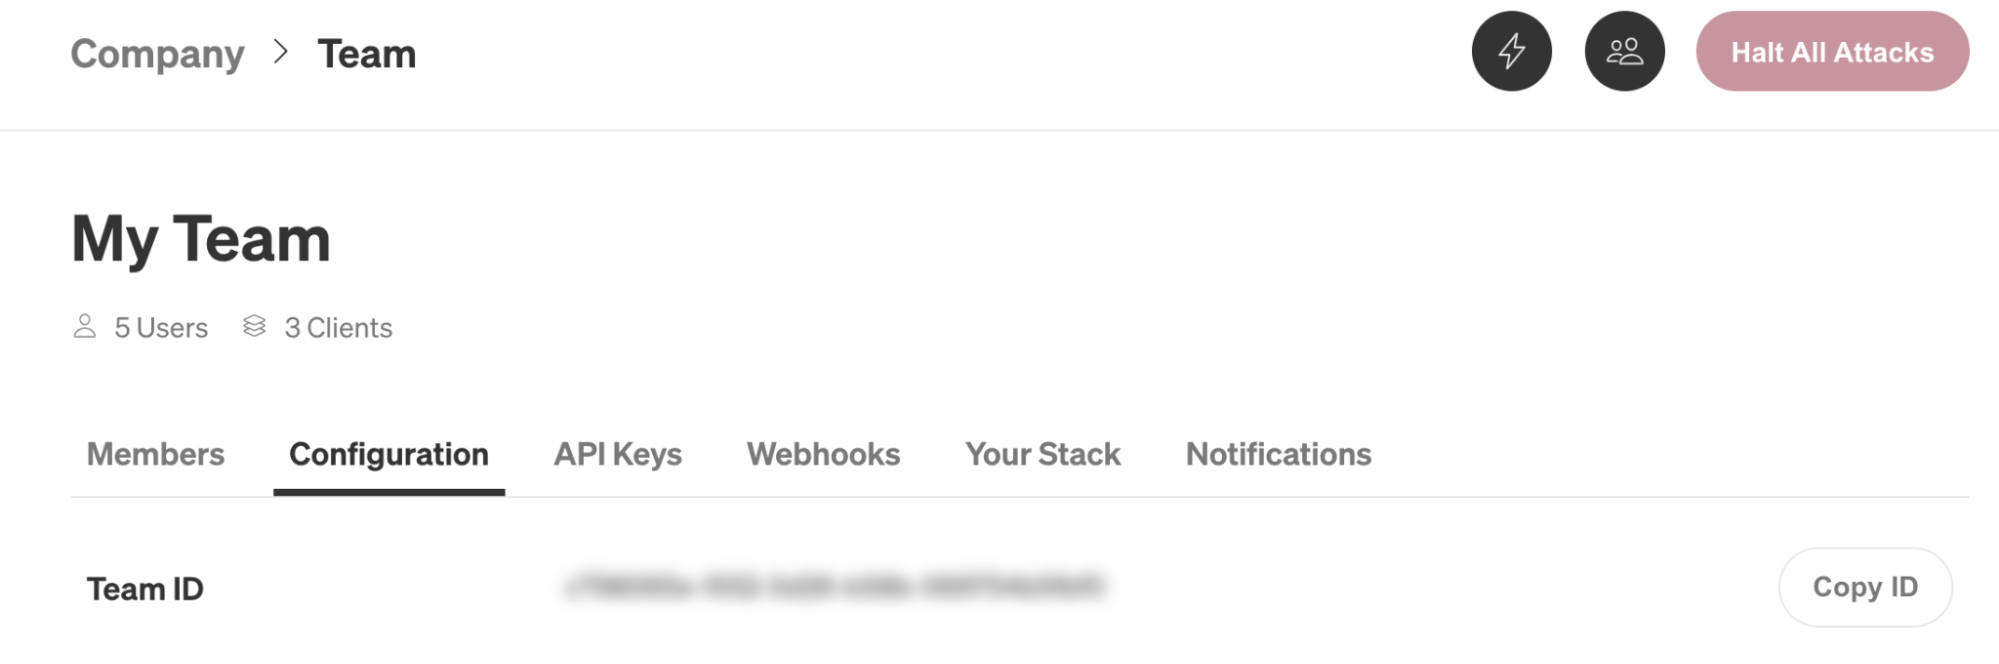
Now that we’ve authenticated, let’s run an attack. For this experiment, we’ll run a CPU attack on a random host for 120 seconds (2 minutes) utilizing 100% of all cores. In addition to the authorization header we created in step 1, we’ll also need our team ID. This is available in the Team Settings page, under the Configuration tab:
Now, we’ll run the following command in a terminal. We’ll replace <span class="code-class-custom">your_team_id</span> in the URL with our actual team ID.
The API will start the attack and return a unique execution ID. We can use this ID in other API requests, such as querying the status of an attack or halting an attack. Here’s an example of the response:
<span class="code-class-custom">443bf563-21c7-11ea-b4dc-024221b6d1e6</span>
Step 3: Run a chaos experiment using the Gremlin API Examples
Instead of creating each attack request by hand, we can also generate fully-formed API requests through the web app. This makes it easy to build a chaos experiment in the web app and simply copy the identical API calls to our REST API tool, terminal, CI/CD tool, or script. This also works for Scenarios.
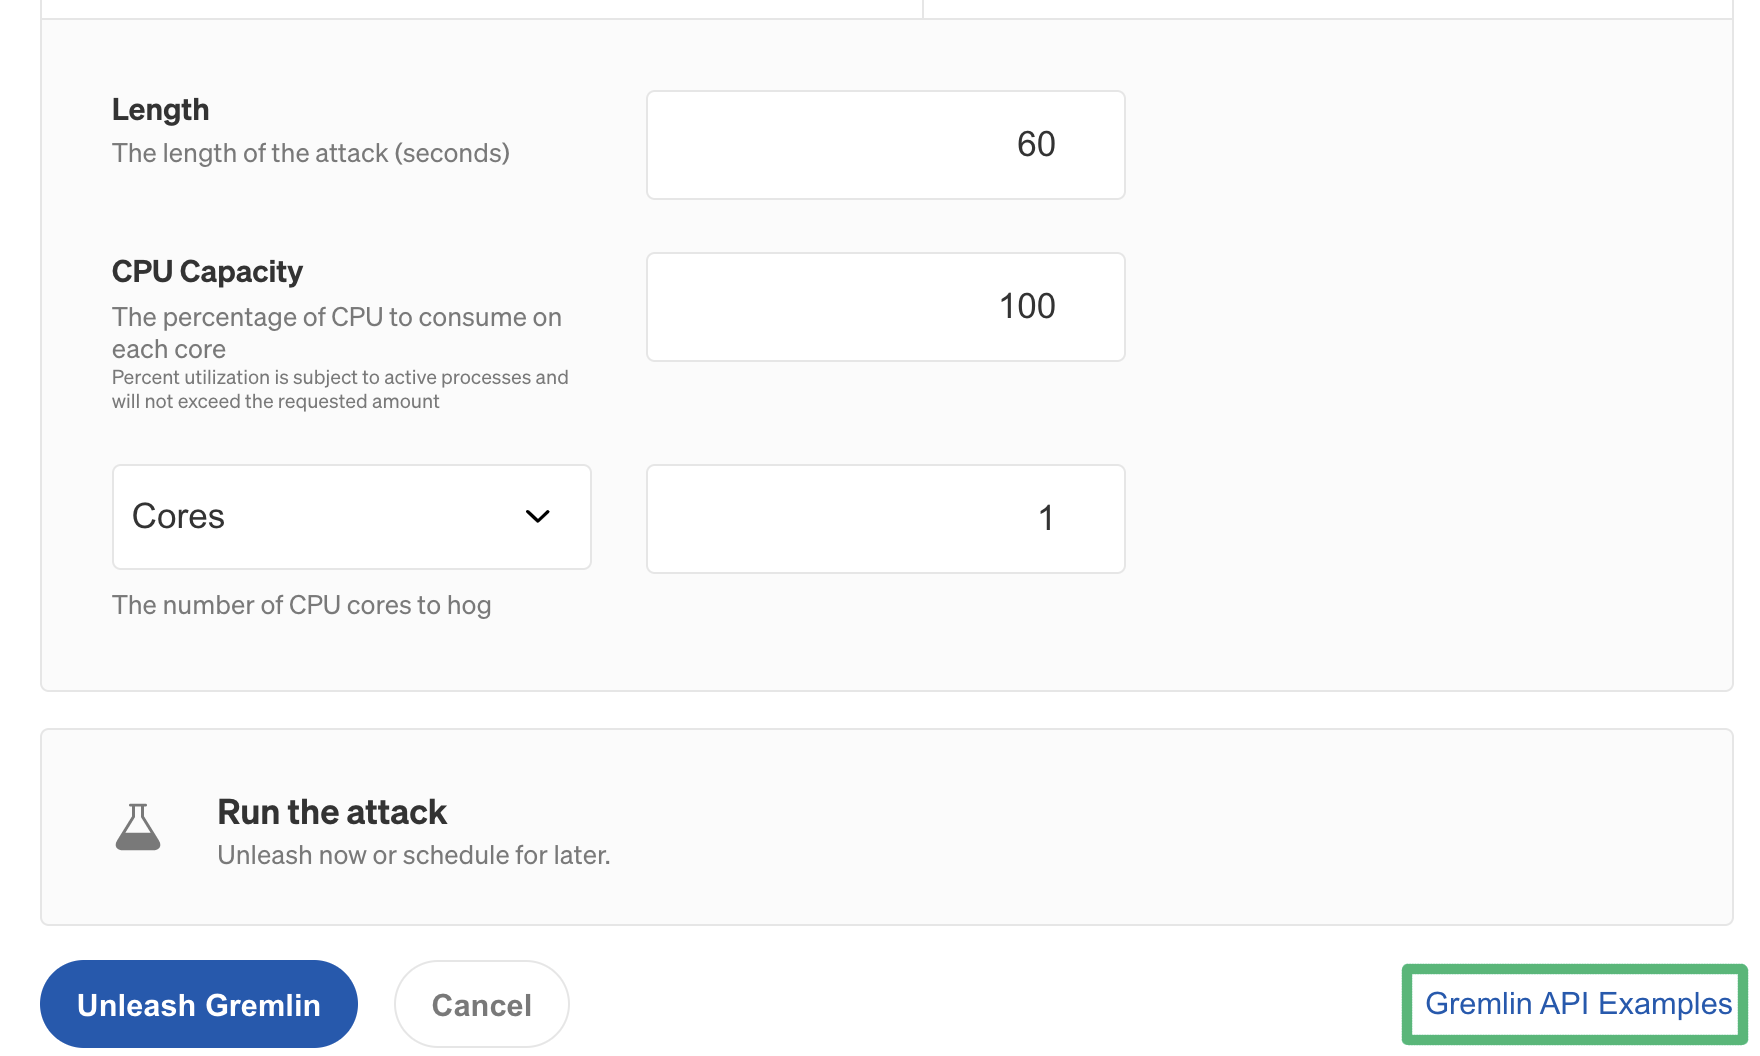
As an example, we’ll recreate the same attack in the Gremlin web app. First, we’ll log into the Gremlin web app and create a new attack by clicking Attacks in the left nav bar, then click New Attack. We’ll select our host as the target, expand Choose a Gremlin, select Resource, then select CPU. We’ll change the length to 120 and set the CPU Capacity to 100.
Now, instead of clicking Unleash Gremlin, we’ll click Gremlin API Examples in the bottom right corner of the screen:
This opens the API pane, which contains a fully formatted request that we can run using curl. This also shows the endpoint URL, HTTP method, request headers, and request body. The Authorization drop-down toggles between bearer authentication and API key authentication.
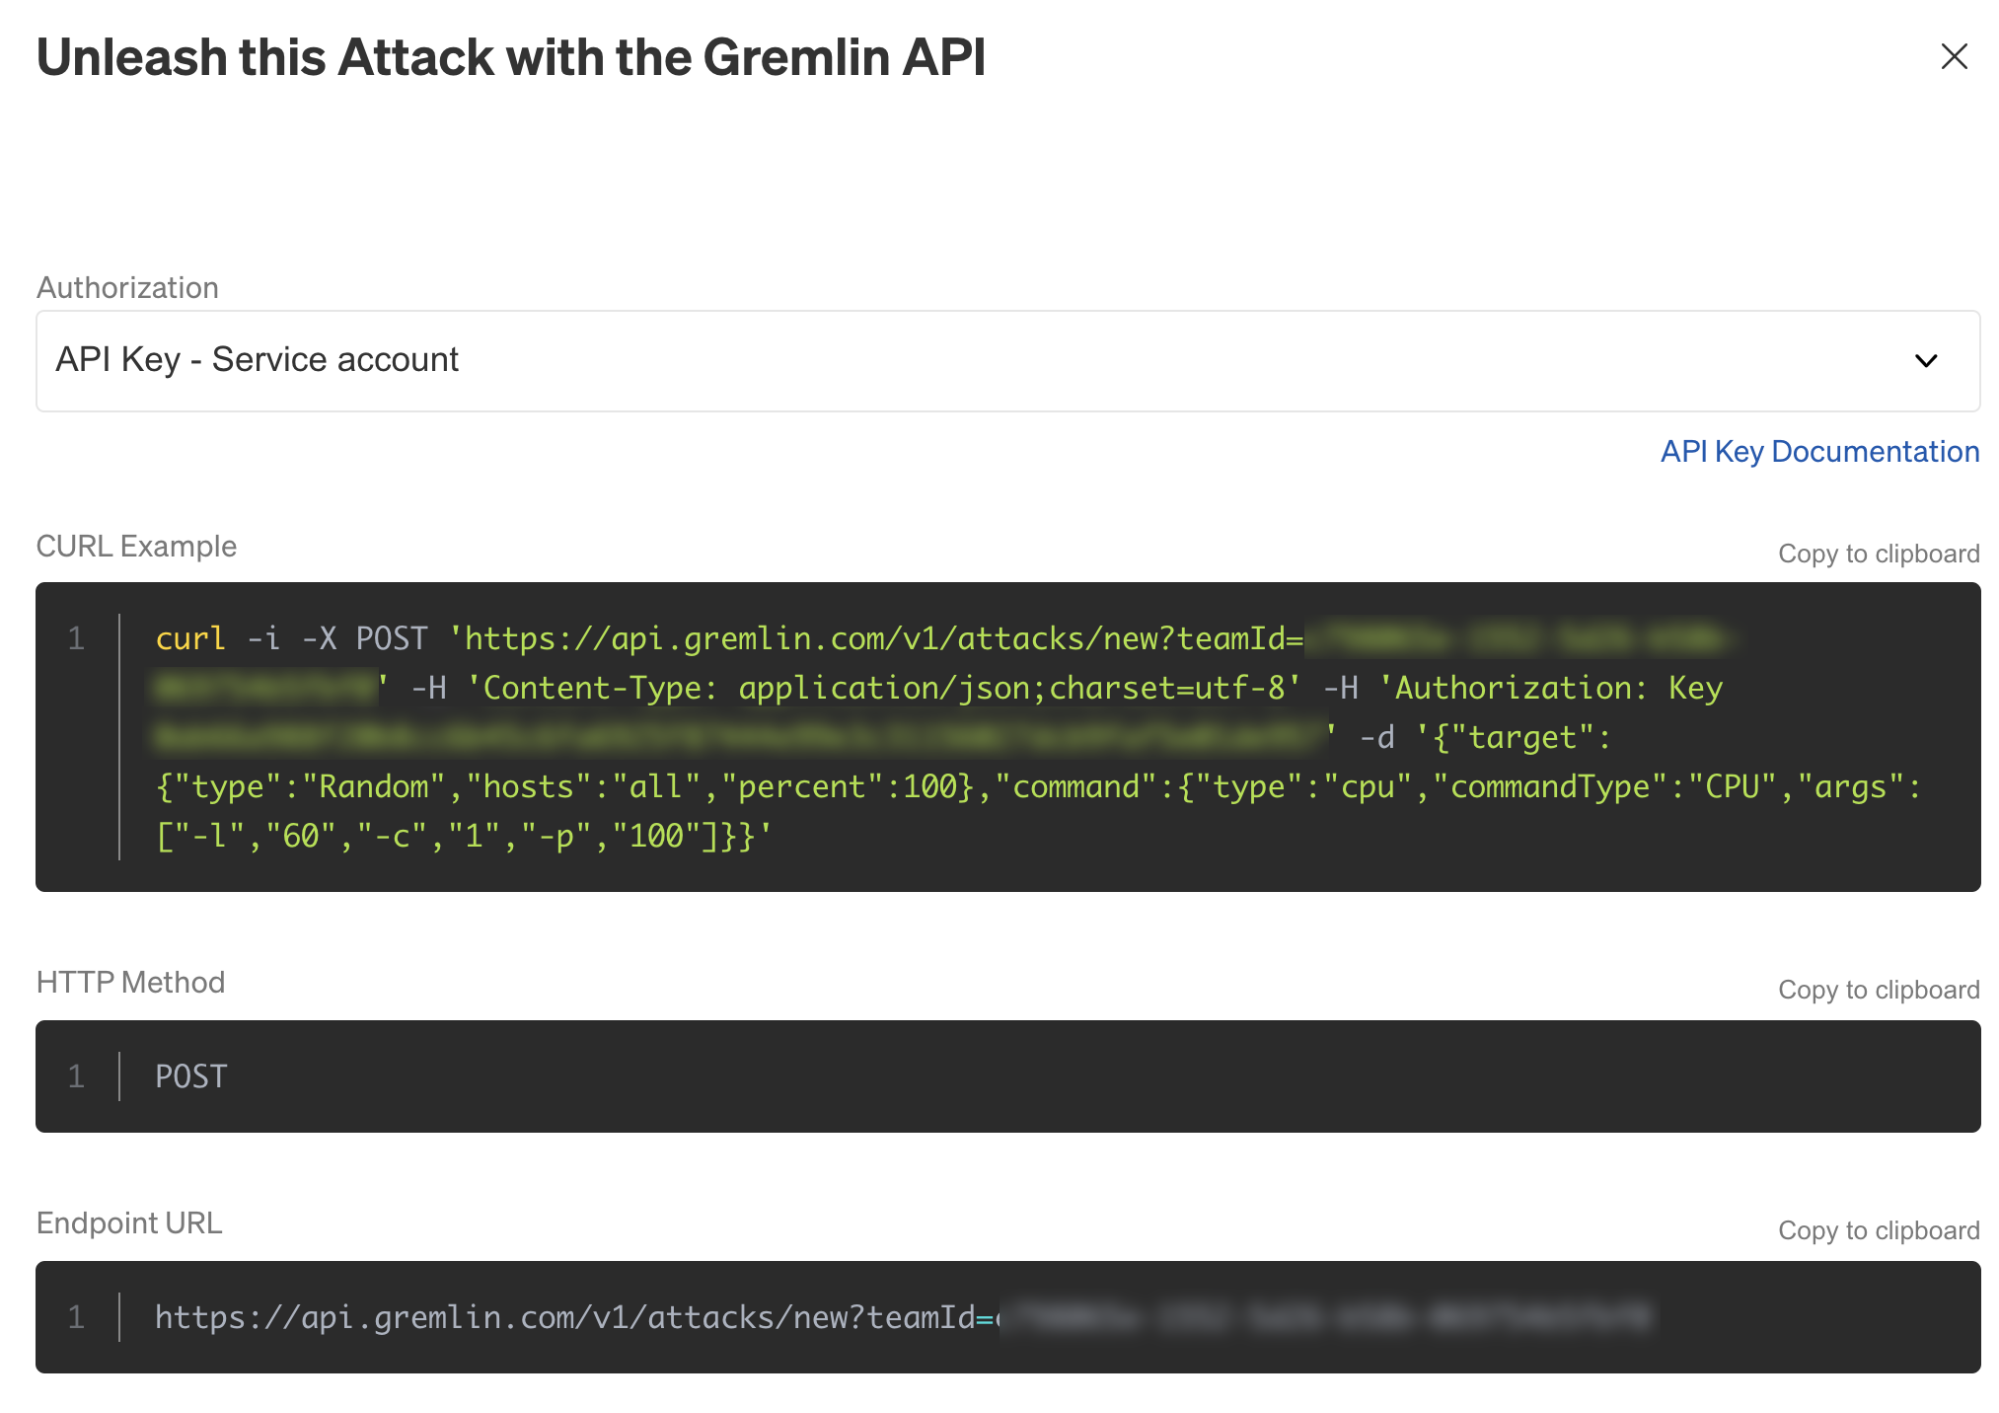
This makes it easy to create readily-formatted API requests for attacks or Scenarios, and works for existing attacks as well as new attacks.
Step 4: Check the status of an experiment using the API
Once we have the execution ID, we can check the status of the attack by sending a GET request to the <span class="code-class-custom">/attacks/execution_id</span> endpoint. We’ll replace <span class="code-class-custom">execution_id</span> with the attack execution ID from step 2, and replace <span class="code-class-custom">team_id</span> in the URL with our actual team ID:
Here we can see the full details of the attack including the hosts it ran on (<span class="code-class-custom">infra_target.resolvedHosts</span>), the status (<span class="code-class-custom">stage</span>), and the attack configuration (<span class="code-class-custom">attack_configuration</span>). The attack already finished, and this is reflected in the response:
Lastly, we can view this attack in the Gremlin web app by adding the execution ID to the following URL: https://app.gremlin.com/attacks/. For example, here’s our API-created attack in the web app (note that Gremlin shows the user who ran the attack as “Service account” and the type of attack as “API”):

Conclusion
Congrats! You’ve learned how to use the Gremlin API. To learn more about our API and what it’s capable of, check out our interactive API reference, or documentation. Here are some examples of how you can use our API to automate your chaos experiments and bring your Chaos Engineering practice to the next level:
- Add Chaos Engineering to your CI/CD pipeline using Jenkins
- Run chaos experiments alongside frontend tests
- Run Chaos Experiments alongside load testing with JMeter
To see how others are using the API, join the Chaos Engineering Slack community! Have fun exploring!
Avoid downtime. Use Gremlin to turn failure into resilience.
Gremlin empowers you to proactively root out failure before it causes downtime. See how you can harness chaos to build resilient systems by requesting a demo of Gremlin.

.svg)