Chaos Engineering with Gremlin and Squid Proxy


.svg)
.svg)

 This is an older tutorial
Gremlin is a simple, safe and secure service for performing Chaos Engineering experiments through a SaaS-based platform. Squid is a proxy server that can accelerate web traffic through caching.
Prerequisites
- An Ubuntu 18.04 host. You need to have sudo or root access on the host.
- A Gremlin account (sign up here).
Overview
This tutorial will show you how to install Squid, and perform Chaos Engineering experiments on it with Gremlin
- Step 1 - Installing the Gremlin Agent
- Step 2 - Installing Squid
- Step 3 - Running a latency experiment
- Step 4 - Running a DNS experiment
Step 1 - Installing the Gremlin Agent
Install the Gremlin agent on the Ubuntu host using Step 1 of our Ubuntu 18.04 tutorial.
Step 2 - Installing Squid
On your Ubuntu host, run the following command to install Squid:
There are several use cases for Squid. The one we’ll be looking at in our Chaos Engineering experiments is using Squid as a transparent proxy. A transparent proxy sits between a user and their destination web site. Sometimes companies will place a Squid transparent proxy on their network to cut down on their outgoing bandwidth, and to speed up requests for users (since some resources will be coming from the proxy’s cache).
We can test that Squid is functioning correctly as a transparent proxy using the curl command on the Squid host, like this:
In this case the -x tells the curl command to use our local Squid proxy (Squid runs on port 3128 by default), and the -L sets the destination.
If you receive an error like “Command not found” when trying to run curl, you can install it with this command:
If the curl request succeeds, you will get a lot of output on your screen. That's the source code for the web page, and there’s quite a bit of code on google.com. You should see something like this:
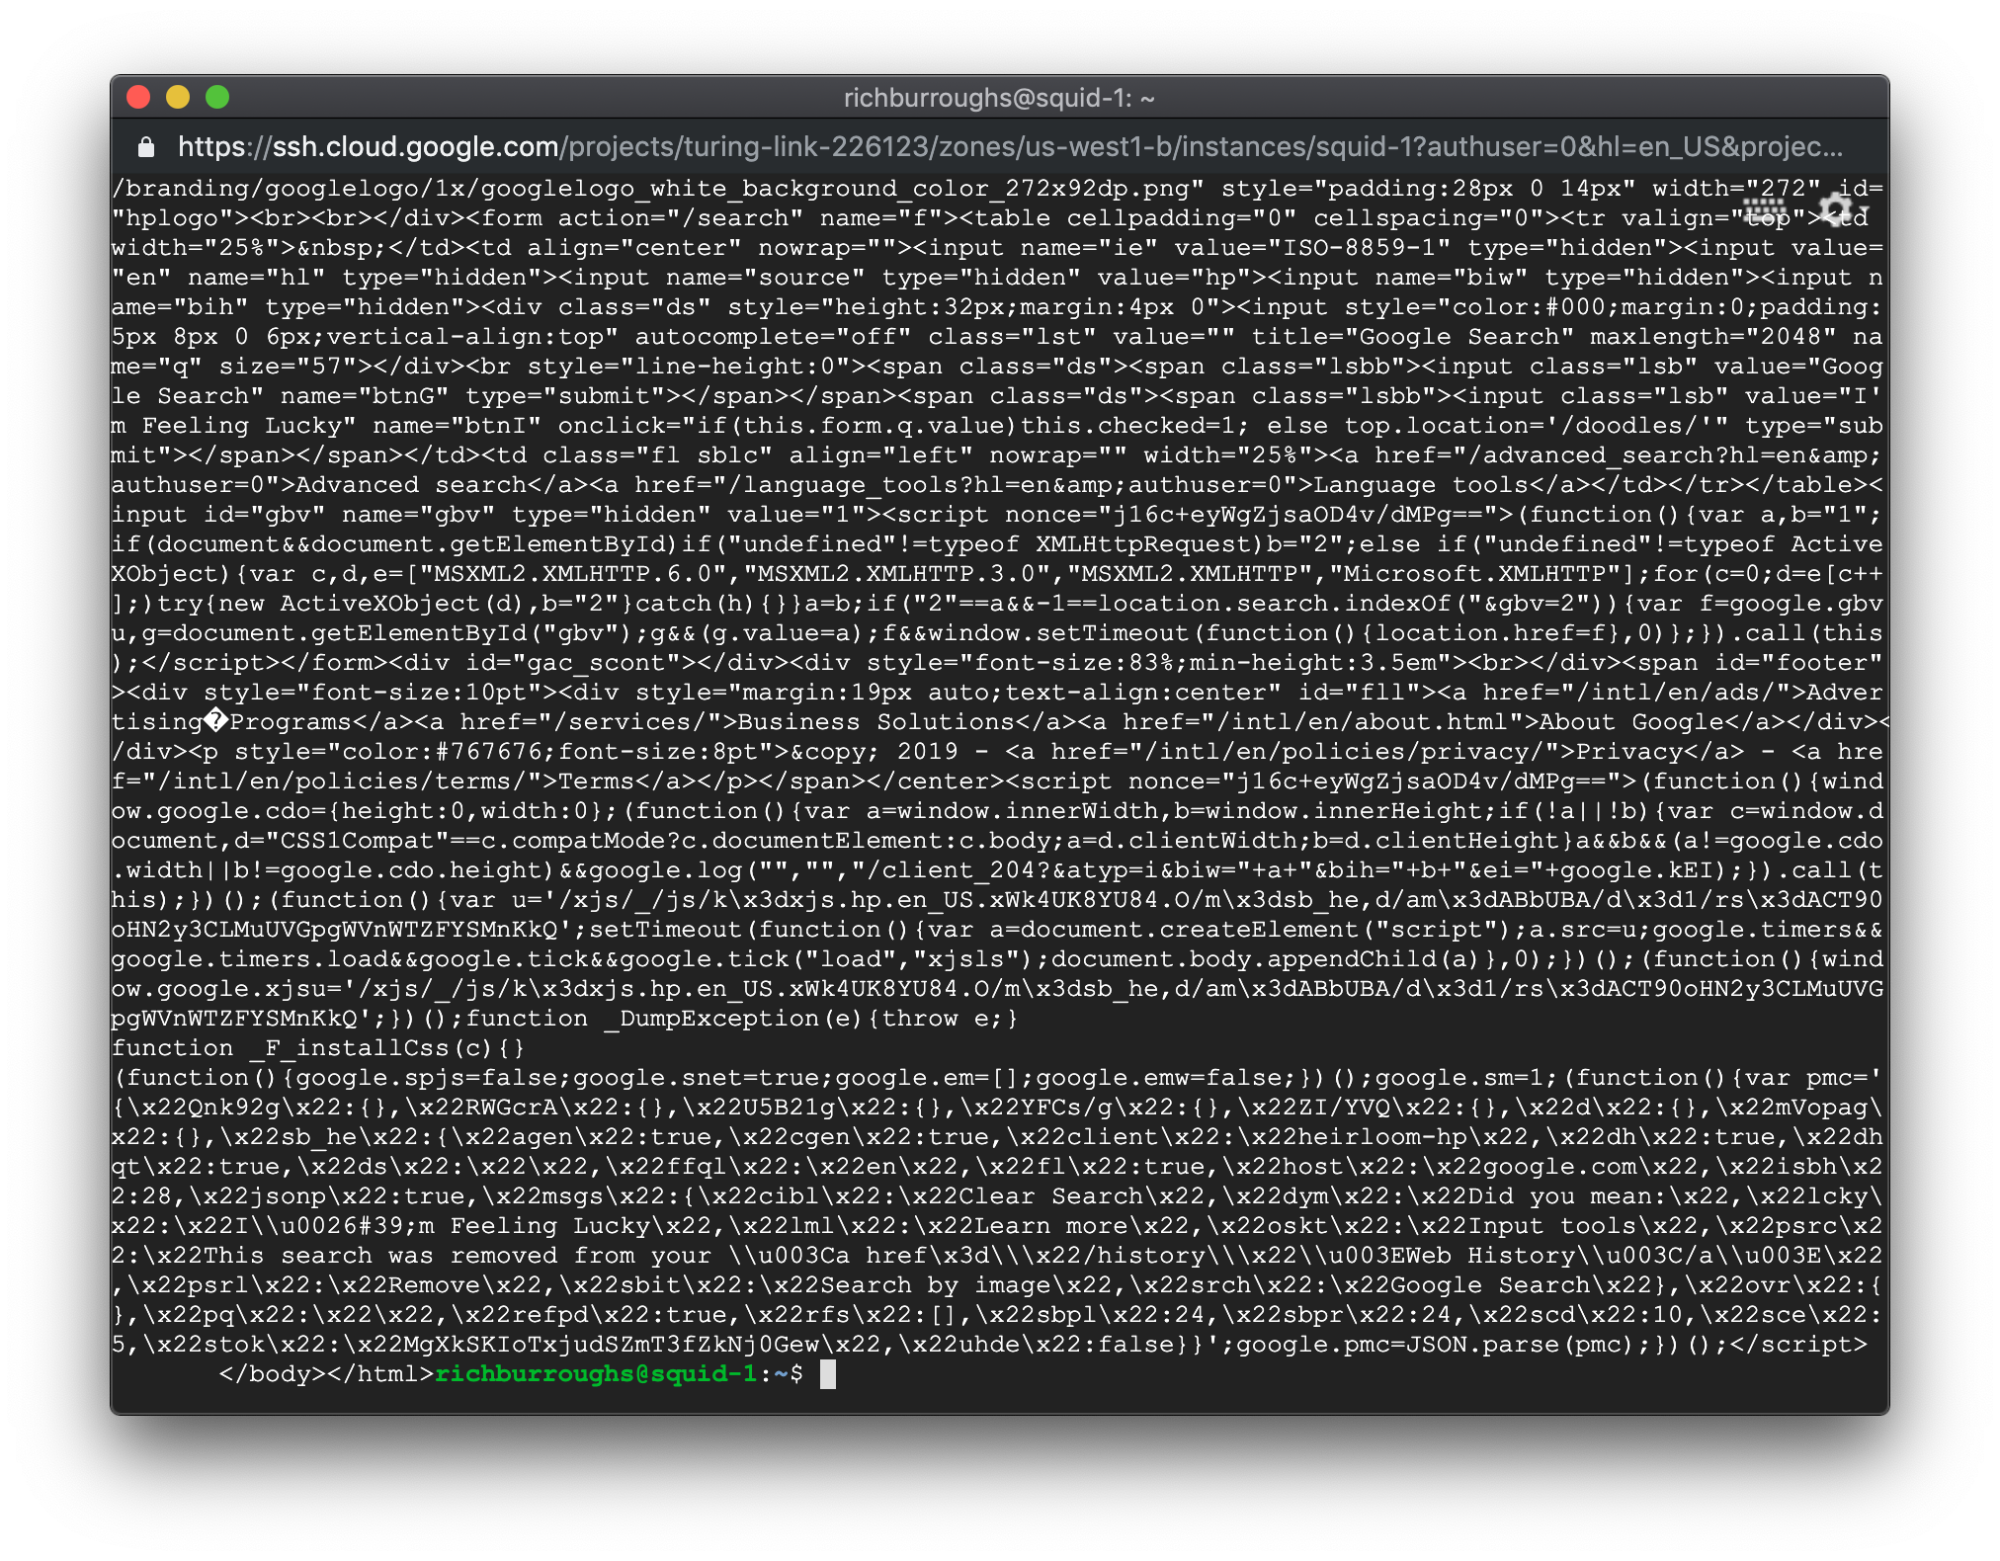
That means it worked. Now we’re ready to get on to the fun part, Chaos Engineering!
Step 3 - Running a latency experiment
One interesting thing to look at with Squid is how network latency impacts performance. We can run a latency attack with Gremlin to see what the impact of additional latency is.
The first step is to gather some baseline data, so we know what the steady state is. This is a very important part of Chaos Engineering, understanding how the system normally behaves before we start performing experiments. Usually you’d get steady state data from your monitoring/observability tools, but for this example we’ll do it manually.
We’ll run curl again but this time we’ll use the time command to see how long it takes the request to complete. The time command is built into Linux, and measures the time it takes for another command to run. We use it by placing “time” before the command we want to measure. In our case, we’ll do:
Our output will look a bit different this time:
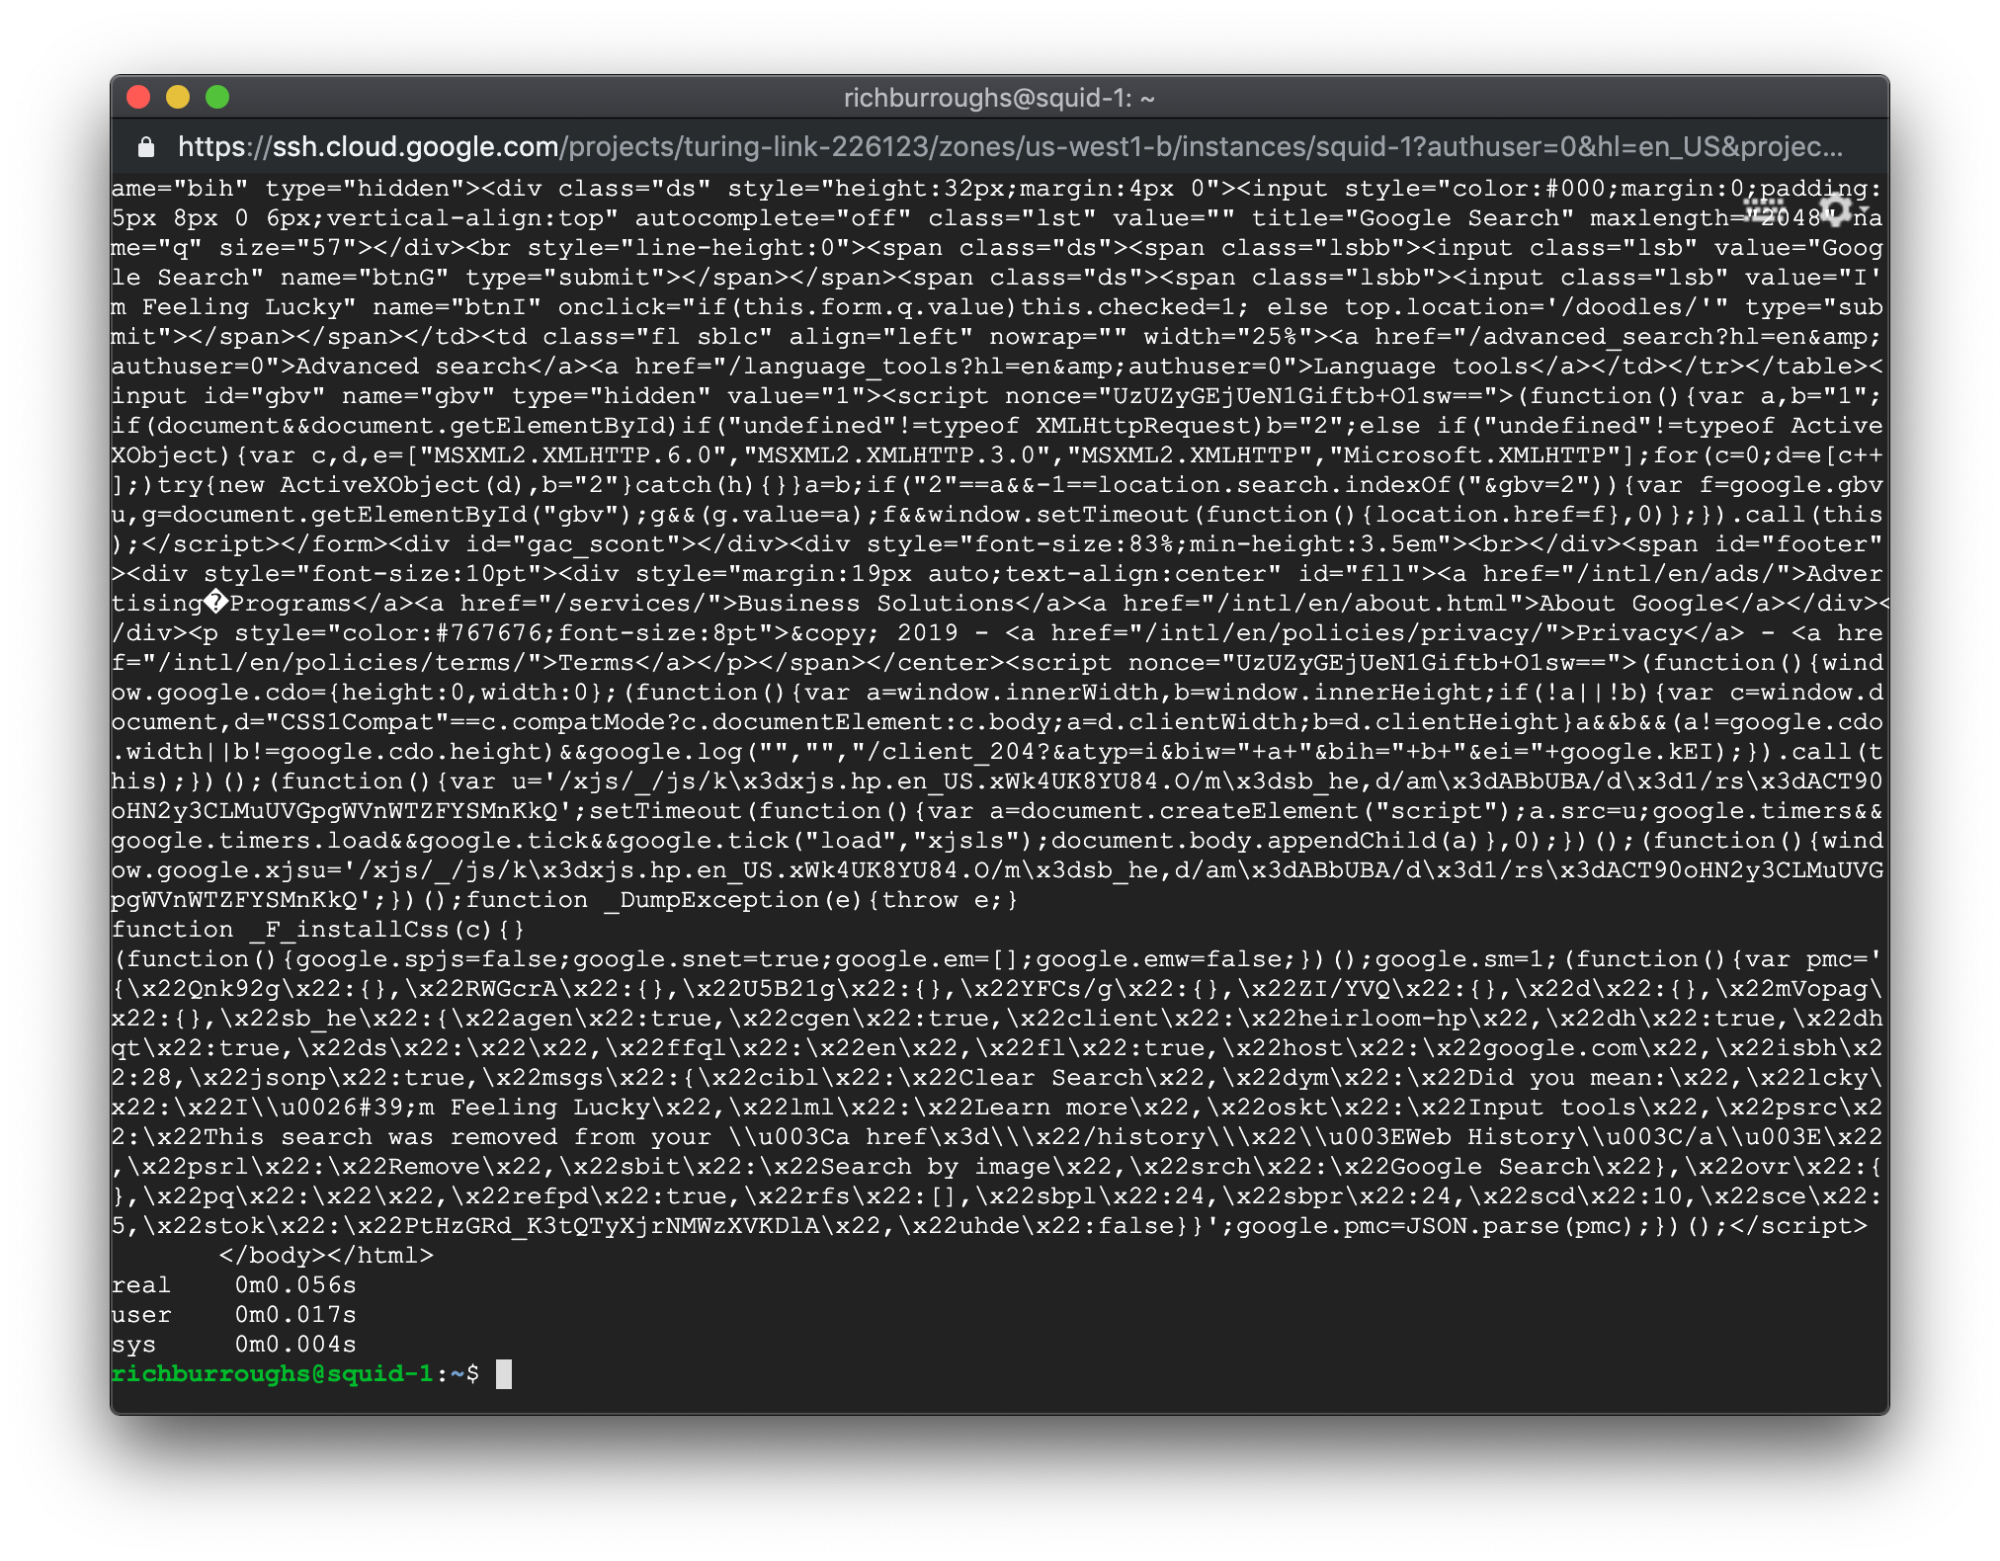
As you can see, there are three new lines after the output from the curl command. Those are the output from the time command. Those three values are: the real time it took the command to execute, the user CPU time, and the system CPU time. For this tutorial we can look at the real time and disregard the other two.
In this example, the output from the time command shows:
So the real time that elapsed was 0 minutes, and 0.056 seconds. Pretty fast! You shouldn’t expect to see these exact numbers when you run the command, but make a note of the real time that elapsed.
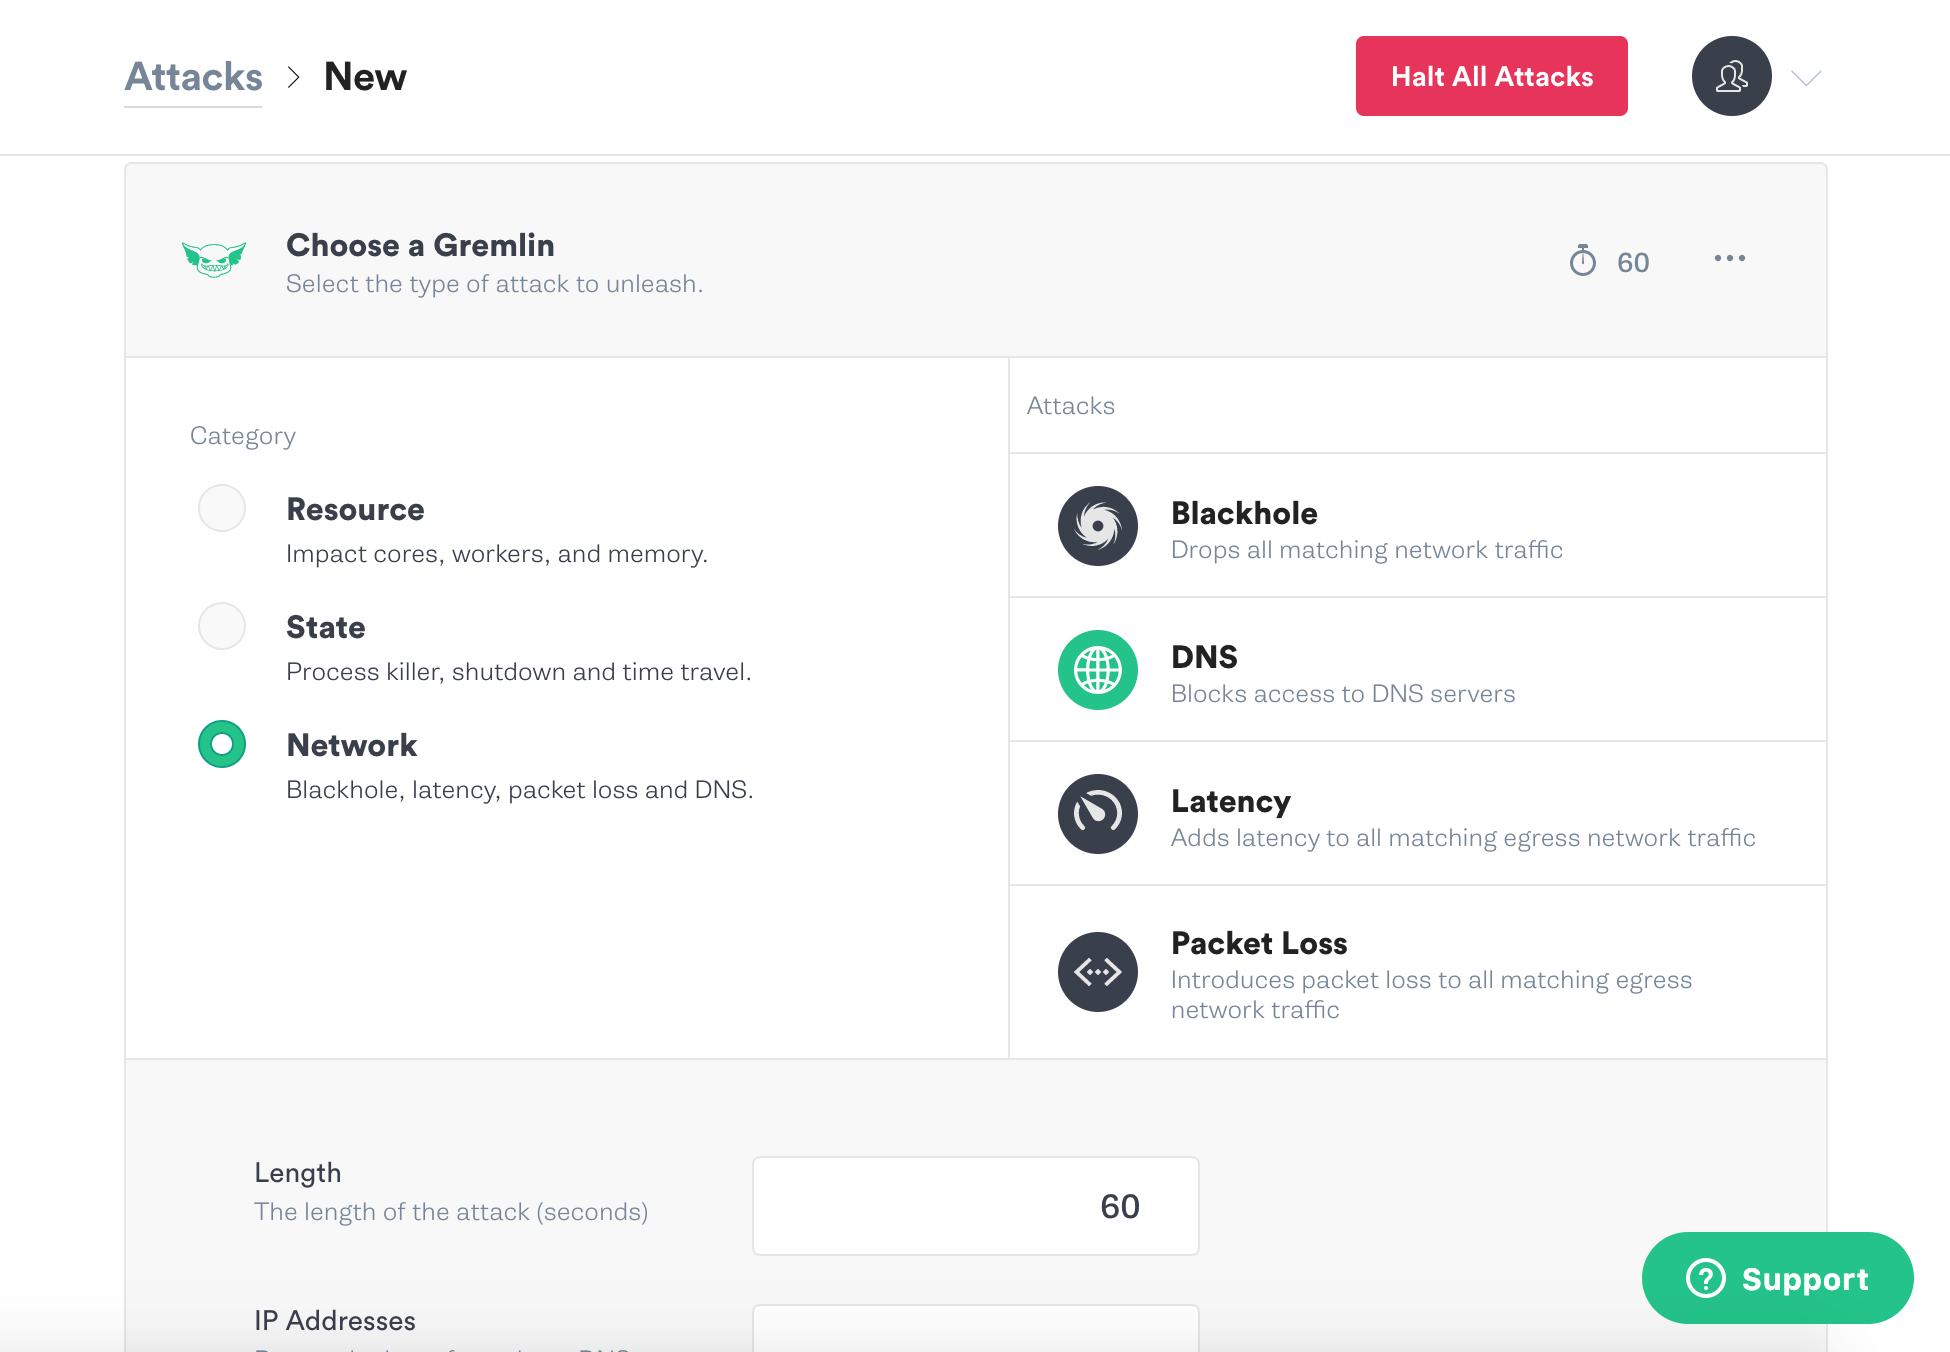
Next we’ll go to the Gremlin UI and run a latency attack. Log in to Gremlin and click the Attacks link in the left navigation bar, and then New Attack. Use the Hosts pane for targeting. Click Exact and then select your Squid host.

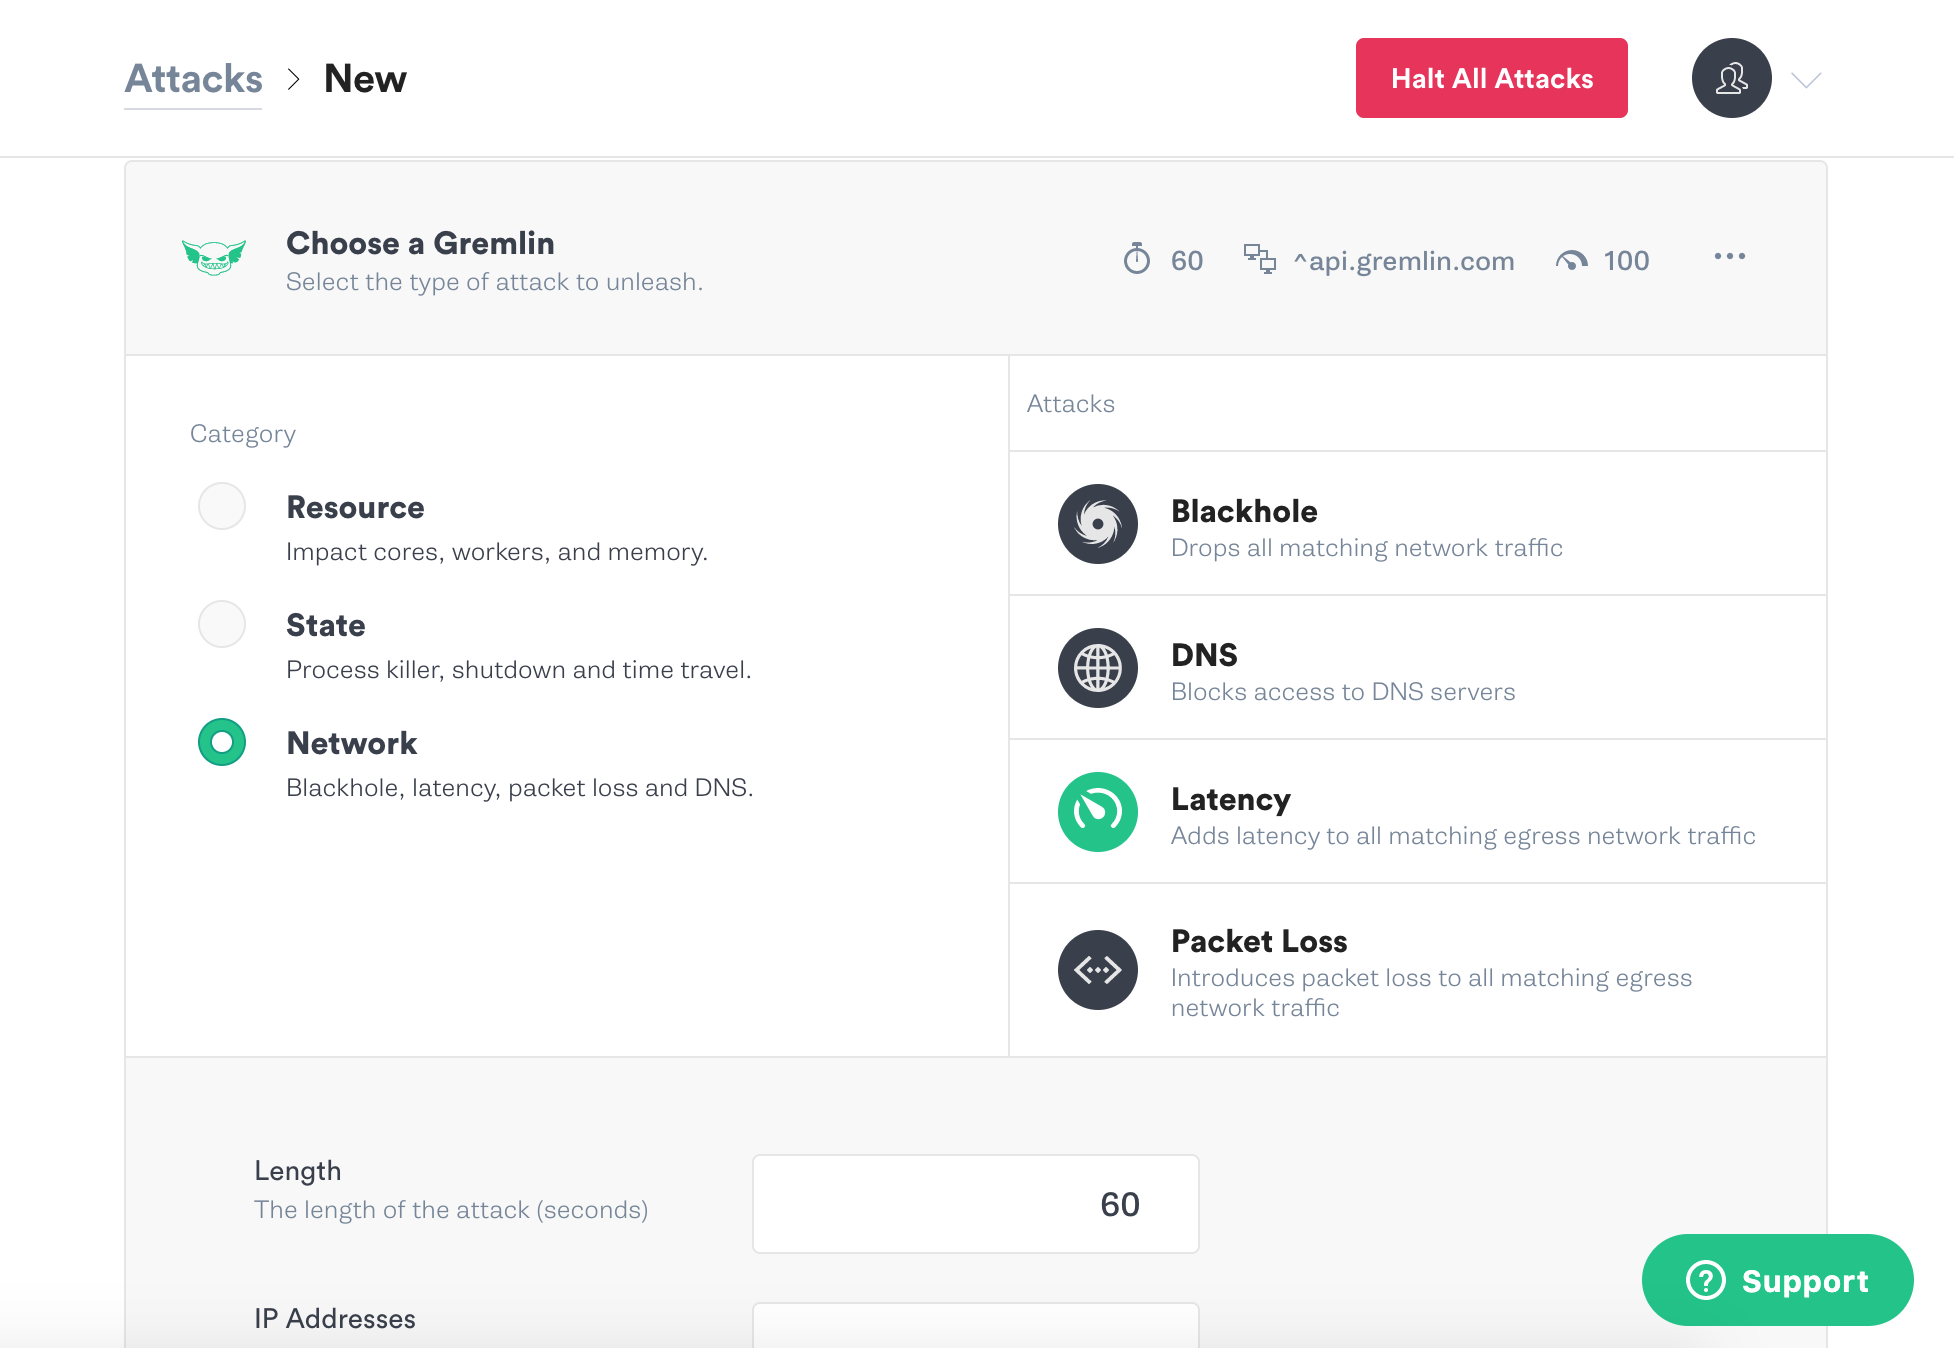
Scroll down and click Choose a Gremlin. Click on Network and then Latency.
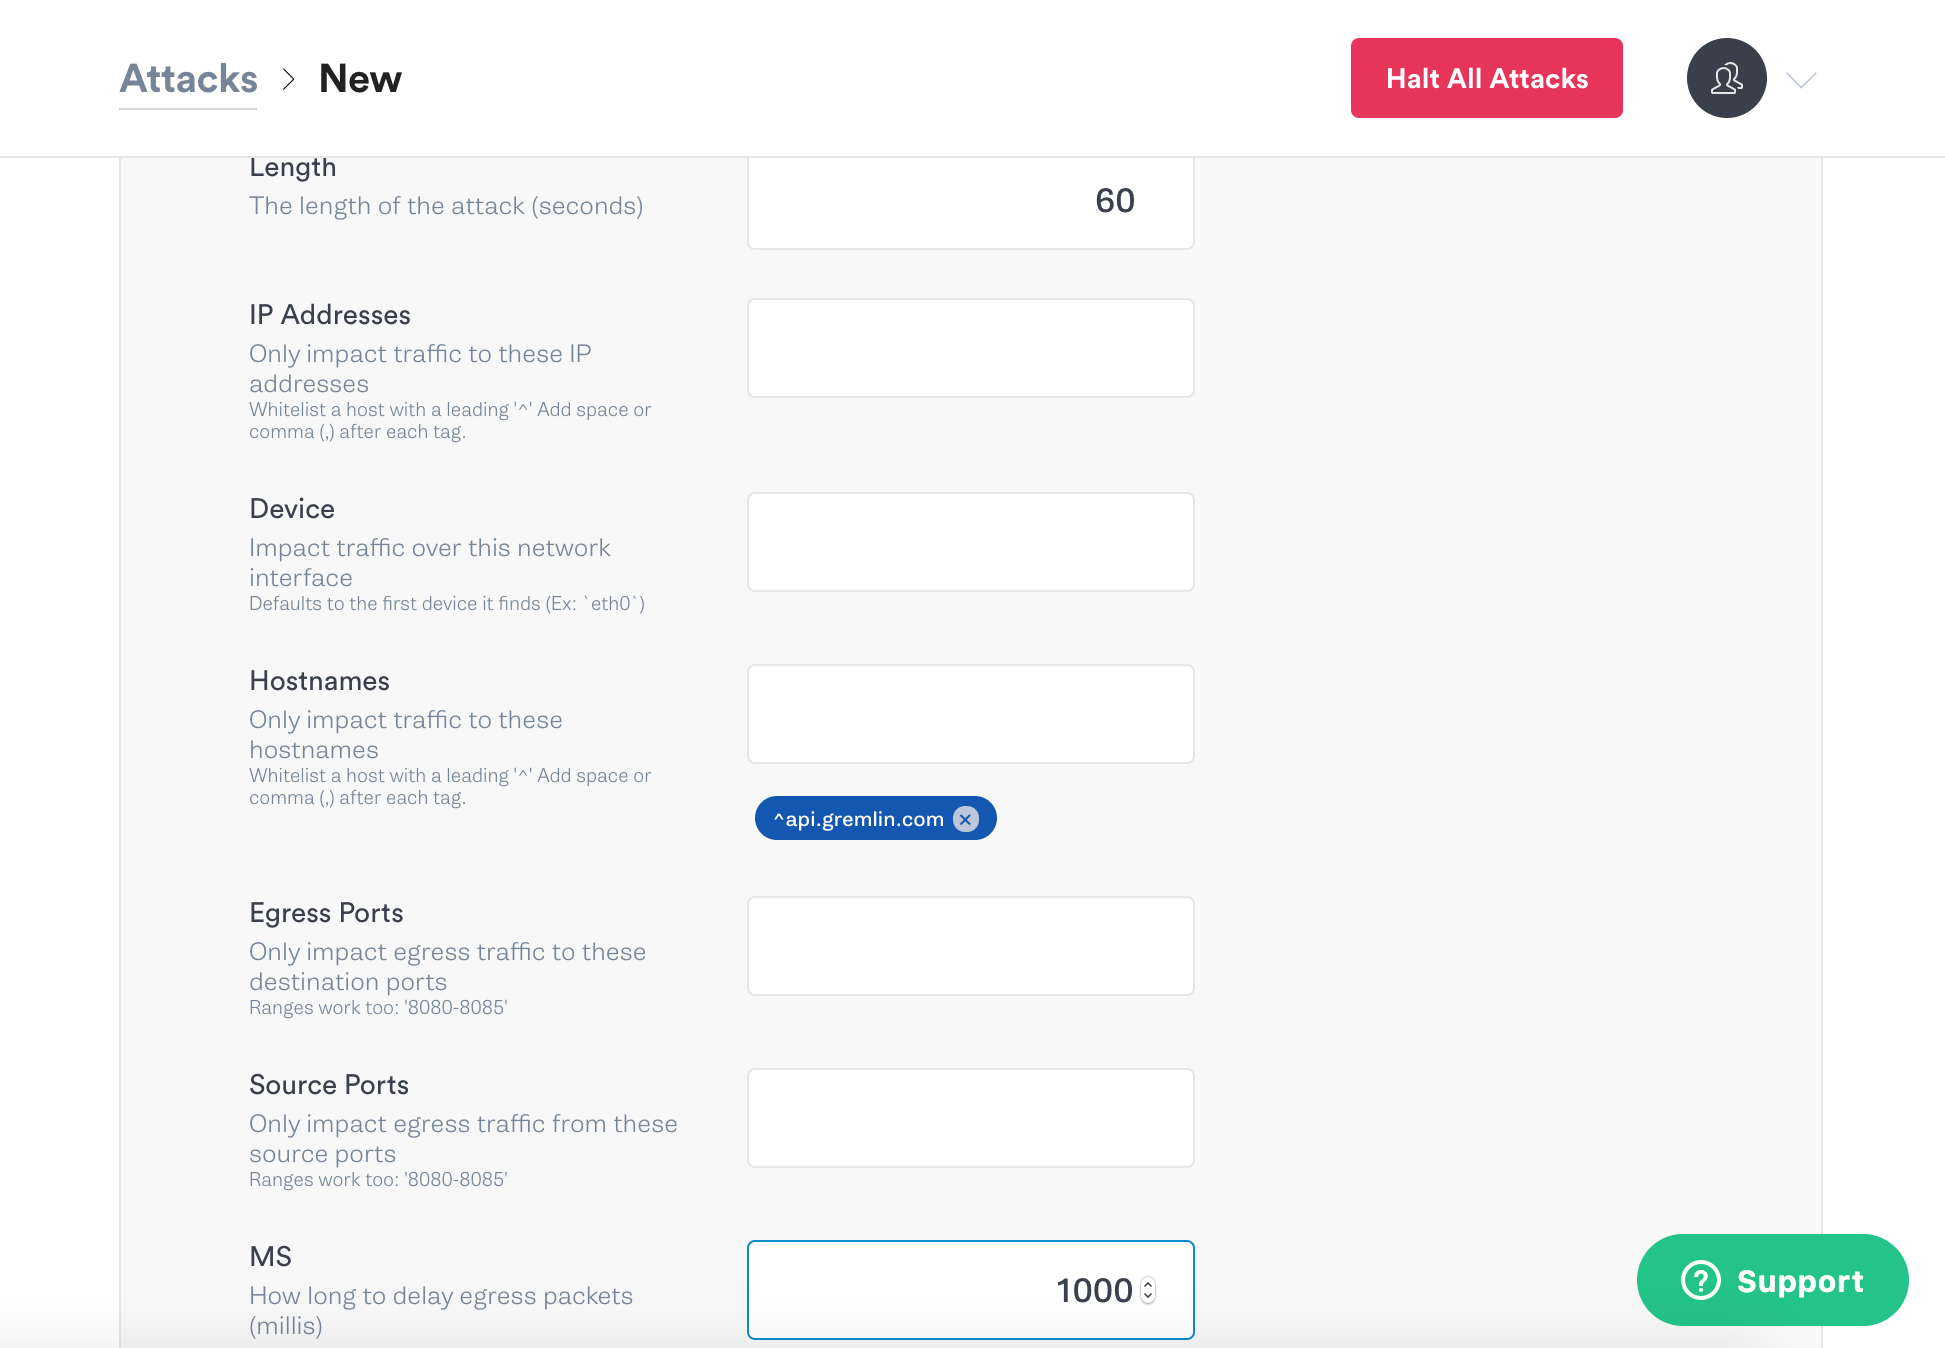
Scroll down again and set the options for the latency attack. Change the length to 180 seconds, and the milliseconds to 200.
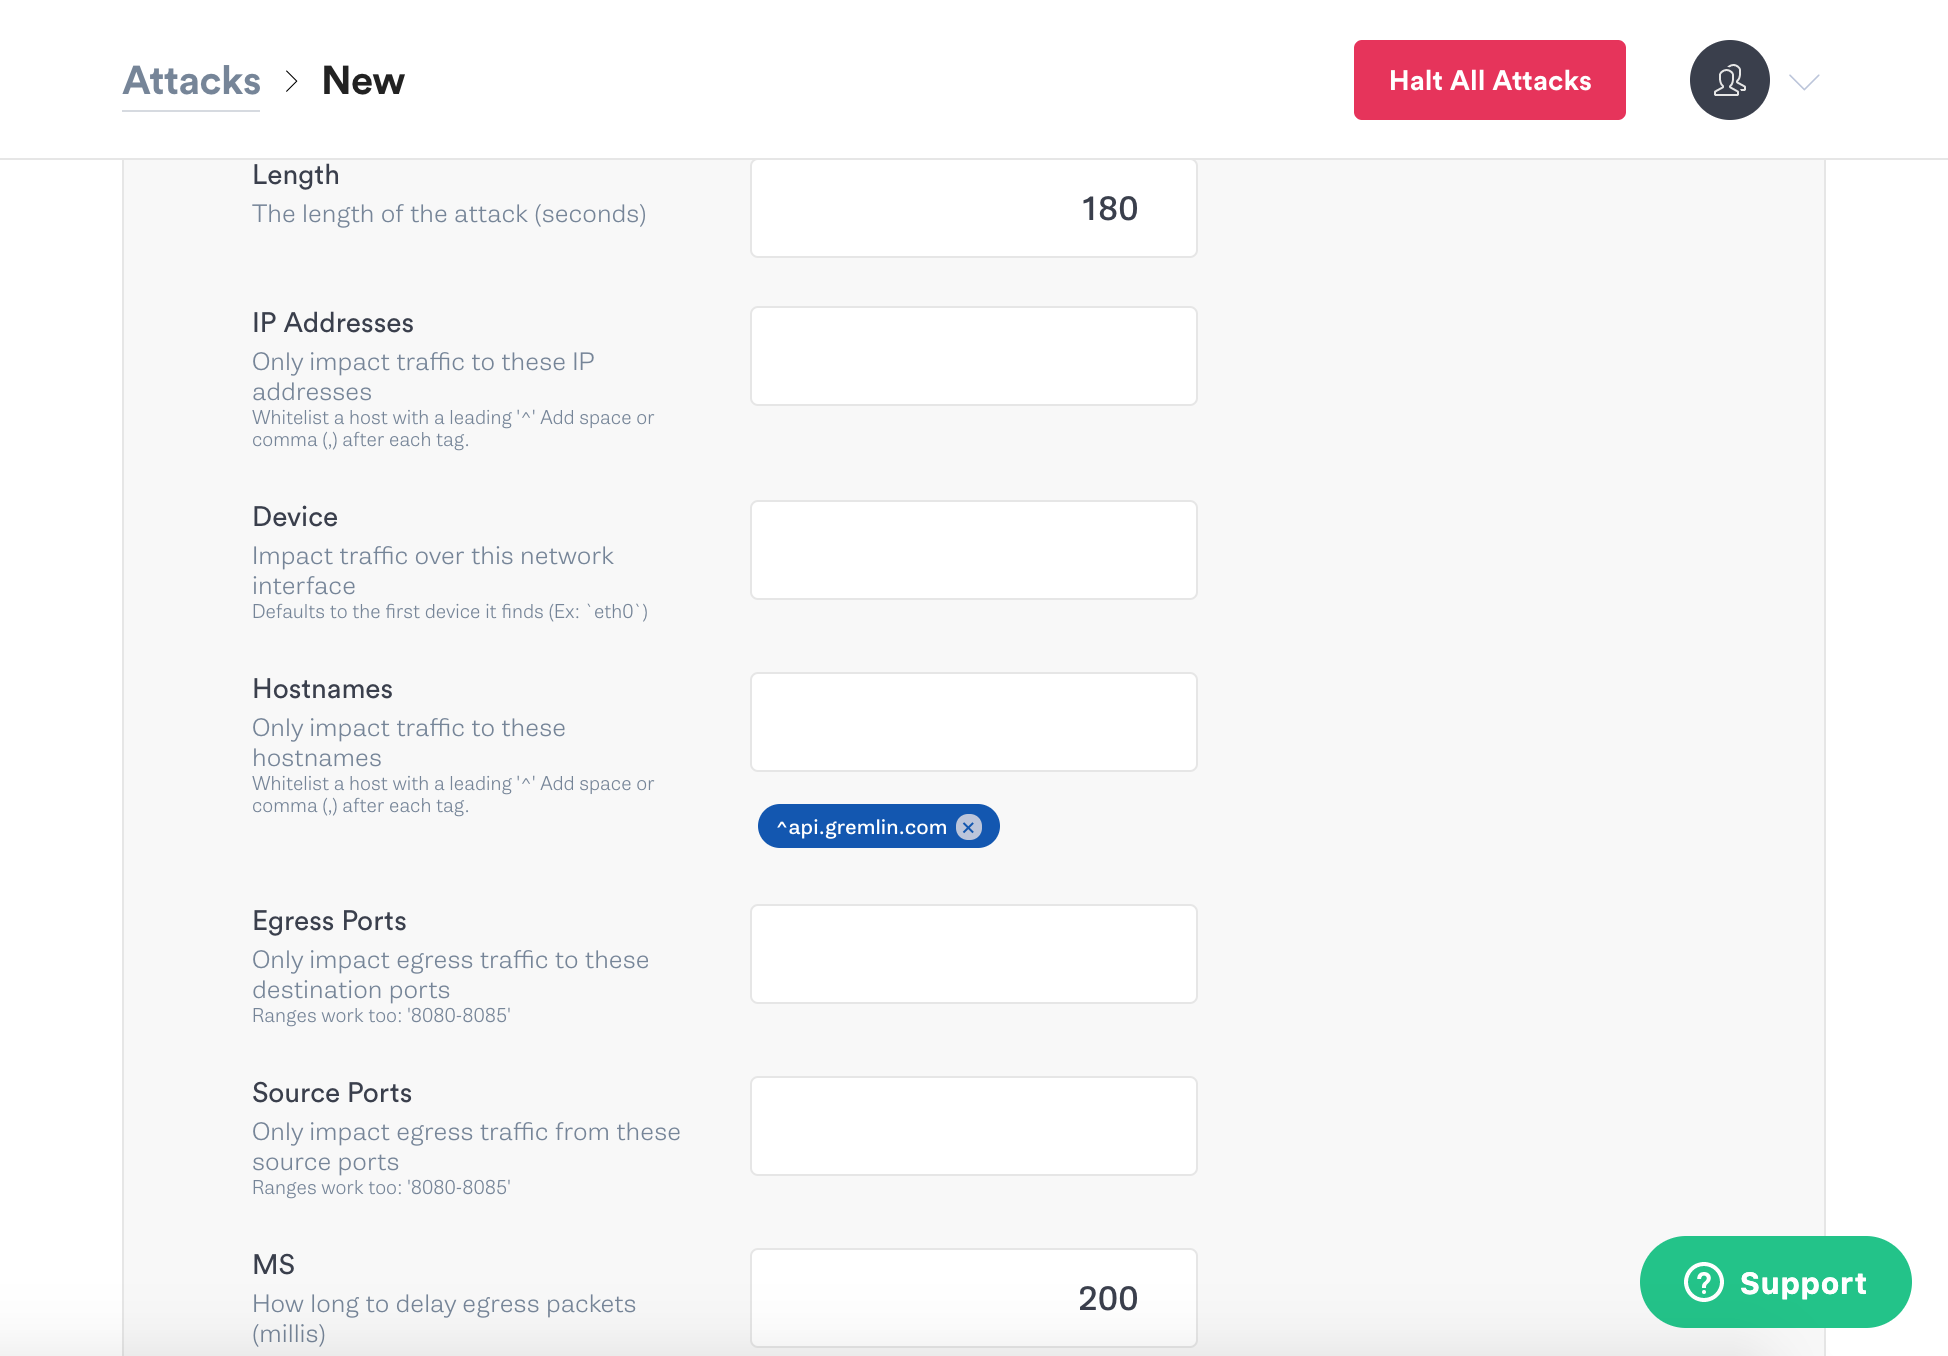
Scroll down a bit more and click the green Unleash Gremlin button to start the attack.
On the Attacks page you’ll see the attack listed as Pending for a few seconds, but then it will change to Running.
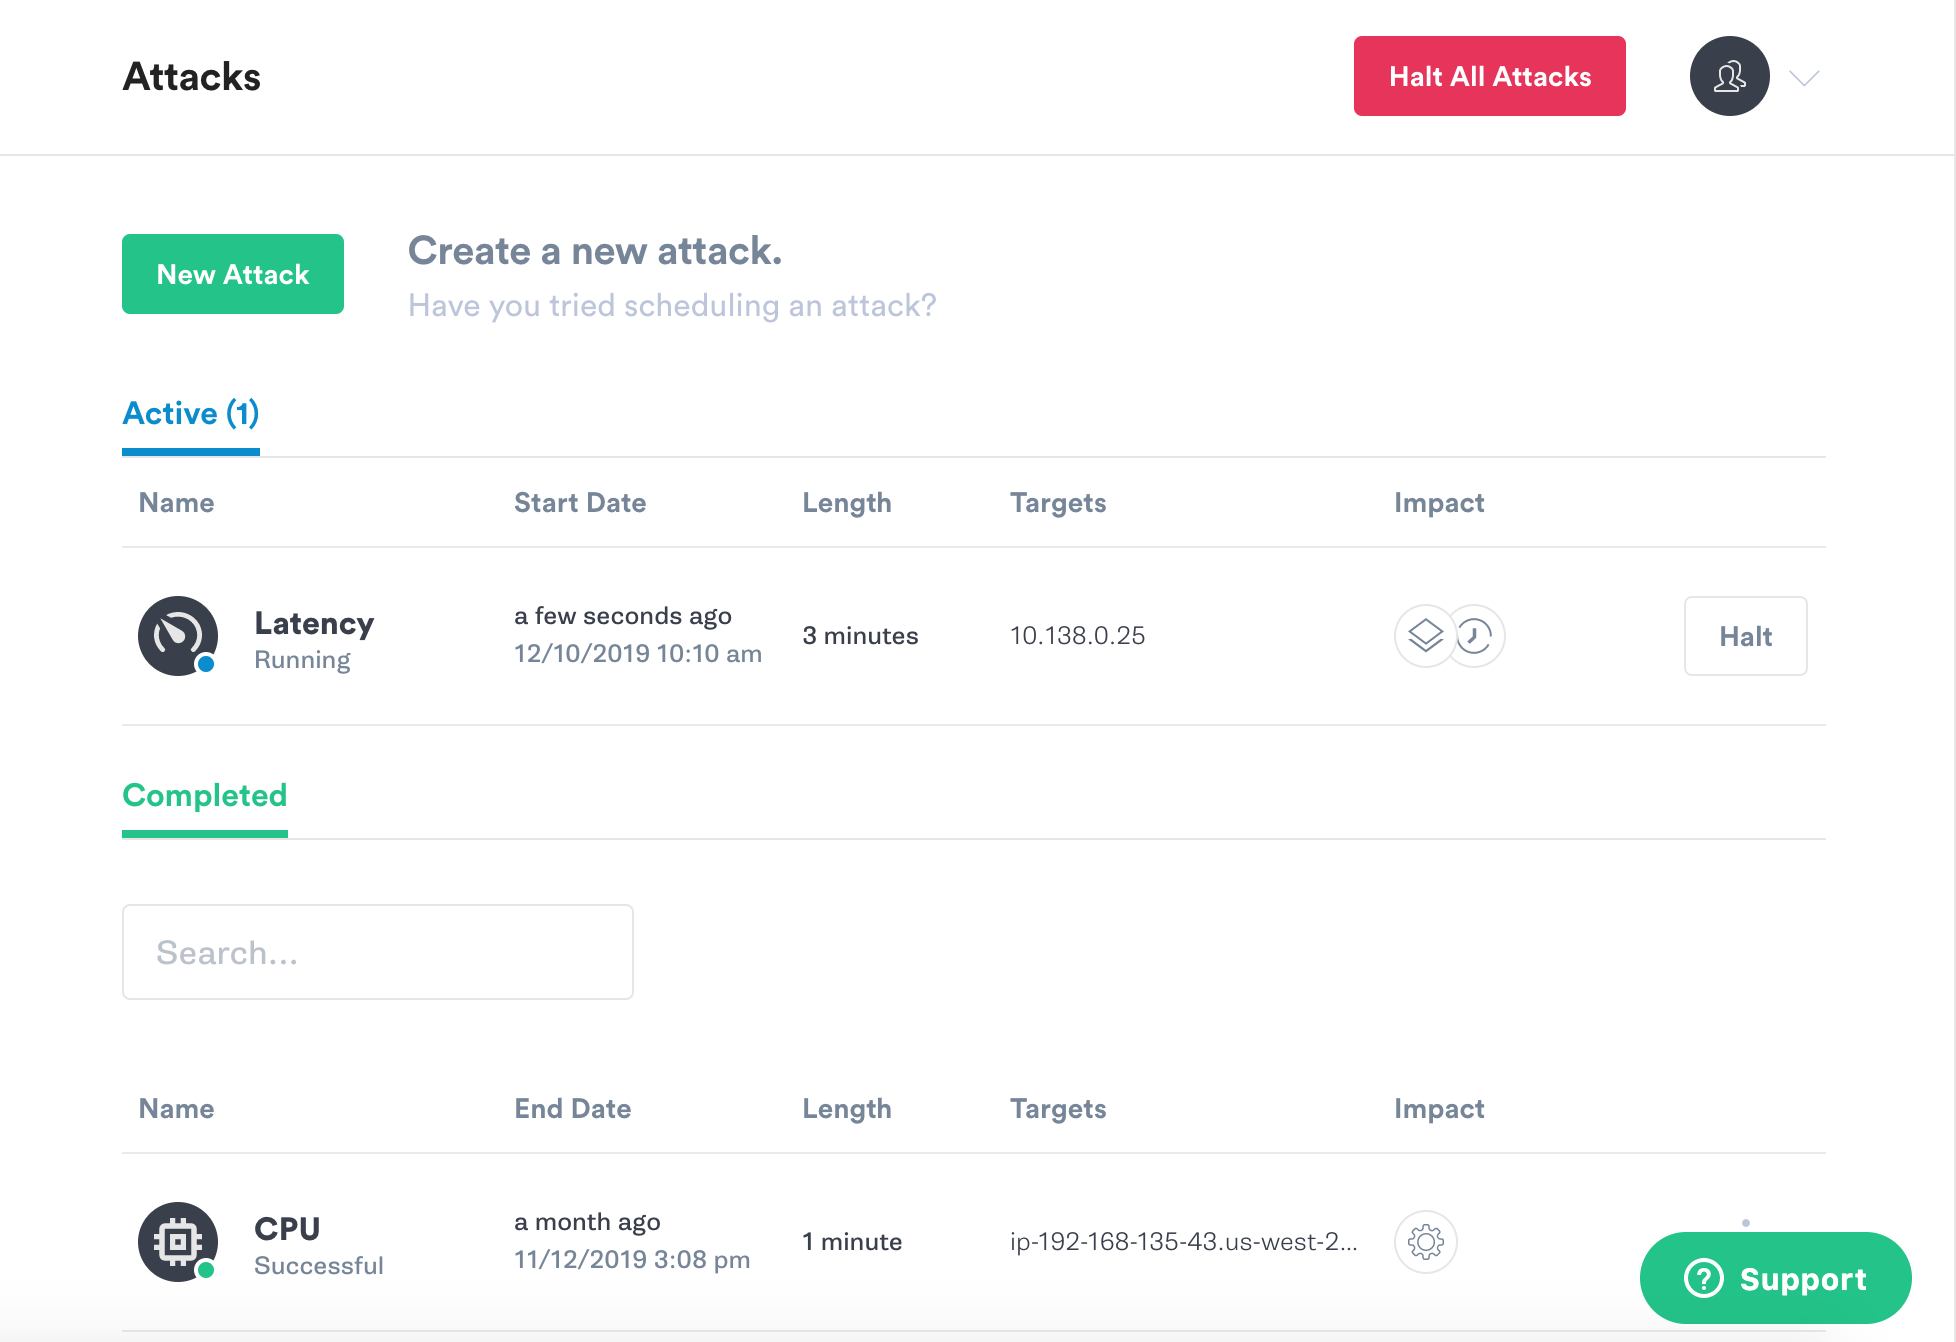
Now, go back to your terminal on the Squid host and run that same curl command.
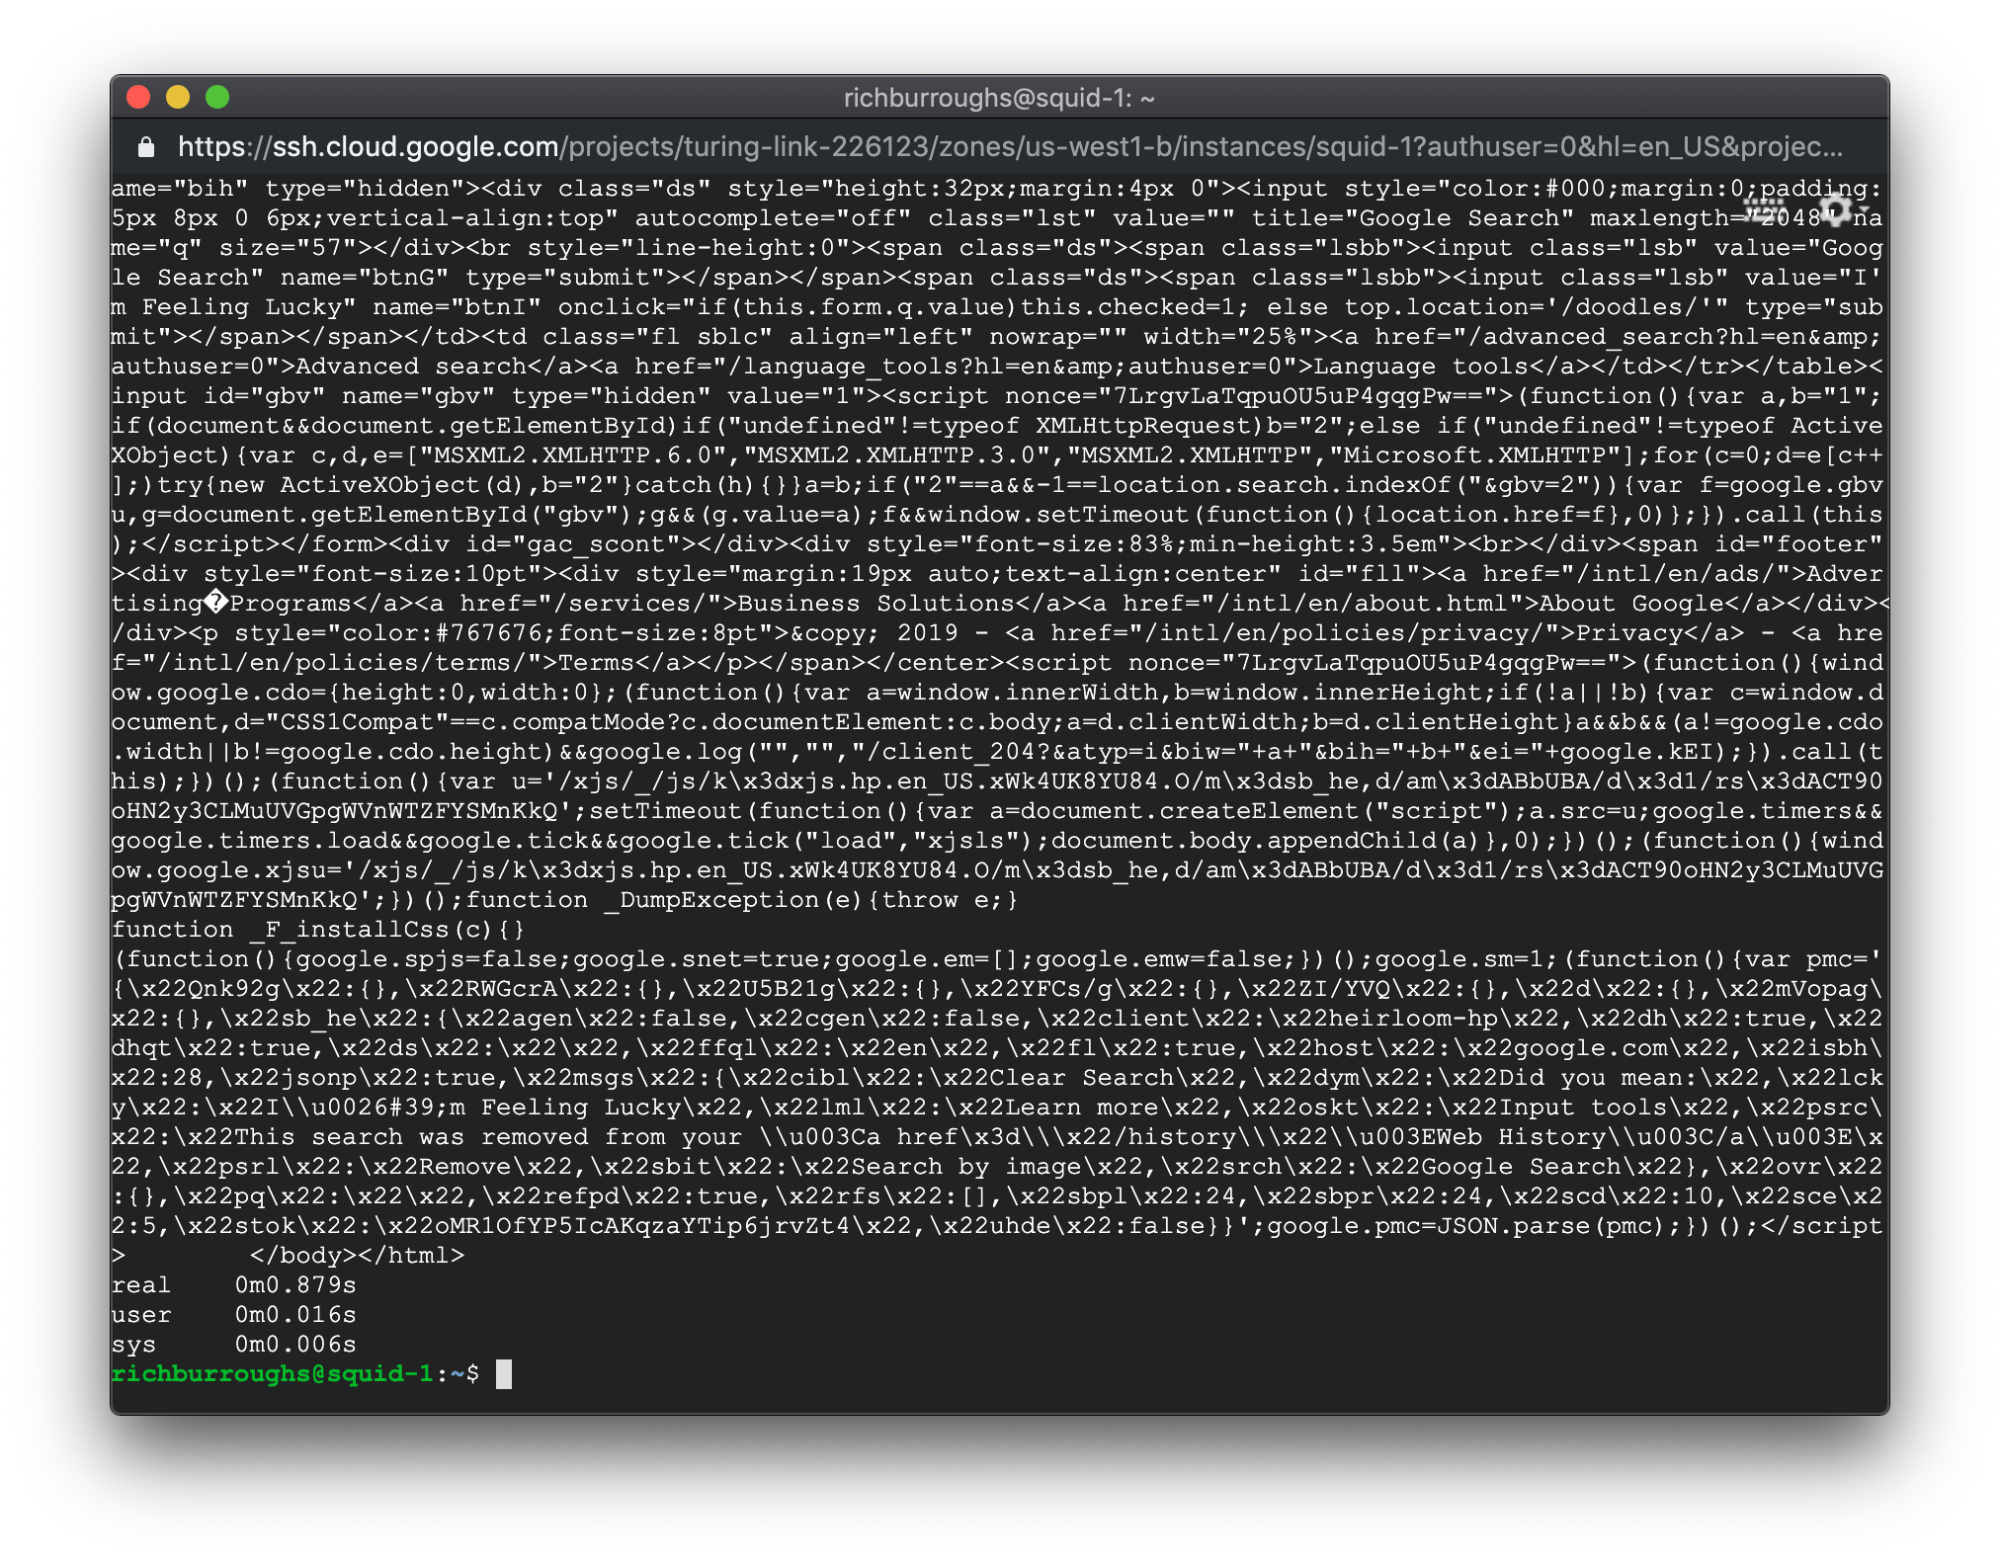
The time output should be different this time. In our example we have:
Our real time went from 0.056 seconds to 0.879 seconds. That’s pretty significant.
Two other important concepts in Chaos Engineering are Blast Radius and Magnitude. Blast Radius is the number of hosts or containers we run an attack on, and Magnitude is the intensity of the attack. In this example the blast Radius was 1 host, and the Magnitude was 200 ms of latency. With both Blast Radius and Magnitude, we want to start off small when we run experiments, and then increase the impact of them as we go. Let’s run the latency experiment again, but this time we’ll increase Magnitude of the latency attack to 1000 milliseconds.
Click Unleash Gremlin to start the new attack.
Go back to your terminal window on the Squid host and run the same curl command again:
You might have trouble even typing the curl command this time with the added latency, so feel free to use the up arrow on your keyboard to find it in your command history.

The output from the command is very different with the added latency:
The real time now in our example is 3.152 seconds. We injected 1000 milliseconds of latency, which is 1 second. So by adding 1 second of latency, we slowed down the load time of the page much more. A very interesting result.
Step 4 - Running a DNS experiment
Another network related attack we can do is DNS, which blocks the host’s access to DNS servers. Let’s see how that impacts our Squid host.
Go to New Attack and select the host again. Click on Network again, and this time click on DNS:
Set the length to 180, and leave the other settings at the defaults. Scroll down and click Unleash Gremlin.
Once the attack is running, go back to your Squid host and run that same curl command:
The command will likely hang for a while but eventually complete. In our example, we received this error:
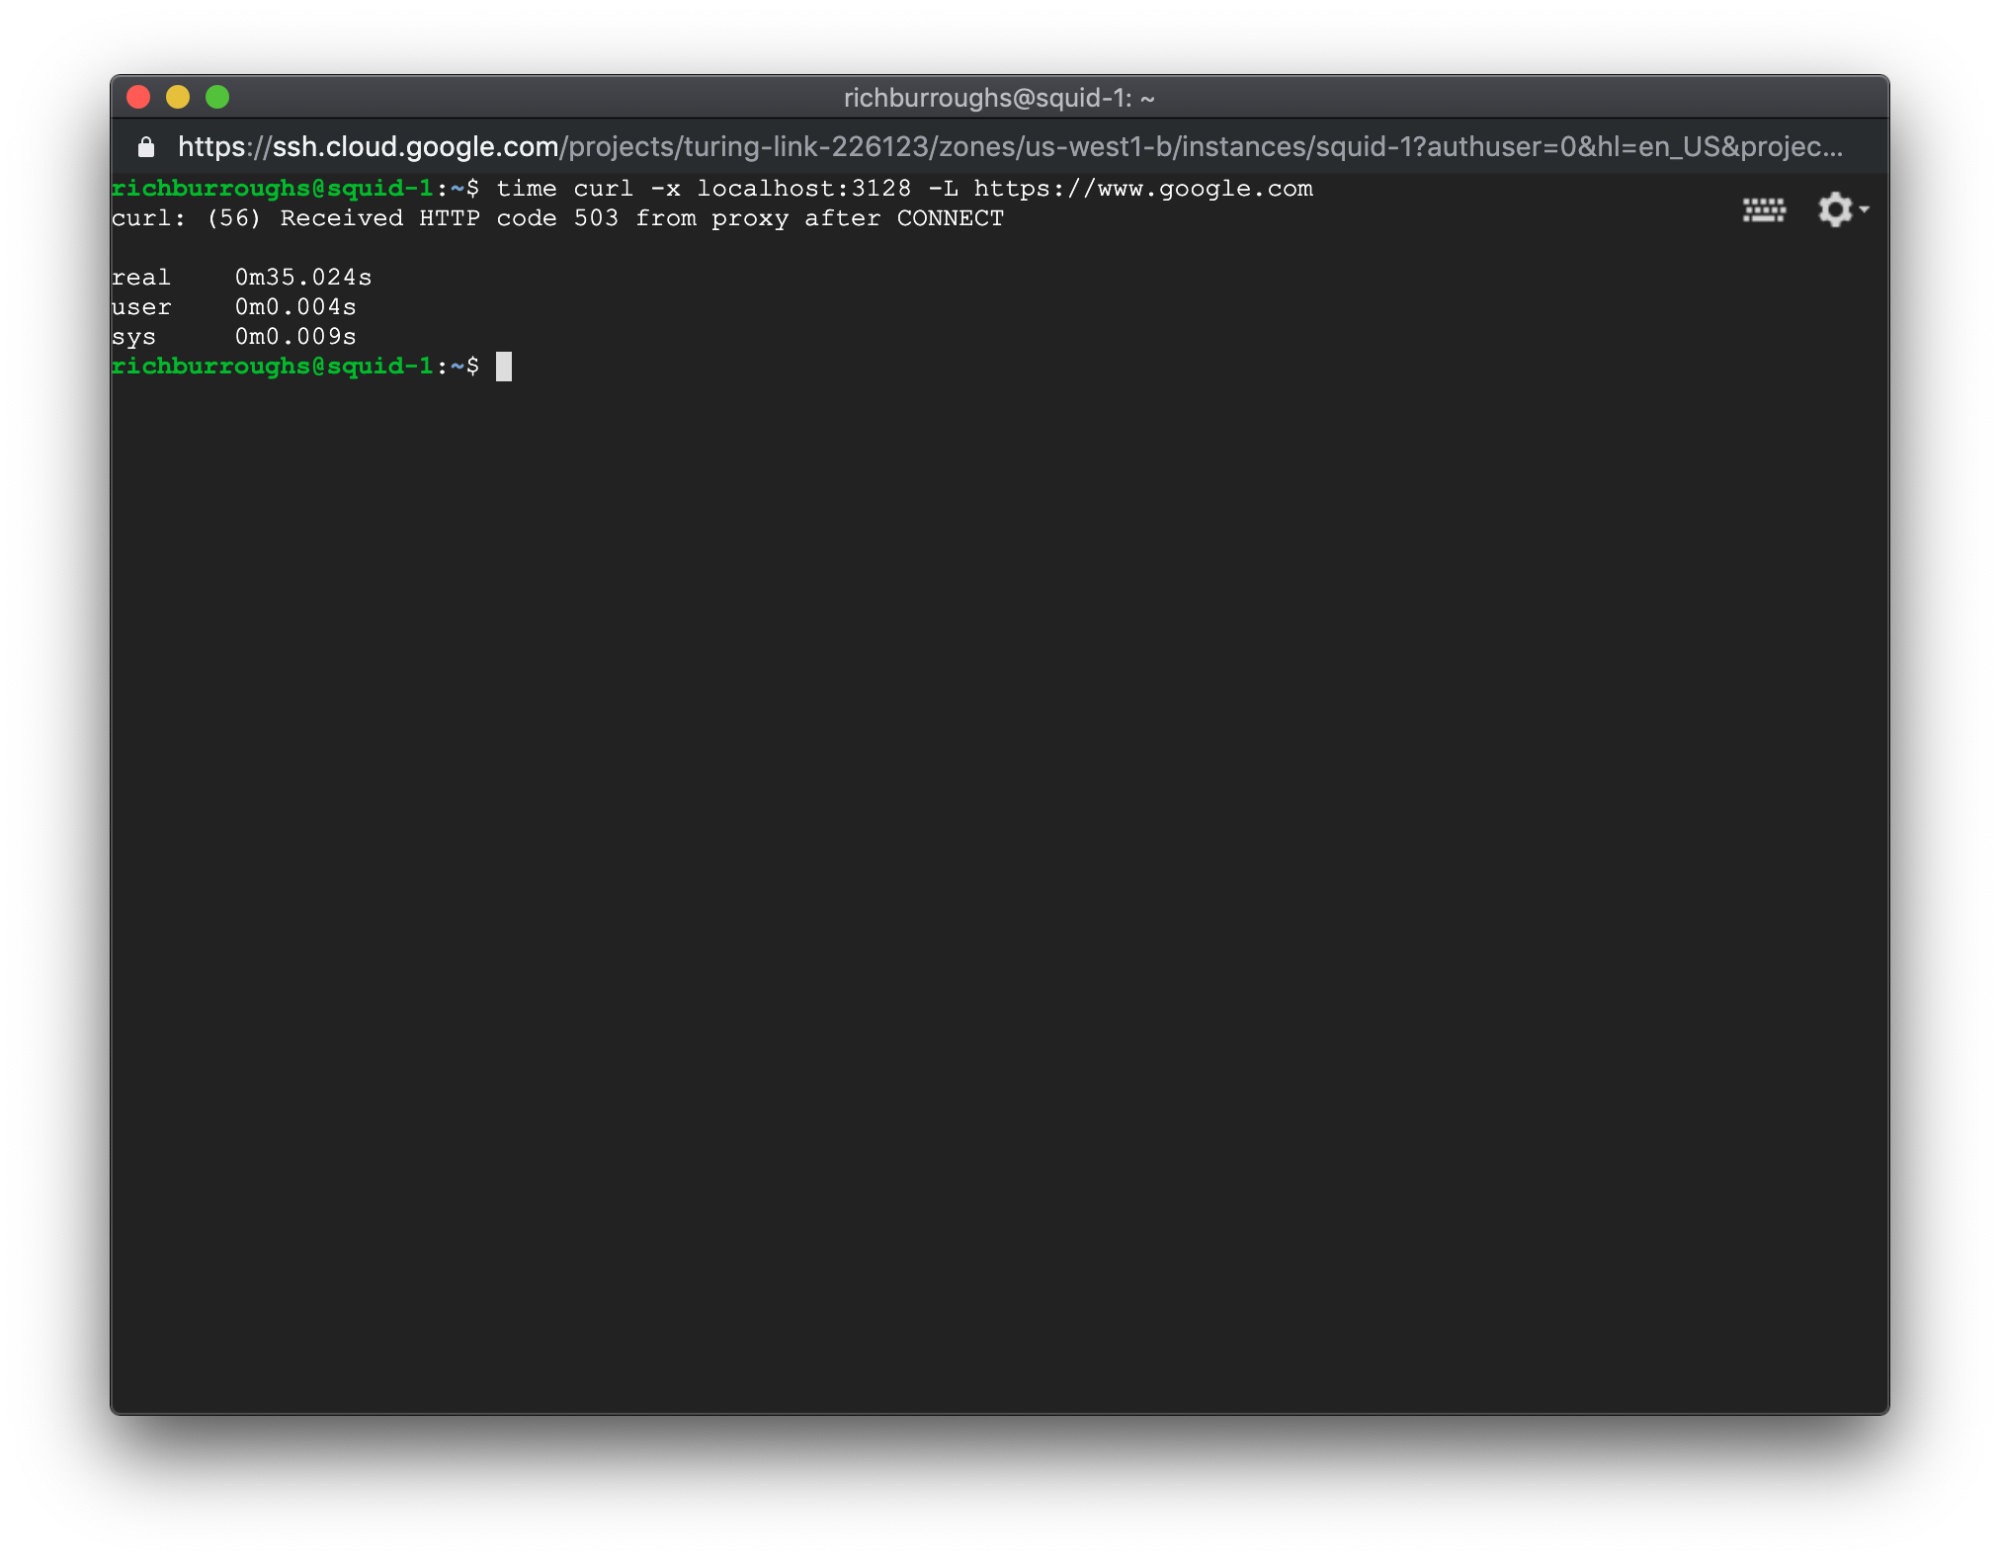
The HTTP 503 error code stands for Service Unavailable. That makes sense, but we might not have guessed that would be the result. Now we know that 503 errors from Squid could be related to DNS problems.
If the request completed normally for you, it might be because of DNS caching. Run the curl command again but use a different destination web address.
Conclusion
We looked at how two Chaos Engineering attacks can impact a Squid transparent proxy, and saw some interesting results. By injecting failures into a system intentionally we can see what errors result from those failures. This gives us more knowledge about how the system actually works, which allows us to observe and operate it better.
There are more experiments we can do with Squid, too. A disk attack would show us how Squid behaves when the host’s disk fills up. Increasing the system’s I/O could also be interesting, as well as doing Memory and CPU attacks. We could also look at some of the other use cases for Squid, beyond using it as a transparent proxy.
To learn more about Gremlin you can read the documentation, which explains the other types of Chaos Engineering attacks you can perform. To learn more about Chaos Engineering join our Chaos Engineering Slack, and read more tutorials on our Community page.
Avoid downtime. Use Gremlin to turn failure into resilience.
Gremlin empowers you to proactively root out failure before it causes downtime. See how you can harness chaos to build resilient systems by requesting a demo of Gremlin.

.svg)