Use Gremlin Webhooks to sync Blazemeter load tests


.svg)
.svg)

 This is an older tutorial
Using load tests while performing Chaos Engineering experiments prepares your applications for high traffic even in less than ideal system conditions. For example, on a high traffic day, can your application handle a little bit of latency?
This tutorial will walk you through how to perform a load test using Blazemeter while injecting failure using Gremlin. Blazemeter is a hosted load testing tool that can create and run custom load tests or run scripts from common open source performance testing tools like JMeter and Gatling. Combined with Gremlin’s webhooks feature, you can synchronize load tests with chaos experiments to run and halt both at the same time.
Prerequisites
- A Blazemeter account (sign up for a free account)
- A Gremlin account (request a free trial)
- A host or application with a Gremlin agent installed
Step 1: Setup a performance test in Blazemeter
In this first step, you’ll set up a performance test using Blazemeter. Go to https://a.blazemeter.com and select “Performance.” Then select “Create Test”. At this point, you can upload your own script or enter your application’s URL. This example uses <span class="code-class-custom">http://gremlin.rocks </span>with <span class="code-class-custom">1</span> user for <span class="code-class-custom">5 </span>minutes and 1 minute of startup time. Everything else you’ll leave as the defaults.
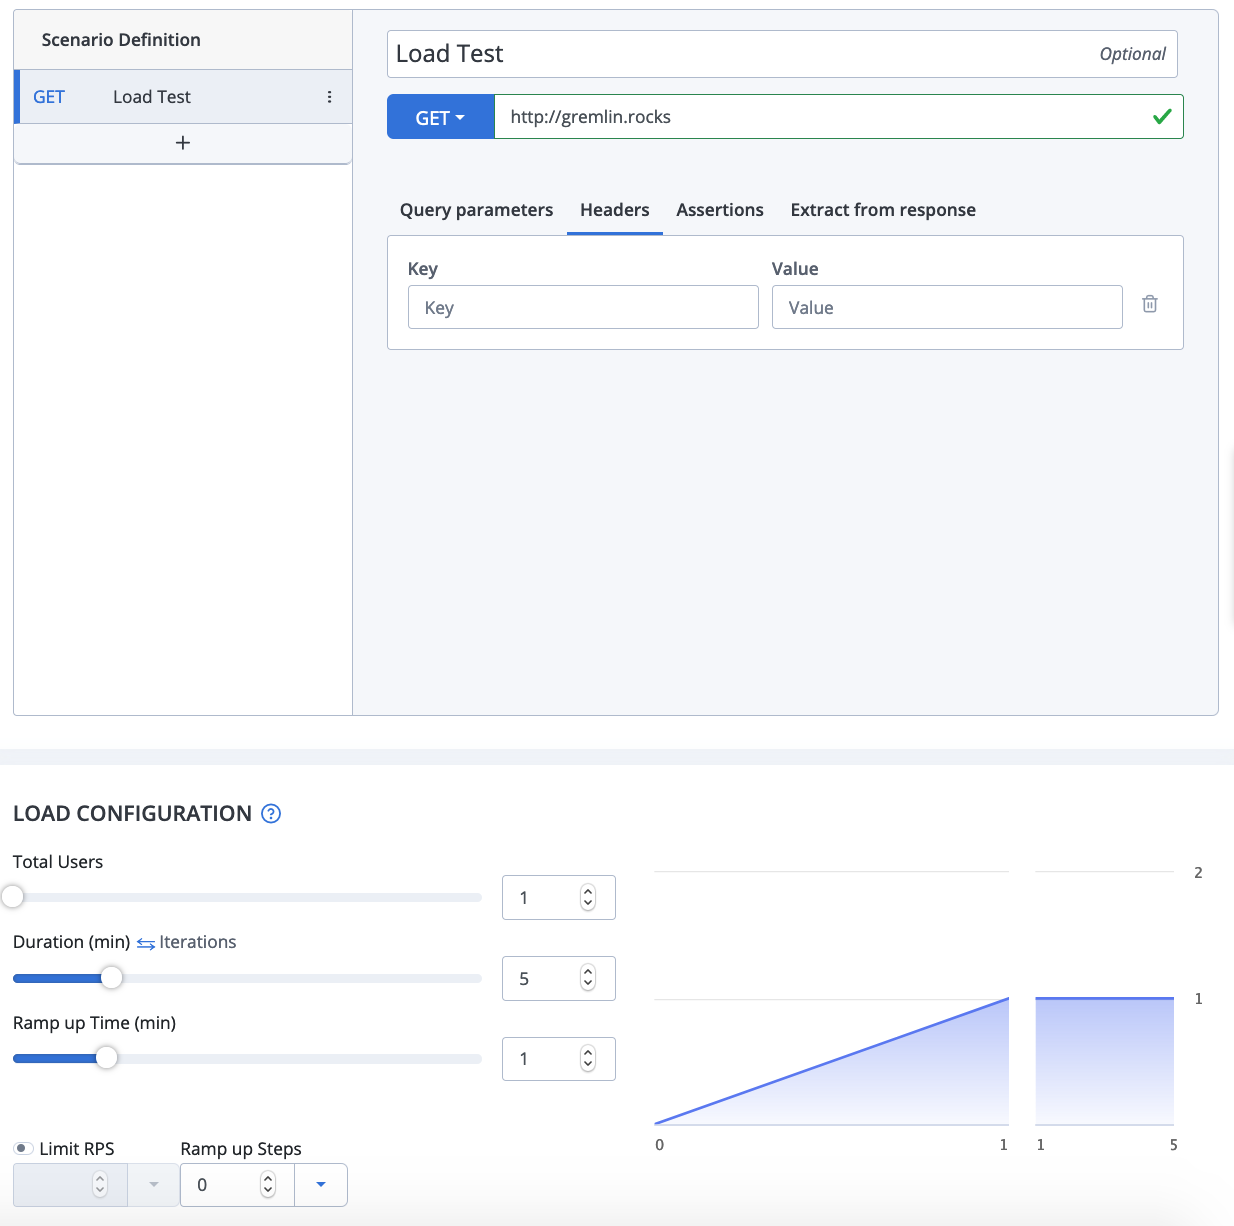
Once you’re done entering the inputs, copy the test number from the URL after <span class="code-class-custom">tests</span> for the API endpoint in step 4. In my case, it’s <span class="code-class-custom">8744700</span>.

Step 2: Gather your Blazemeter API keys
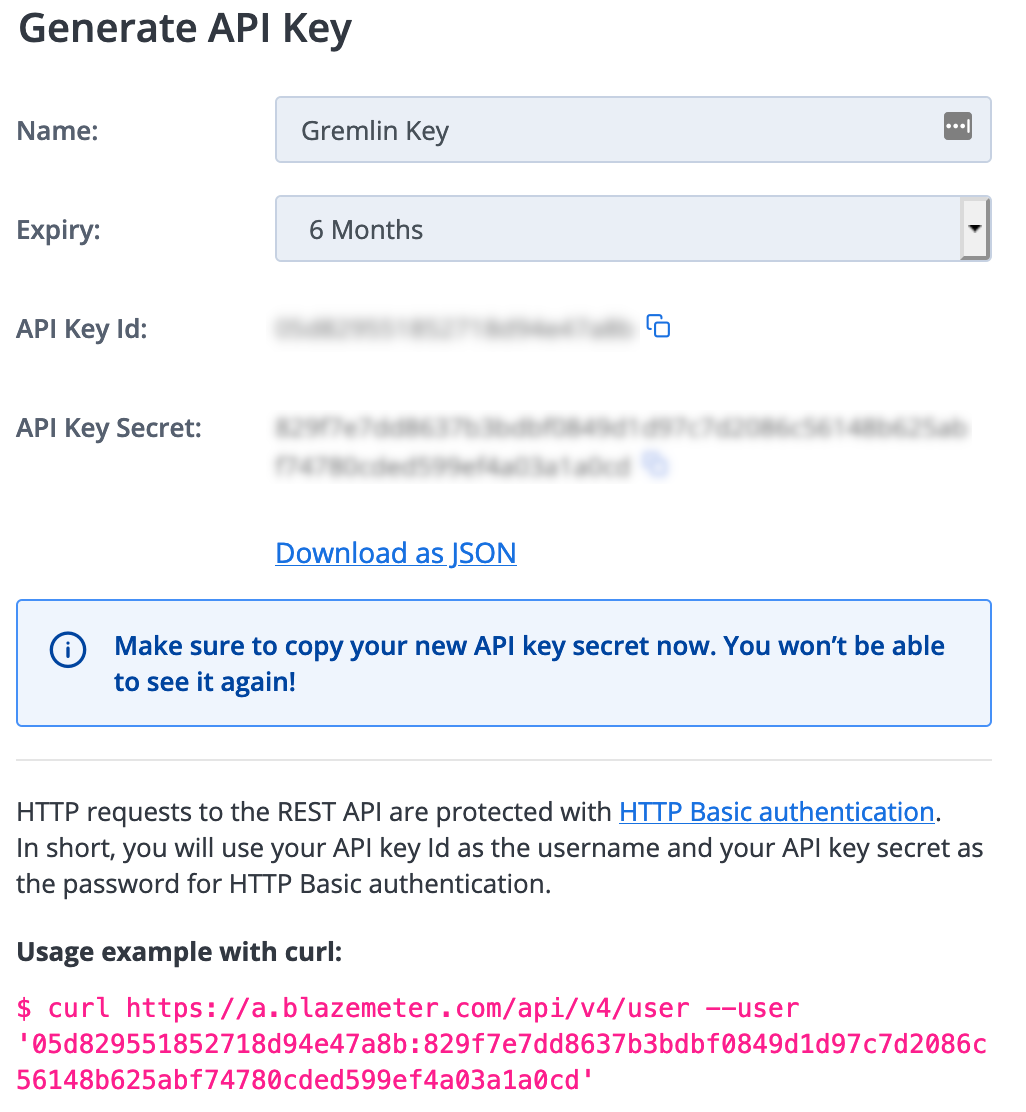
In order to start and stop the load test from Gremlin, you’ll need to authenticate with Blazemeter using the API keys. Click on the gear icon in the upper right corner in Blazemeter. Then select “API Keys.” Create a new API key. Depending on your security preferences, select the length of time for the key to last. Copy the “API Key Id” and “API Key Secret” for use in the next step.
Step 3: Convert your ID and Key to Base64
The Gremlin webhooks we create will use Basic Authentication. To use this, you’ll need to convert the ID and key from the previous step to Base64. If you’re using Mac or Linux, open your terminal and enter:
or Command Prompt (Windows) enter:
Save this output for the next step.
Step 4: Create two Gremlin webhooks
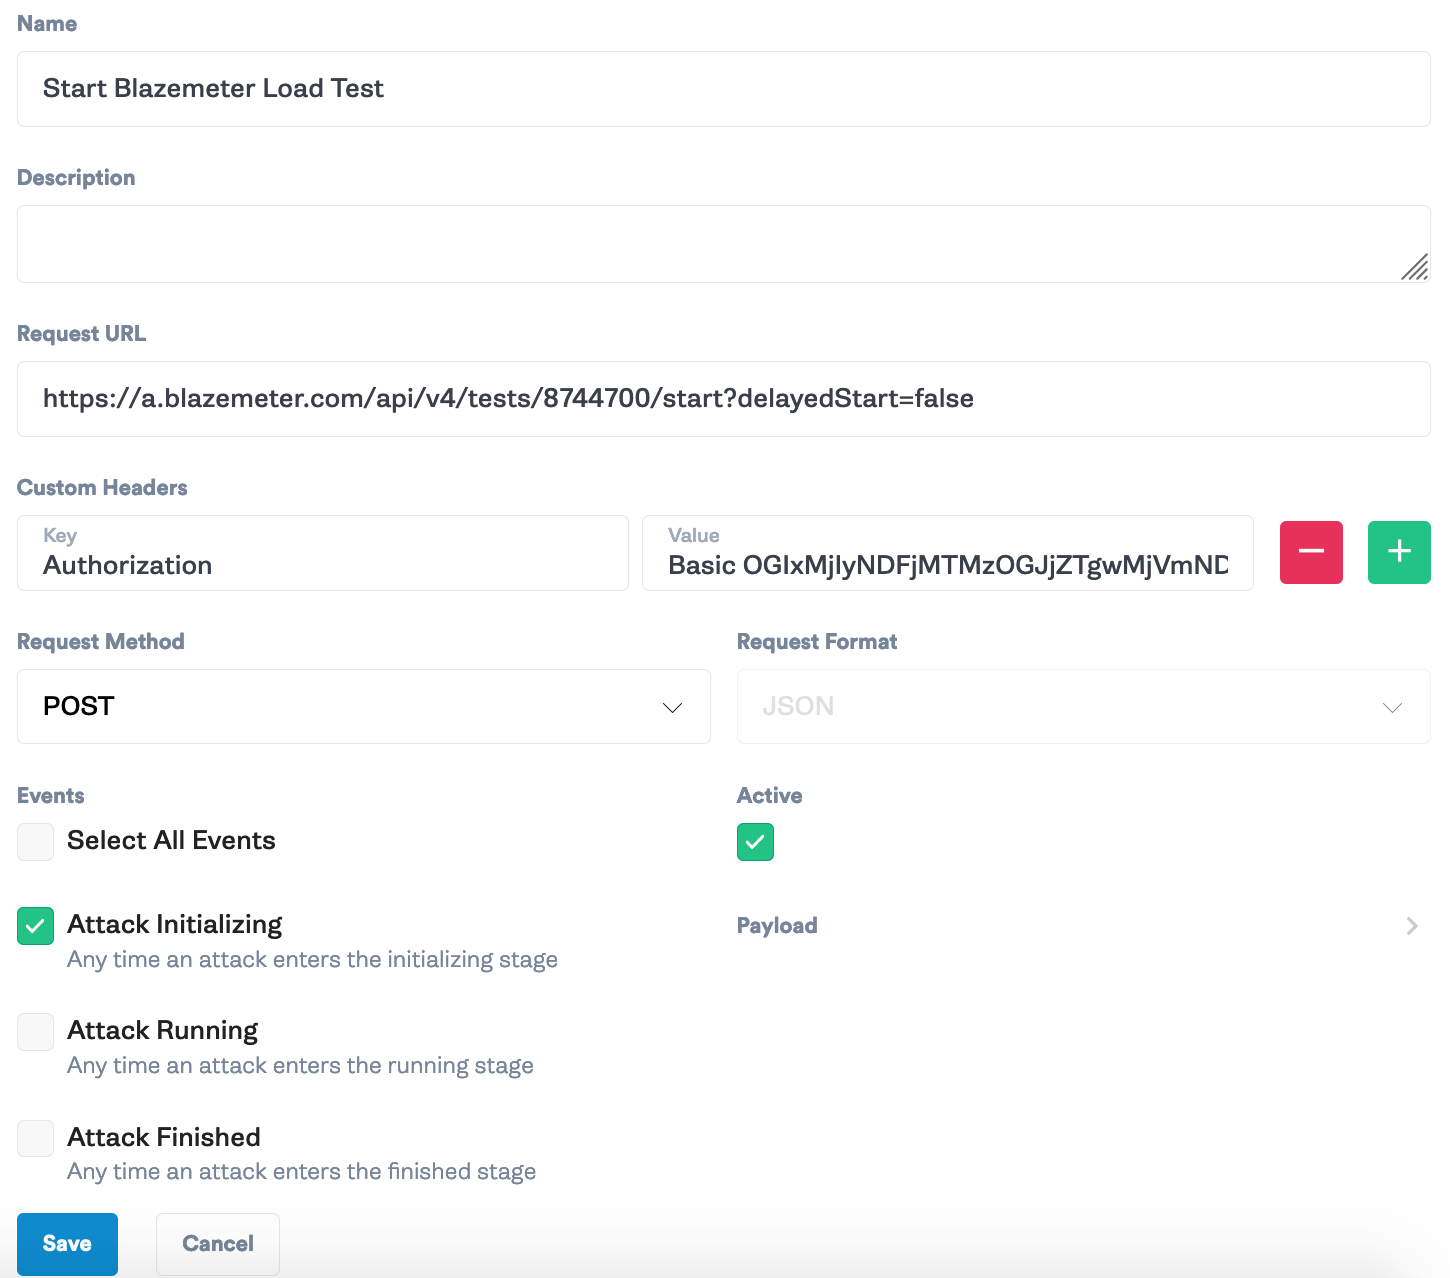
In this step, you’ll create two webhooks: one to start the load test with the Gremlin experiment and one to stop it after the Gremlin experiment ends. In Gremlin, go to “Team Settings,” “Webhooks,” then “New Webhook.” Give the webhook the name <span class="code-class-custom">Start Blazemeter Load Test</span> and set the Request URL to <span class="code-class-custom">https://a.blazemeter.com/api/v4/tests/{your_test_id}/start?delayedStart=false </span>. Then in the headers, add the Key <span class="code-class-custom">Authorization</span> and the Value to <span class="code-class-custom">Basic {your base64 id and password}</span>. Check the “Attack Initializing” box and click “Save.”
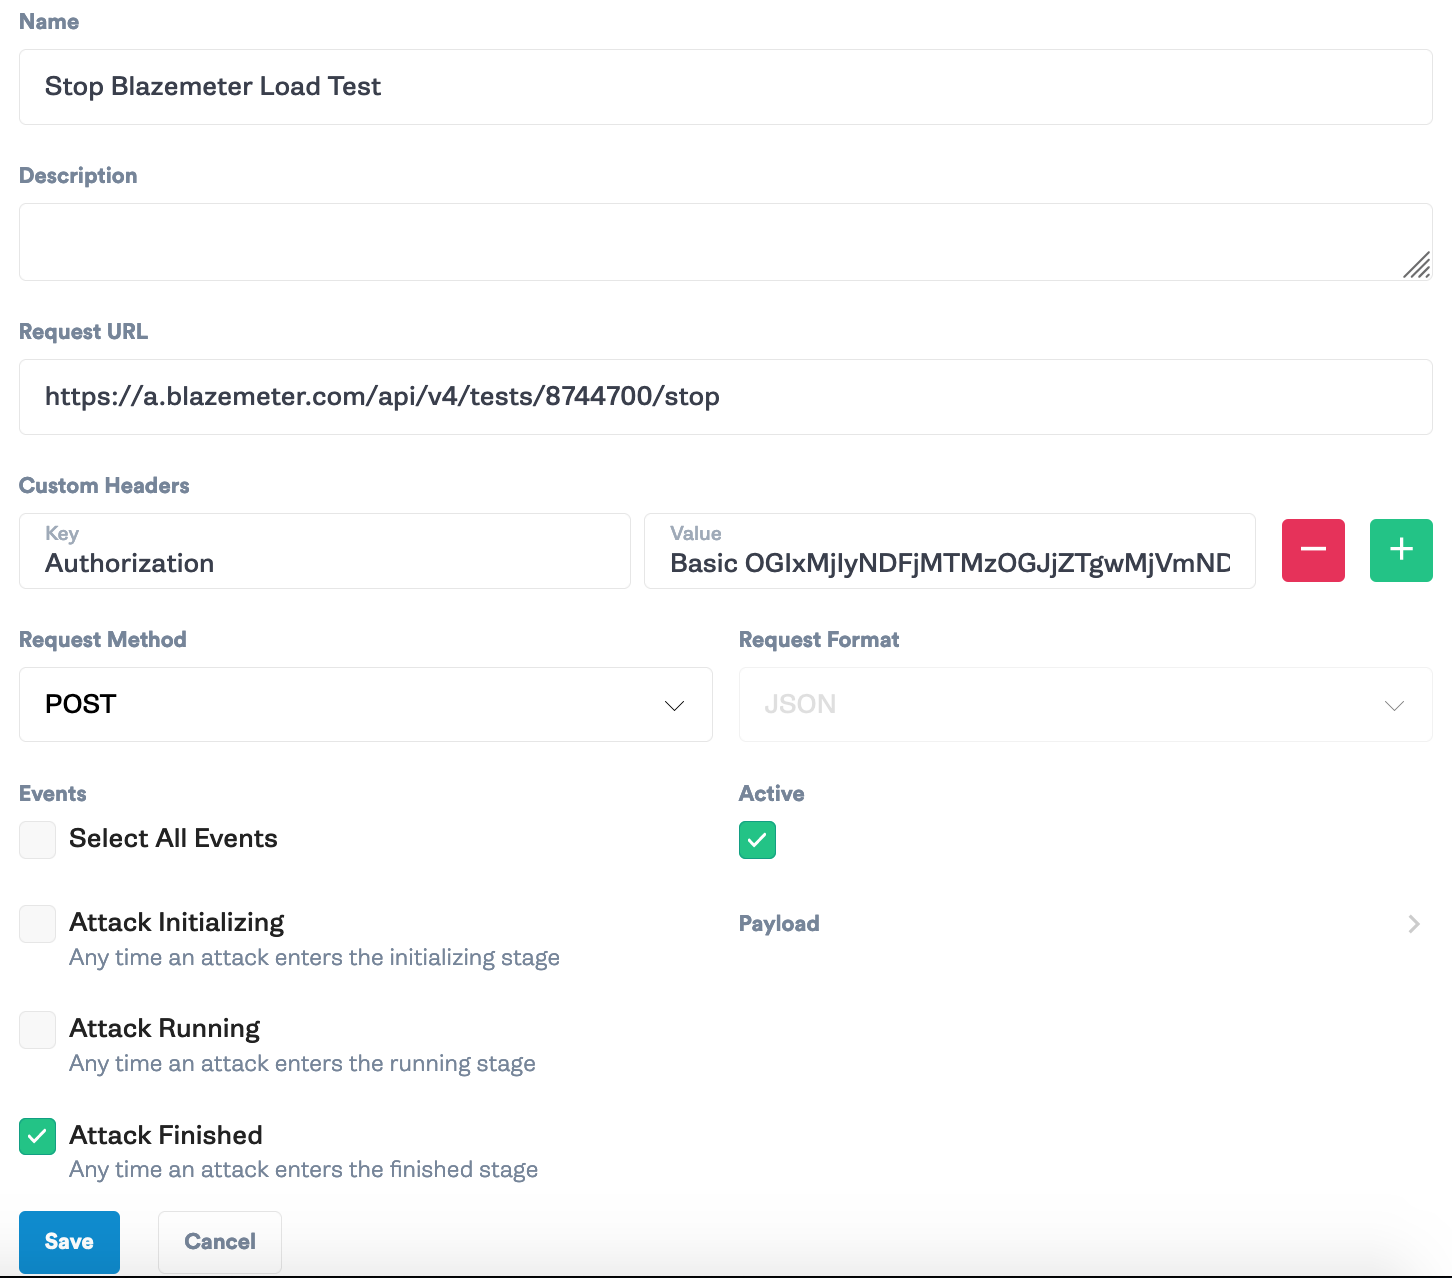
Next, you’ll create a webhook to stop the test. Enter the name <span class="code-class-custom">Stop Blazemeter Load Test</span> and the URL <span class="code-class-custom">https://a.blazemeter.com/api/v4/tests/{your test id}/stop</span>. Add the same authorization header as the previous webhook, check “Attack Finished” and click “Save.”
Now every time you run a Gremlin attack from this Team, that load test will be launched.
Step 5: Run an attack with a load test
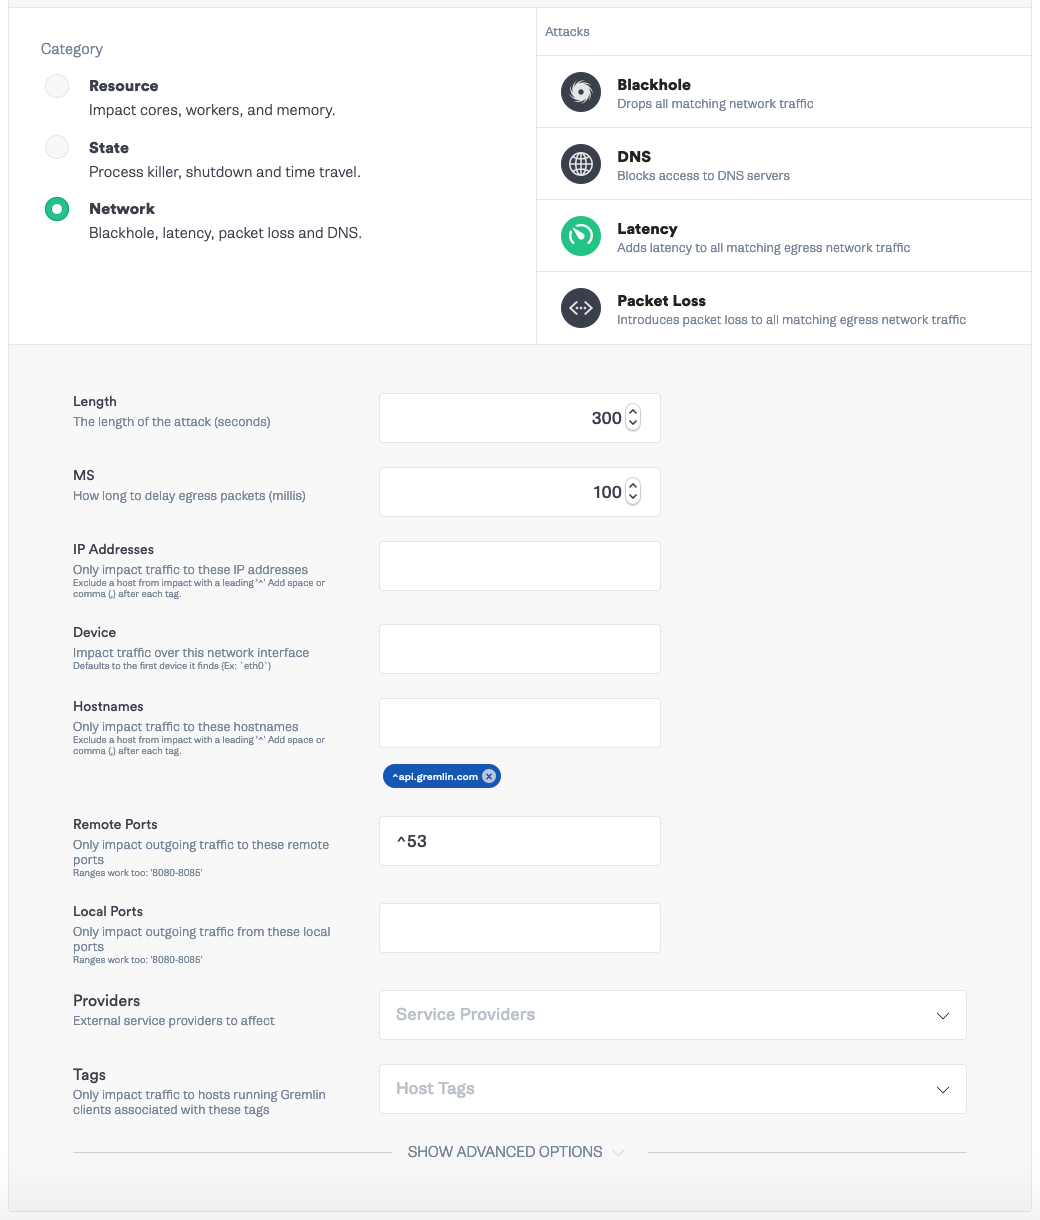
In this step, you’ll run a latency attack to slow down all traffic to and from our hosts while simultaneously kicking off a load test in Blazemeter. In Gremlin, go to “Attacks” -> “New Attack.” Select “Target all hosts.” Then select “Choose a Gremlin” -> “Network” -> “Latency”. For Length set it to <span class="code-class-custom">300</span> seconds and leave the rest to the defaults.
Click “Unleash Gremlin”. After a few seconds, head over to Blazemeter to confirm that the load test is running.
You can wait for the attack to finish in 5 minutes, or click the Halt button in Gremlin. Head back over to Blazemeter to ensure the load test stopped and to see the results.

If you no longer want the load tests to run with every Gremlin attack, deactivate the webhooks in the Gremlin Team Settings.
Run your own load tests
Used in conjunction, load testing and Chaos Engineering are a powerful combination that can test the resiliency of your applications. This load test was a simple example that just pinged the frontend of our webapp and only applied a simple latency attack. A much more thorough script using multiple users clicking around your site and completing transactions with a more targeted blast radius, such as a single service, would be an informative next step. Similarly, try different magnitudes and types of Gremlin attacks to see how your application behaves with a single service getting blackholed (dropping network traffic) or experiencing a spike in CPU.
Avoid downtime. Use Gremlin to turn failure into resilience.
Gremlin empowers you to proactively root out failure before it causes downtime. See how you can harness chaos to build resilient systems by requesting a demo of Gremlin.

.svg)