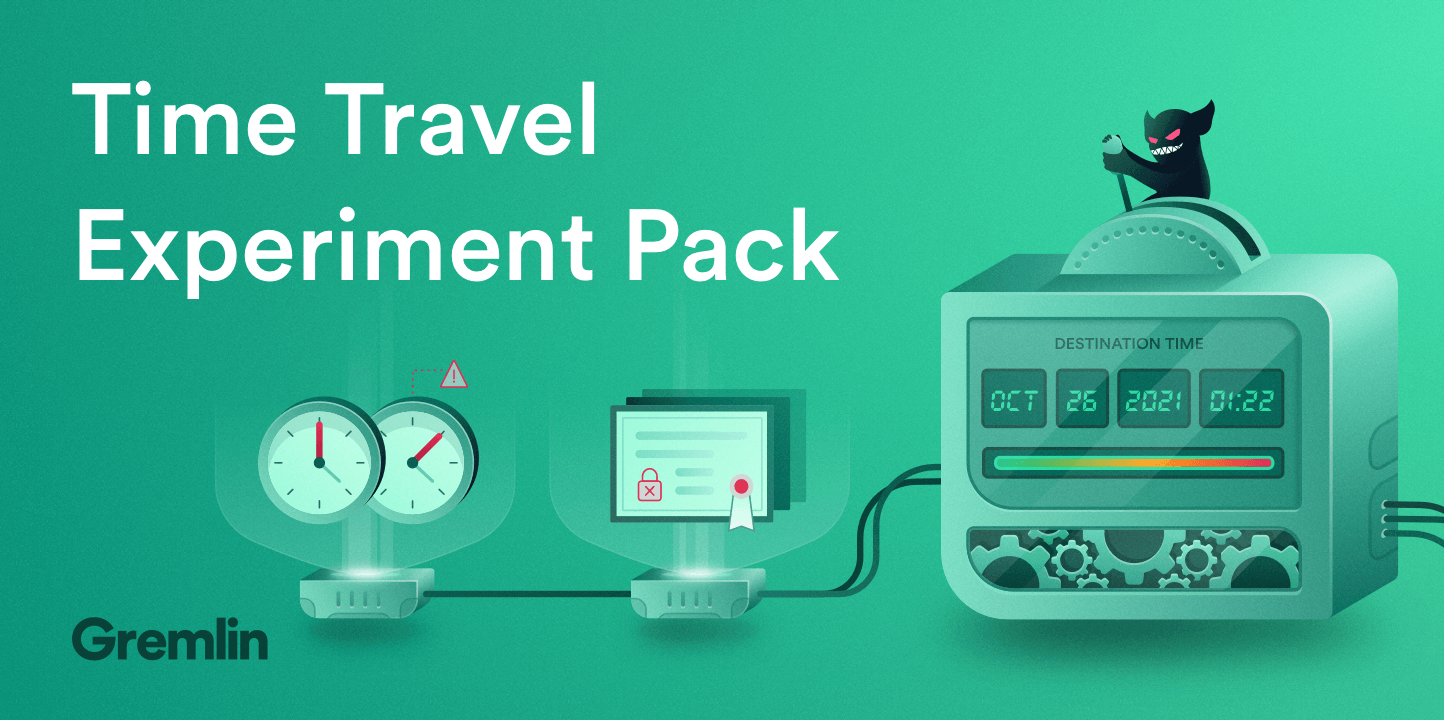
Time Travel Experiment Pack

.svg)
.svg)

 This is an older tutorial
Description
This Gremlin Time Travel Experiment Pack shares how you can utilize the Gremlin Time Travel attack to change the clock time of cloud infrastructure instances. This attack is cloud-agnostic and will work across AWS, GCP, Azure, DigitalOcean, Linode and more. There are many reasons to regularly use the Time Travel attack. One important reason is to ensure your systems can effectively handle certificate expiration.
What’s Included
- Ability to time travel cloud infrastructure hosts on AWS, Azure, GCP & more
- Ability to time travel with Gremlin installed directly on the instance
What we’ll break
With Gremlin, you have the ability to time travel any instance wherever it may reside.
This pack includes 3 x 5-minute experiments:
- Experiment 1: Time Travel a cloud infrastructure instance using Gremlin
- Experiment 2: Time Travel a cloud infrastructure instance using Gremlin in a Docker container
- Experiment 3: Time Travel a Kubernetes node using Gremlin
What you’ll need
- A Gremlin account (sign up here)
- Your Gremlin daemon credentials
- Cloud Infrastructure hosts (e.g. an AWS EC2 instance)
- Cloud Infrastructure containers (e.g. A DigitalOcean Docker Droplet)
- A kubernetes cluster (e.g. Azure AKS)
Get ready to unleash chaos, get your credentials!
After you have created your Gremlin account (sign up here) you will need to get your Gremlin Daemon credentials. Time Travel requires a full account, contact our team to get an upgrade: sales@gremlin.com
Login to the Gremlin App using your Company name and sign-on credentials. These details were emailed to you when you signed up to start using Gremlin.
Experiment 1: Time Travel a cloud infrastructure host using Gremlin
Step 1.0 - Installing the Gremlin Daemon and CLI
First, ssh into your server and add the Gremlin Debian repository:
Import the repo’s GPG key:
Then install the Gremlin daemon and CLI:
Step 1.1 - Register your server to the Gremlin control plane
To install the Gremlin agent and Kubernetes agent, you will need your Gremlin Team ID and Secret Key. If you don’t know what those are, you can get them from the Gremlin web app.
Visit the Teams page in Gremlin, and then click on your team’s name in the list.
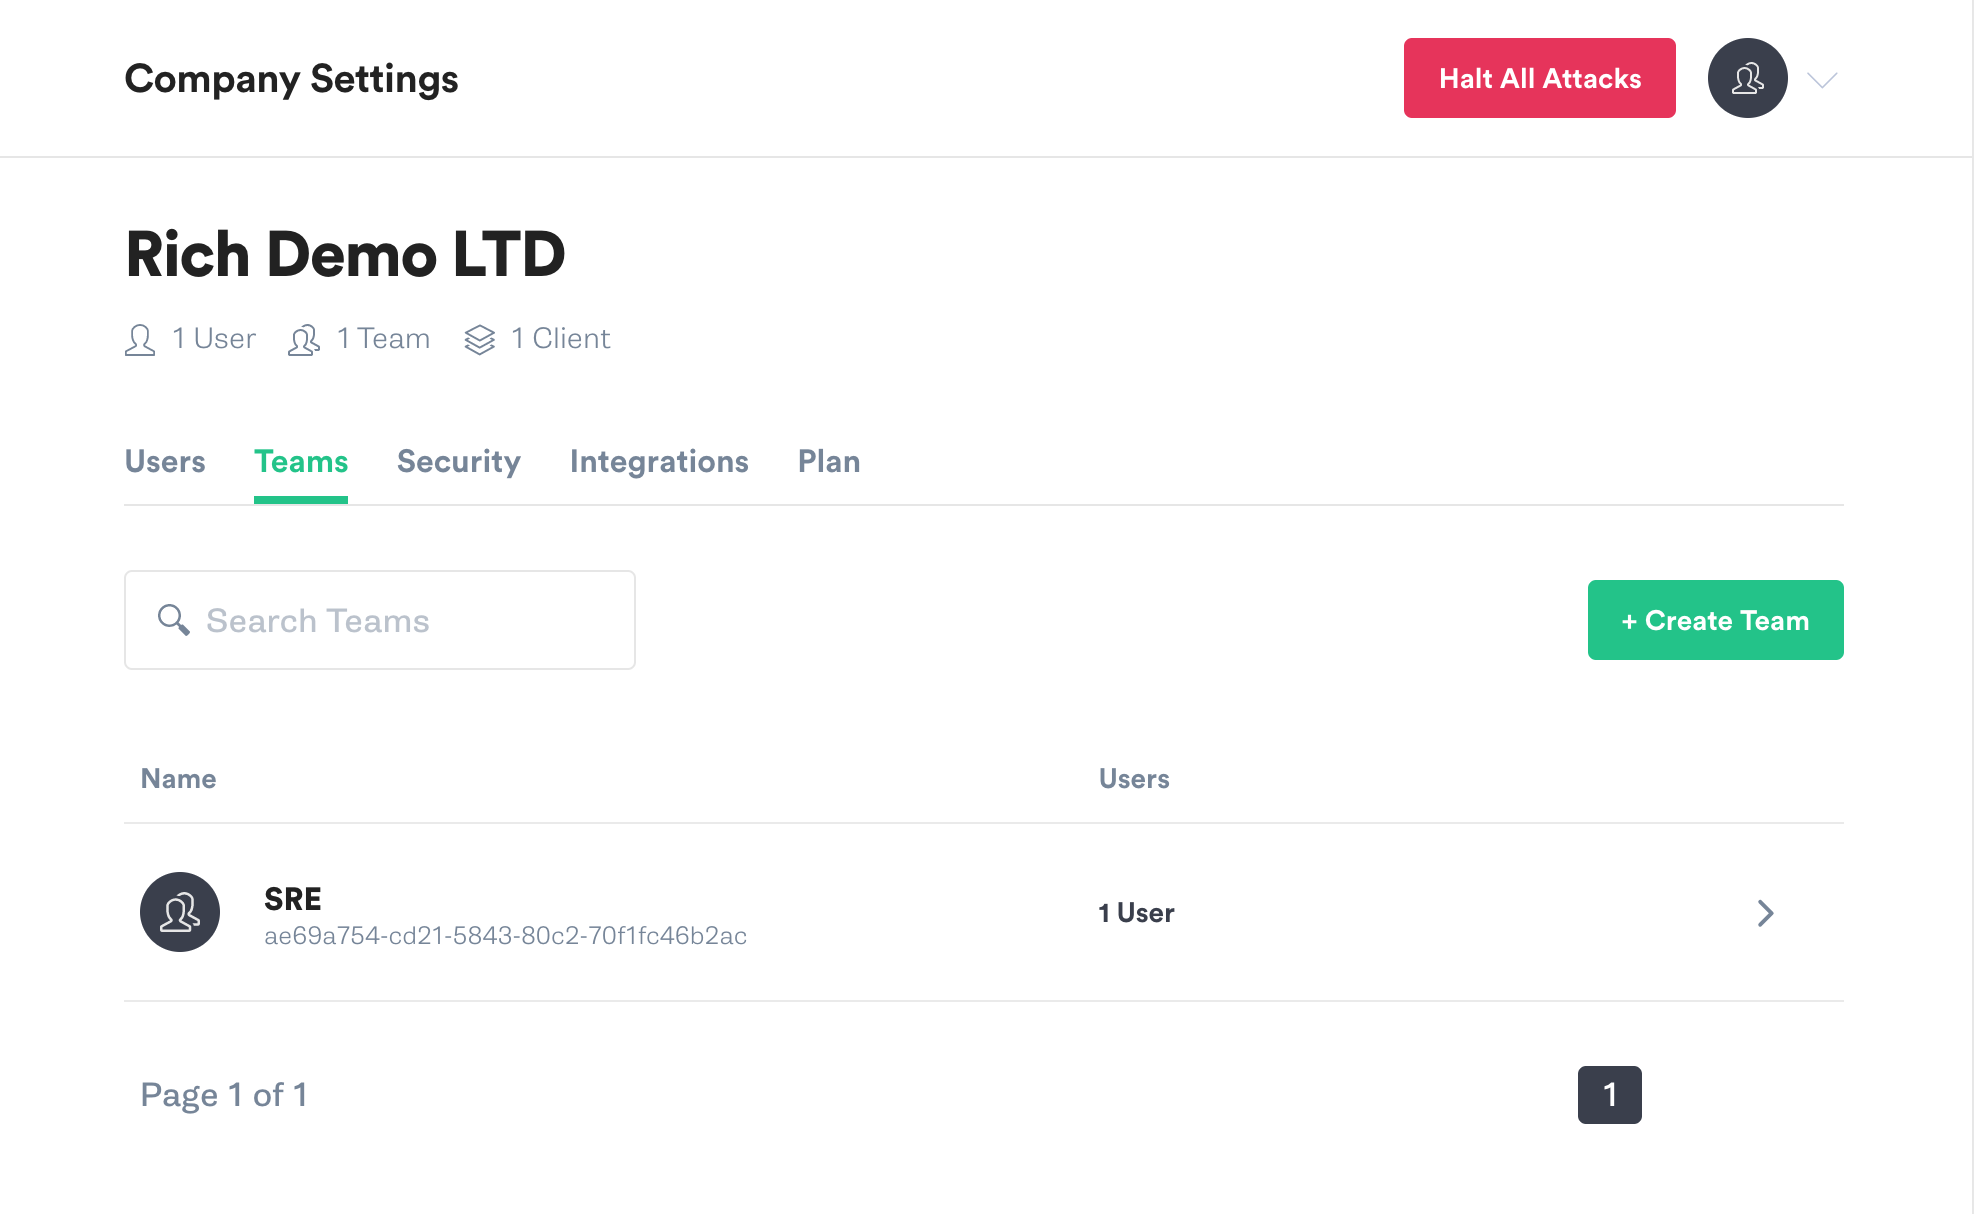
On the Teams screen click on Configuration.
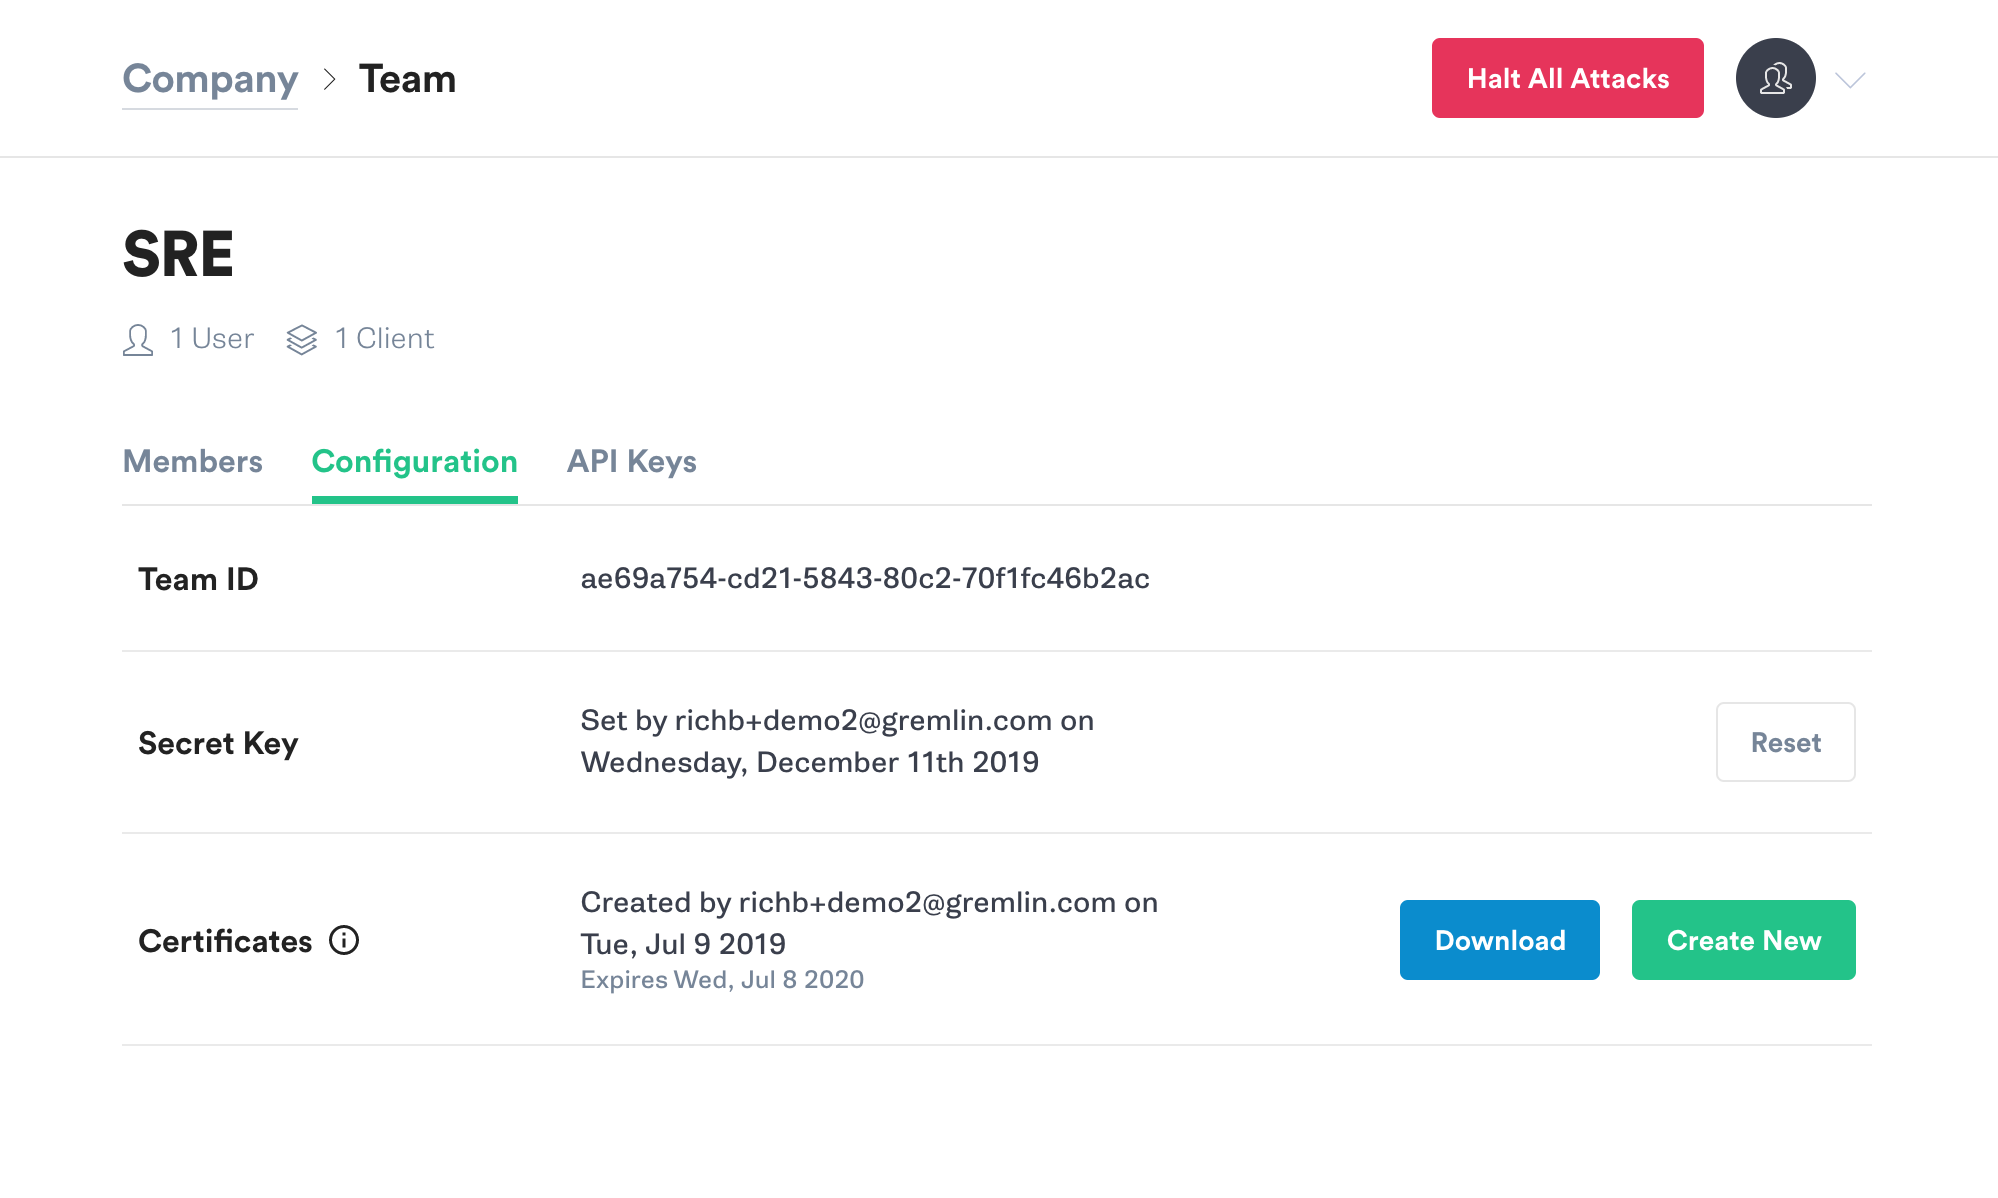
Make a note of your Team ID.
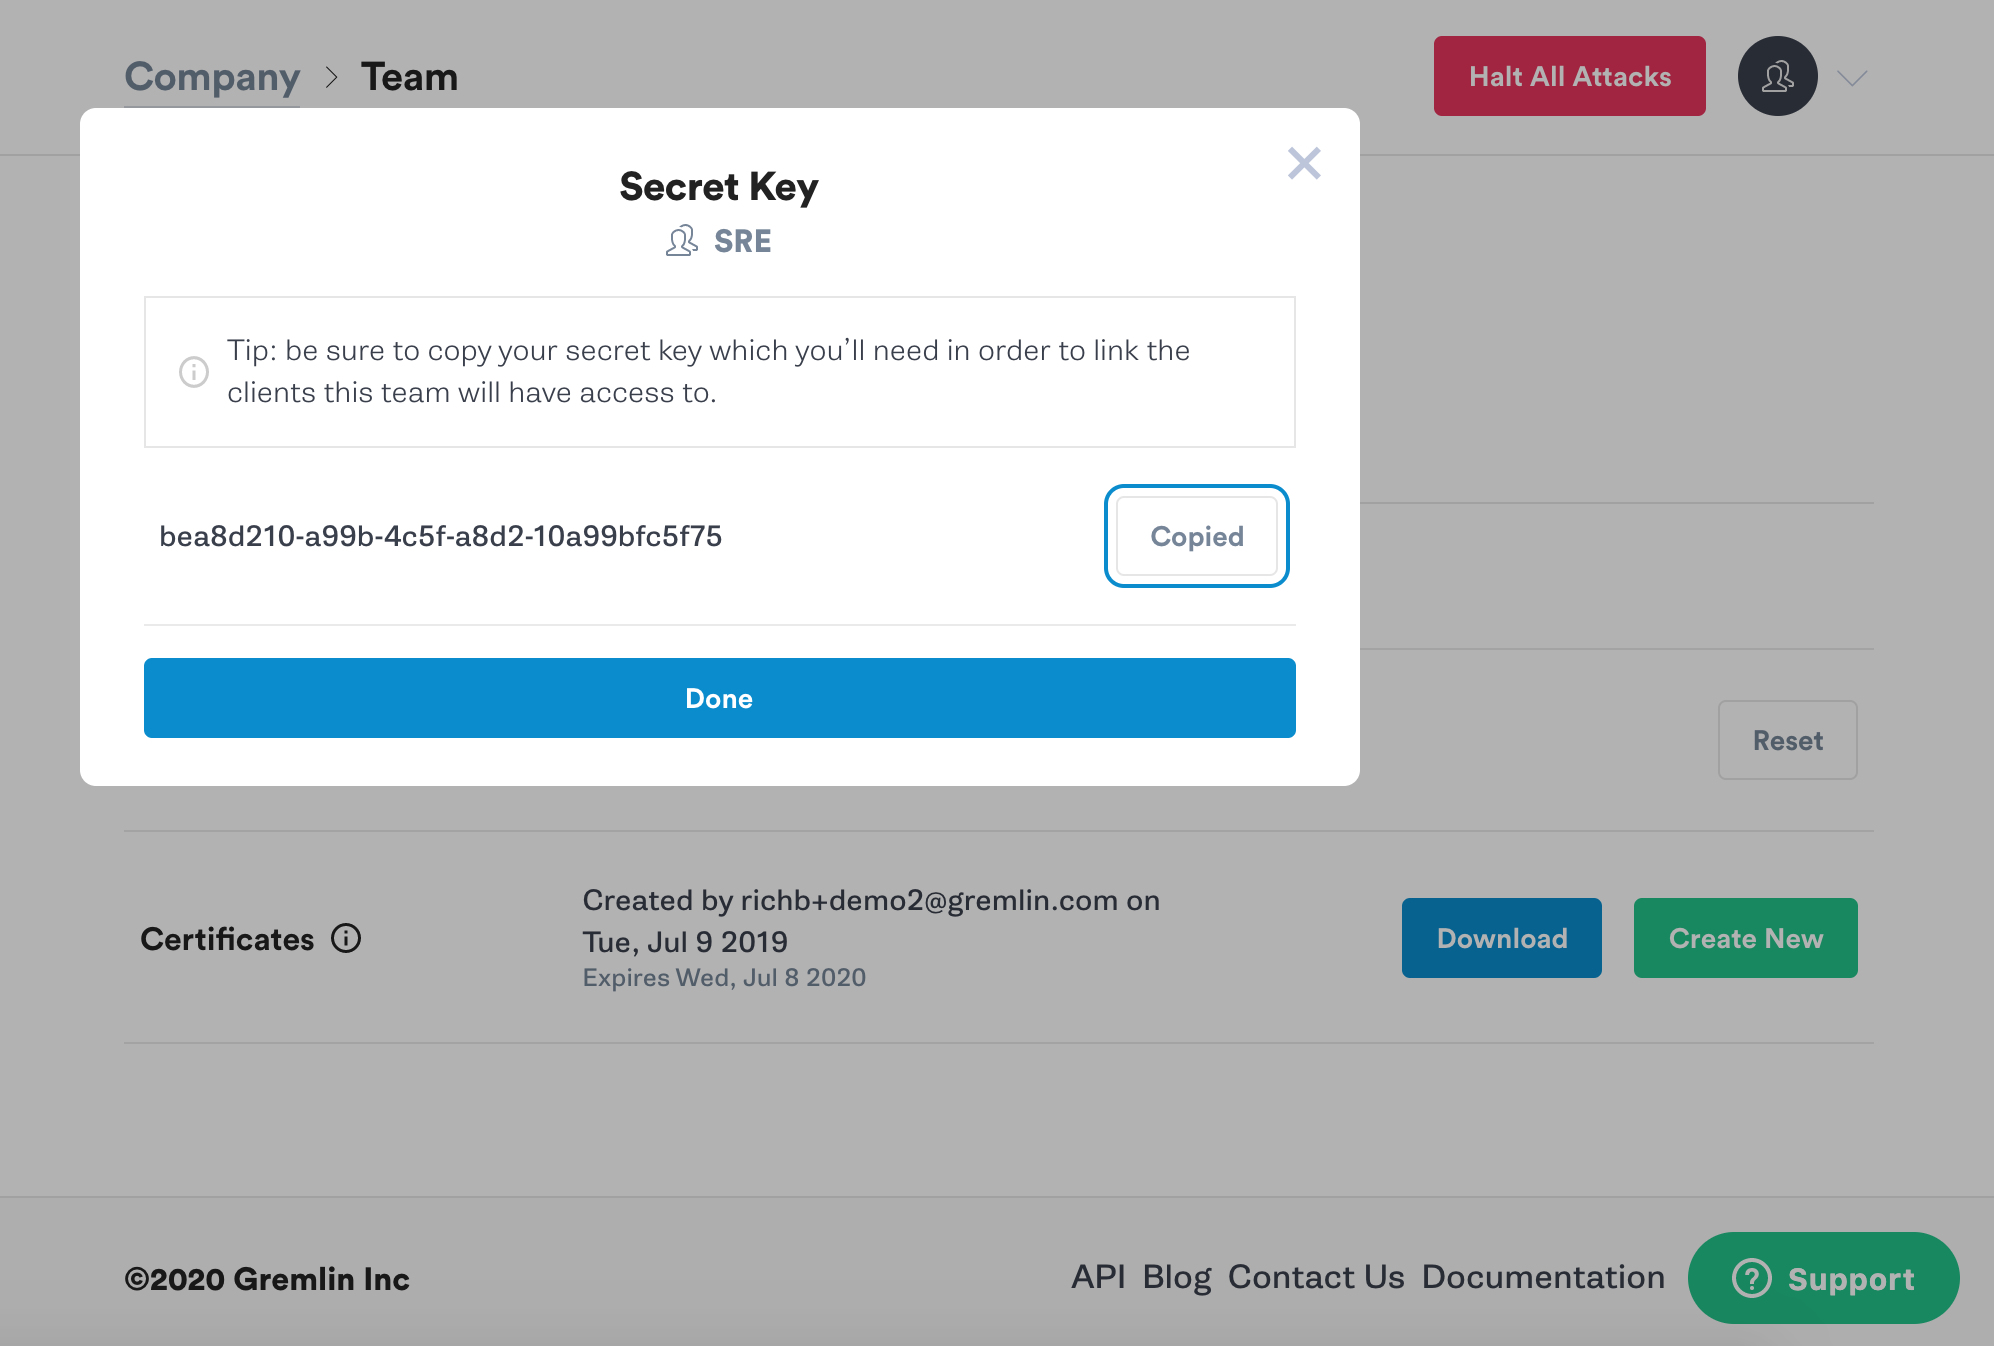
If you don’t know your Secret Key, you will need to reset it. Click the Reset button. You’ll get a popup reminding you that any running agents using the current Secret Key will need to be configured with the new key. Hit Continue.
Next you’ll see a popup screen that will show you the new Secret Key. Make a note of it.
Initialize Gremlin by running the following command and follow the prompts to enter your Team ID and Secret Key.
Now you’re ready to run attacks using Gremlin.
Step 1.2 - View the current clock time and disable NTP
Using the built in Linux date tool check the current system time:
You will see a result similar to below:
Disable NTP on the instance:
Step 1.3 - Run a Time Travel Attack Using Gremlin
First click Create Attack.
First choose your target by selecting the host you registered with Gremlin.
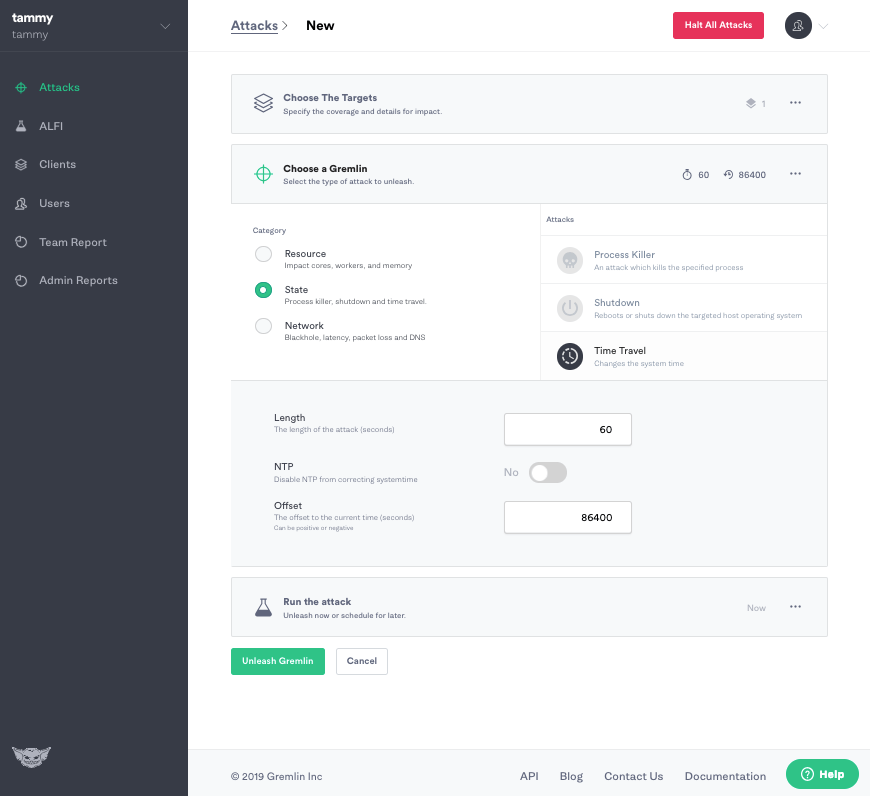
Next we will use the Gremlin App to create a Time Travel Attack. Choose the State Category and Select the Time Travel Attack.
Click Unleash Gremlin and the Gremlin Time Travel Attack will time travel your host.
Step 1.4 - Check the new adjusted clock time
Using the built in Linux date tool check the adjusted system time:
Experiment 2 - Time Travel a cloud infrastructure instance using Gremlin in a Docker container
Step 2.0 - Install Docker
In this step, you’ll install Docker.
Add Docker’s official GPG key:
Use the following command to set up the stable repository.
Update the apt package index:
Make sure you are about to install from the Docker repo instead of the default Ubuntu 16.04 repo:
Install the latest version of Docker CE:
Docker should now be installed, the daemon started, and the process enabled to start on boot. Check that it’s running:
Make sure you are in the Docker usergroup, replace $USER with your username:
Log out and back in for your permissions to take effect, or type the following:
Step 2.1 View the current clock time
Use the built in Linux date tool check the current system time
You will see a result similar to the following:
Disable NTP on the instance:
Step 2.2 - Set up your Gremlin agent credentials
Using your Gremlin login credentials (which were emailed to you when you created your account), log in to the Gremlin App. Open Settings and copy your Team ID and Secret.
Set the following export variables:
Step 2.3 - Run the Gremlin Daemon in a Container
Use docker run to pull the official Gremlin Docker image and run the Gremlin daemon:
Make sure to pass in the three environment variables you set in Step 4. If you don’t, the Gremlin daemon cannot connect to the Gremlin backend.
Use docker ps to see all running Docker containers:
You will see a result similar to the following:
Step 2.4 - Check the new adjusted clock time
Using the built in Linux date tool check the adjusted system time:
Experiment 3 - Time Travel a Kubernetes node using Gremlin
Kubernetes is a container management system which is built with reliability in mind. Architecture is commonly 1 primary and 2 or more nodes which are replicated from the master. When the primary dies the nodes are ready to replace it. When one node dies another will be ready to replace it.
To create a Kubernetes cluster follow our guide on "How to Use and Install Kubernetes with Weave Net". Alternatively you can use a managed Kubernetes service such as GKE, EKS and AKS.
Step 3.0 - Install the Gremlin Agent
The simplest way to install the Gremlin agent on your Kubernetes cluster is to use Helm. If you do not already have Helm installed, go here to get started. Once Helm is installed and configured, the next steps are to add the Gremlin repo and install the agent.
Add the Gremlin Helm chart:
Create a namespace for the Gremlin Kubernetes agent:
Next you will run the <span class="code-class-custom">helm</span> command to install the Gremlin agent. In this command there are three placeholder variables that you will need to replace with real data. Replace <span class="code-class-custom">$GREMLIN_TEAM_ID</span> with your Team ID from Step 1.1, and replace <span class="code-class-custom">$GREMLIN_TEAM_SECRET</span> with your Secret Key from Step 1.1. Replace <span class="code-class-custom">$GREMLIN_CLUSTER_ID</span> with a name for the cluster.
If you are using Helm v3, run this command:
For older versions of Helm, use the --name option:
If you’re not sure which version of Helm you’re using, run this command:
For more information on the Gremlin Helm chart, including more configuration options, check out the chart on Github.
Step 3.1 - View the current clock time and disable NTP
Use the built in Linux date tool check the current system time
You will see a result similar to the following:
Disable NTP on the instance:
Step 3.2 - Creating attacks using the Gremlin App
Example: Creating a Time Travel Attack against a Kubernetes node using the Gremlin App
You can use the Gremlin App or the Gremlin API to trigger Gremlin attacks. You can view the available range of Gremlin Attacks in Gremlin Help.
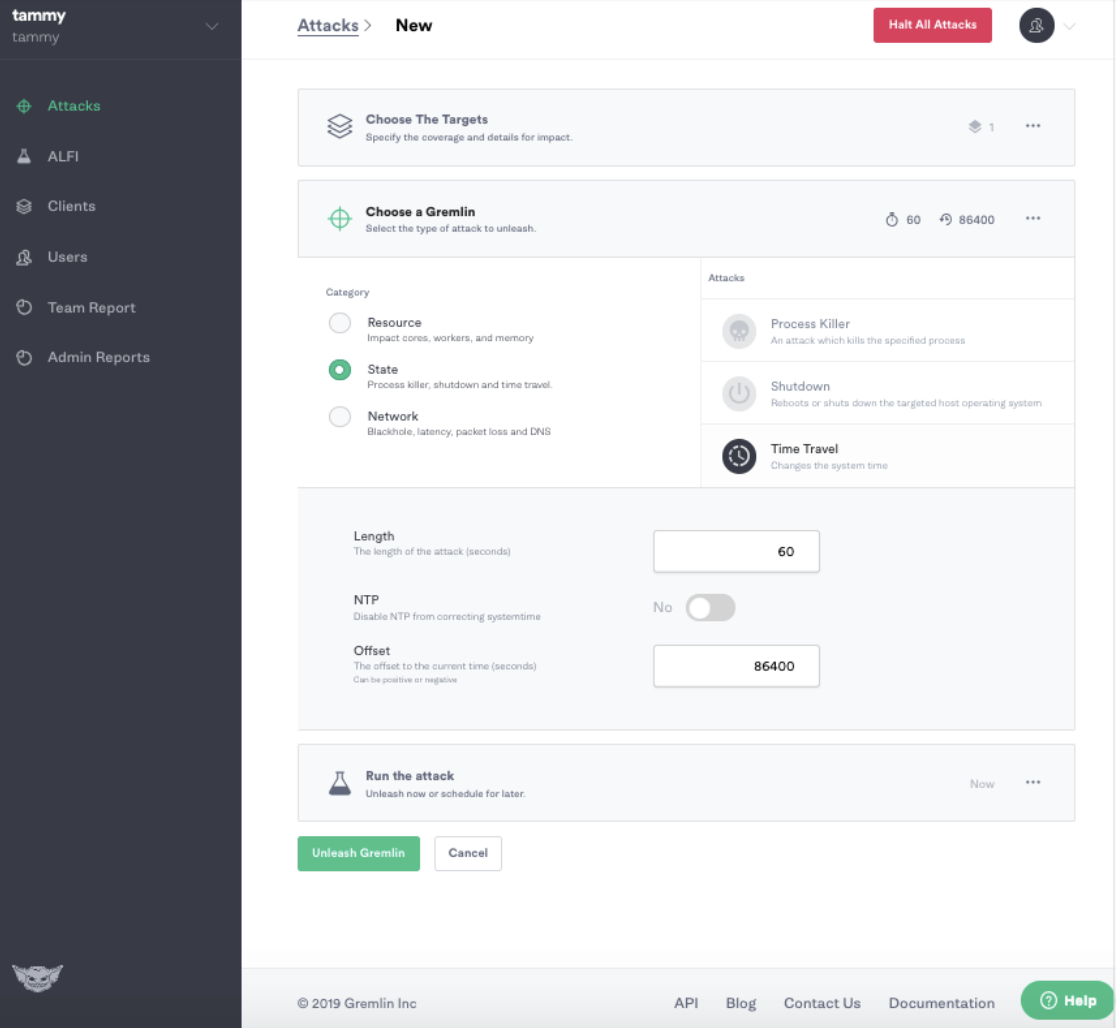
To create a Time Travel Attack, click Attacks in the left Navigation bar and New Attack.
Host targeting should be selected by default. Click on the Exact button to expand the list of available hosts, and select one of them. You’ll see the Blast Radius for the attack is limited to 1 host.
Click “Choose a Gremlin,” and then select State and Time Travel.
Leave the Length set to 60 seconds. Leave the radio button for NTP set to “No,” as we’ve already disabled NTP on the host. Leave the offset set to 86400 second. That’s the amount of clock drift that will be introduced. Then hit the green Unleash Gremlin button.
When your attack is finished it will move to Completed Attacks in the Gremlin App. To view the logs of the Attack, click on the Attack in Completed Attacks then click to the arrow to view the logs.
Step 3.3 - Check the new adjusted clock time
Using the built in Linux date tool check the adjusted system time:
Avoid downtime. Use Gremlin to turn failure into resilience.
Gremlin empowers you to proactively root out failure before it causes downtime. See how you can harness chaos to build resilient systems by requesting a demo of Gremlin.

.svg)