
Cloud computing has made provisioning new servers easy, fast, and relatively cheap. Almost anyone can log into a cloud console, spin up a new server, and deploy an application. And if they need greater uptime, major cloud providers include all kinds of settings, services, and configurations to add fault tolerance and failover. So why is it that many services fail when a single server instance fails?
It’s not enough to spin up a cluster of servers, deploy your applications, and hope for the best. Making your applications resilient to host failures means distributing them across multiple instances—in other words, making them host-redundant. We’ll explore why host redundancy is so important, how you can make your own services redundant, and finally how you can test and prove that your services will stay online even if your hosts fail.
What is host redundancy?
Host redundancy simply means adding one or more backup hosts to support a primary host. The goal is to increase the availability of a service by keeping it running even if the primary host fails. This commonly means running your services on multiple hosts, replicating data and configuration changes across all of them, then using a load balancer or API gateway to direct traffic between them.
Why is host redundancy important?
Before distributed platforms like Kubernetes and tools for managing infrastructure as code (IaC), it was normal to run your entire application stack on hand-crafted, monolithic servers. These servers may have had some redundancy built in, but they were still single points of failure. If a server running a critical application failed, it was “all hands on deck” until it could be brought back online, or the application and data migrated to a different server.
With virtualization, cloud computing, and containerization, the idea of running an entire stack on a single host became antiquated. Now you can spin up a new server at a moment’s notice, or even automate server provisioning if your cluster is becoming full. You still need to configure your systems and cloud environment, but the tools are more readily available now than ever.
How to implement host redundancy
What does it take to make your hosts redundant? The process will vary depending on your cloud provider or on-prem setup, but the basic components are the same: two or more hosts, a shared data store or data replication system, and a load balancer to direct traffic between hosts. For example, on Amazon EC2:
- Set up an Auto Scaling Group (ASG) with at least two instances. While ASGs are designed for scaling, they work for redundancy because they’ll maintain the minimum number of identical instances. This means detecting unhealthy instances, terminating them, and immediately deploying replacements.
- If you use a distributed persistent data store, such as S3, make sure your new instances can access it. Otherwise, you’ll need a way to replicate data between instances.
- Attach a load balancer to your ASG to distribute traffic between available instances.
For this blog, assume we have an application already replicated across two hosts. We want to ensure that we can still access this application after one of the hosts fails.
How to ensure your applications are host-redundant
You can test the redundancy of your applications by recreating a host failure. If you’re familiar with Chaos Monkey, you’ll already have a good idea of what this entails. Netflix built Chaos Monkey to test redundancy by randomly terminating EC2 instances. We’ll be using a more controlled test by using a shutdown experiment and selecting a specific instance instead of a random one. You can, of course, use Gremlin to recreate a Chaos Monkey-style test, but a more thoughtful approach makes it easier to understand exactly how your systems respond to certain failures.
Gremlin provides experiment workflows called Scenarios. With Scenarios, we can organize multiple experiments to run sequentially or in parallel, and we can use Health Checks to monitor our service or observability tool while the test is running. This will tell us whether our services are still running after we shut down one of our hosts.
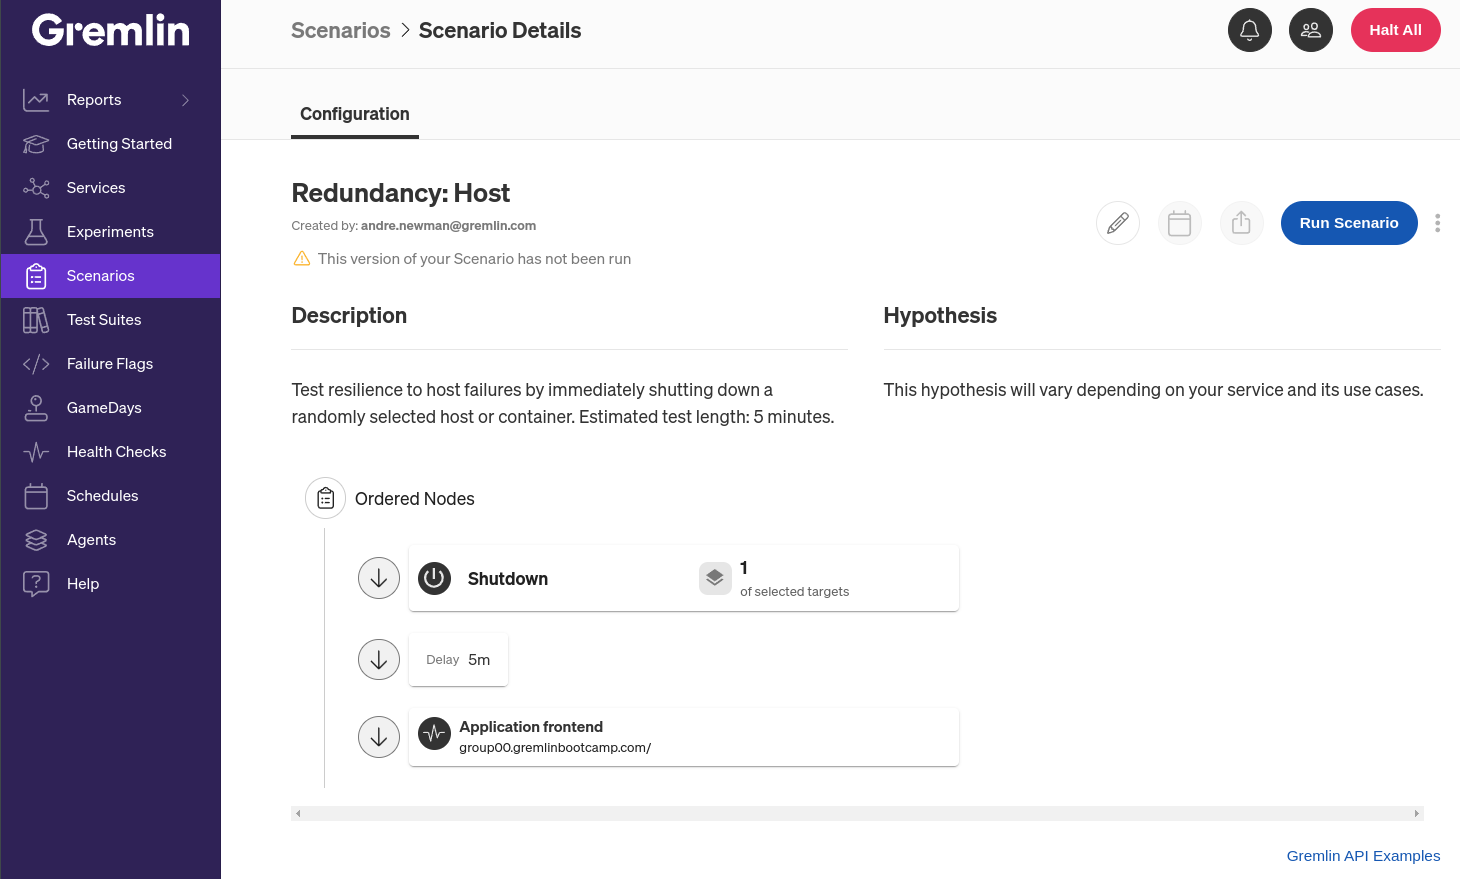
Gremlin comes with over 30 pre-built “Recommended Scenarios” based on common failure modes and industry best practices (you can, of course, create your own). For this blog, we’ll look at the “Redundancy: Host” Scenario.

What does the host redundancy Scenario entail?
Before we run this Scenario, let’s look at what it does. The first step in the Scenario is to run the shutdown experiment. This simply sends a shutdown command to the host. After a five-minute delay, we then run a Health Check to ping our application and make sure it’s still available. Gremlin natively integrates with a number of observability tools, so as a best practice, we recommend using your existing monitors or alerts for your Health Checks. If your application has a public-facing URL, like the one in our example, you can also use that as a simple uptime/availability check.
To run this Scenario yourself, you’ll first need to add your Health Check and select the host you want to target. Open the Scenario page and click the Customize button. In the Ordered Nodes section are three nodes: the first runs the Shutdown experiment, the second introduces a delay, and the last runs the Health Check. Click on the menu on the third node, then select Edit. Here, you can select (or create) the Health Check you want to use. In our example, we already created a Health Check that sends a request to our application frontend:
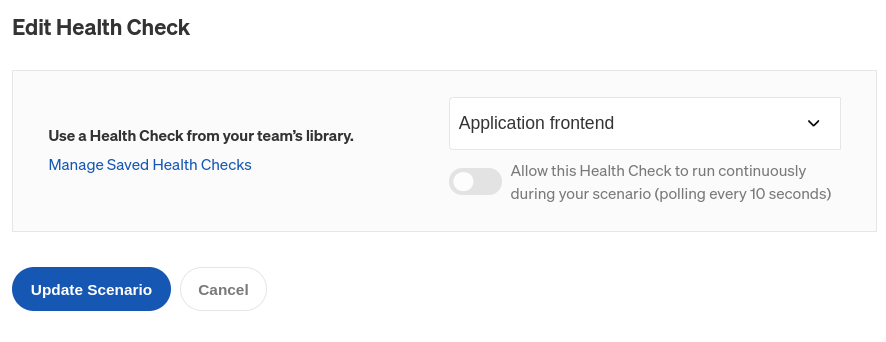
Click Update Scenario to save your Health Check. You can learn more about Health Checks, how they work, and which observability tools Gremlin supports in our documentation
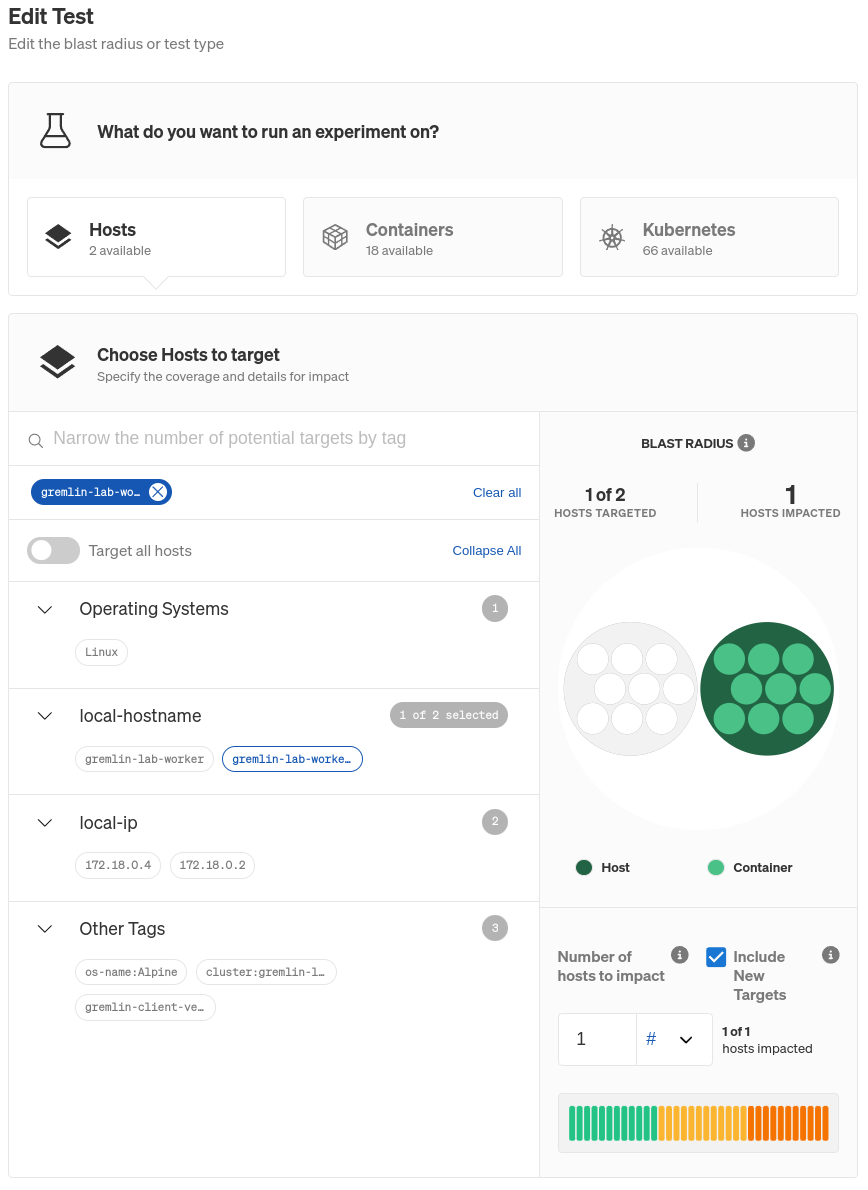
Next, we need to select the host to target. Click on the menu to the right of the shutdown experiment node, then click Edit. Use the tags shown in the side bar to select the host to target. You can learn more about adding tags in Configuring the Gremlin agent.
For now, the easiest method of choosing your desired host may be to use the hostname tag. If you choose a tag that results in multiple hosts being selected, change the Percent of hosts to impact option on the right side of the page until only one host is selected. Gremlin will highlight the hosts that will be impacted.
Further down, the Shutdown experiment will already be selected and configured, so click Update Scenario to save your selection and close the editor pane. Click Save Scenario to save your changes and create a copy of the Scenario that you can now run.
Now, we click Run Scenario. This triggers the Gremlin agent running on our host to issue a reboot syscall to the host (on Windows, it issues an ExitWindowsEx API call). The host performs a graceful shutdown to allow running processes to terminate cleanly, which is why the Scenario has a five-minute delay before running the Health Check.
So, what do we expect to happen? If we’ve set up our host redundancy properly, our load balancer should detect that our target is no longer available and redirect traffic to the healthy host. If we haven’t set up host redundancy, but we’ve configured our hosts to restart automatically (e.g. using an alarm), we’ll have a temporary service interruption until the host boots back up. If neither of these is true, the host will remain offline and service won’t be restored.
Regardless of the outcome, we should document our findings. Gremlin lets you record the results of a Scenario run, including whether the system performed as expected. If you discover a problem, you can also use Gremlin’s Jira integration to create and track a ticket.
Continuously monitoring service health while running a Scenario
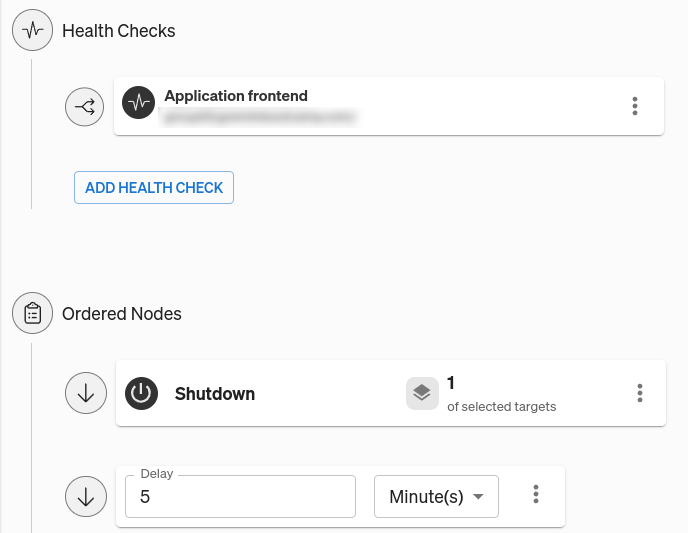
One downside to running a Health Check this way is that it only runs once. In the five-minute delay between running the experiment and running the check, we have no feedback on whether our service is available. Sure, we could open the AWS console or try accessing our service in a web browser, but this means having to constantly monitor our systems and be ready to stop the Scenario manually. A better way to test redundancy would be to make the Health Check continuous, meaning it runs every 10 seconds during the Scenario.
To do this, we need to edit the Scenario again, then click the Add Health Check button at the top of the node list under “Health Checks”. We’ll select the Health Check we've already created, then click Update Scenario. Health Checks added this way are continuous by default. Click Save Scenario. Now, when we run the Scenario, Gremlin will check our application every 10 seconds and halt the Scenario if it’s unavailable.
What other scenarios should I be testing?
When you’re ready to scale up your testing from hosts to entire availability zones, check out our blog on zone redundancy testing. You’ll also learn how to run a blackhole experiment, which drops network traffic to a target instead of shutting it down. You can use this to simulate both host and zone outages, since blackhole experiments effectively disconnect the target system(s) from others.
Gremlin includes these, along with 30 other Recommended Scenarios out of the box. If you're interested in testing your own services, you can sign up for a free 30-day Gremlin trial.
Length:
5 minutes
Experiment(s):
Gremlin's automated reliability platform empowers you to find and fix availability risks before they impact your users. Start finding hidden risks in your systems with a free 30 day trial.
sTART YOUR TRIALHow to make your services zone redundant
Learn how to prepare for—and become resilient to—availability zone and region outages.


Learn how to prepare for—and become resilient to—availability zone and region outages.
Read moreHow to deploy a multi-availability zone Kubernetes cluster for High Availability
Many cloud infrastructure providers make deploying services as easy as a few clicks. However, making those services high availability (HA) is a different story. What happens to your service if your cloud provider has an Availability Zone (AZ) outage? Will your application still work, and more importantly, can you prove it will still work?

Many cloud infrastructure providers make deploying services as easy as a few clicks. However, making those services high availability (HA) is a different story. What happens to your service if your cloud provider has an Availability Zone (AZ) outage? Will your application still work, and more importantly, can you prove it will still work?
Read more