


Authenticating Users with Microsoft Entra ID (Azure Active Directory) via SAML
Supported platforms:
This page provides instructions on configuring Microsoft Entra ID (previously Azure Active Directory) to enable SAML-based authentication. Before following this guide, first follow instructions 1–3 in Authenticating users with SAML. You’ll need the Gremlin Service Provider (SP) metadata fields and claims. This page will show you how to configure Microsoft Entra ID with your metadata and claims.
Enabling SAML-based authentication with Microsoft Entra ID
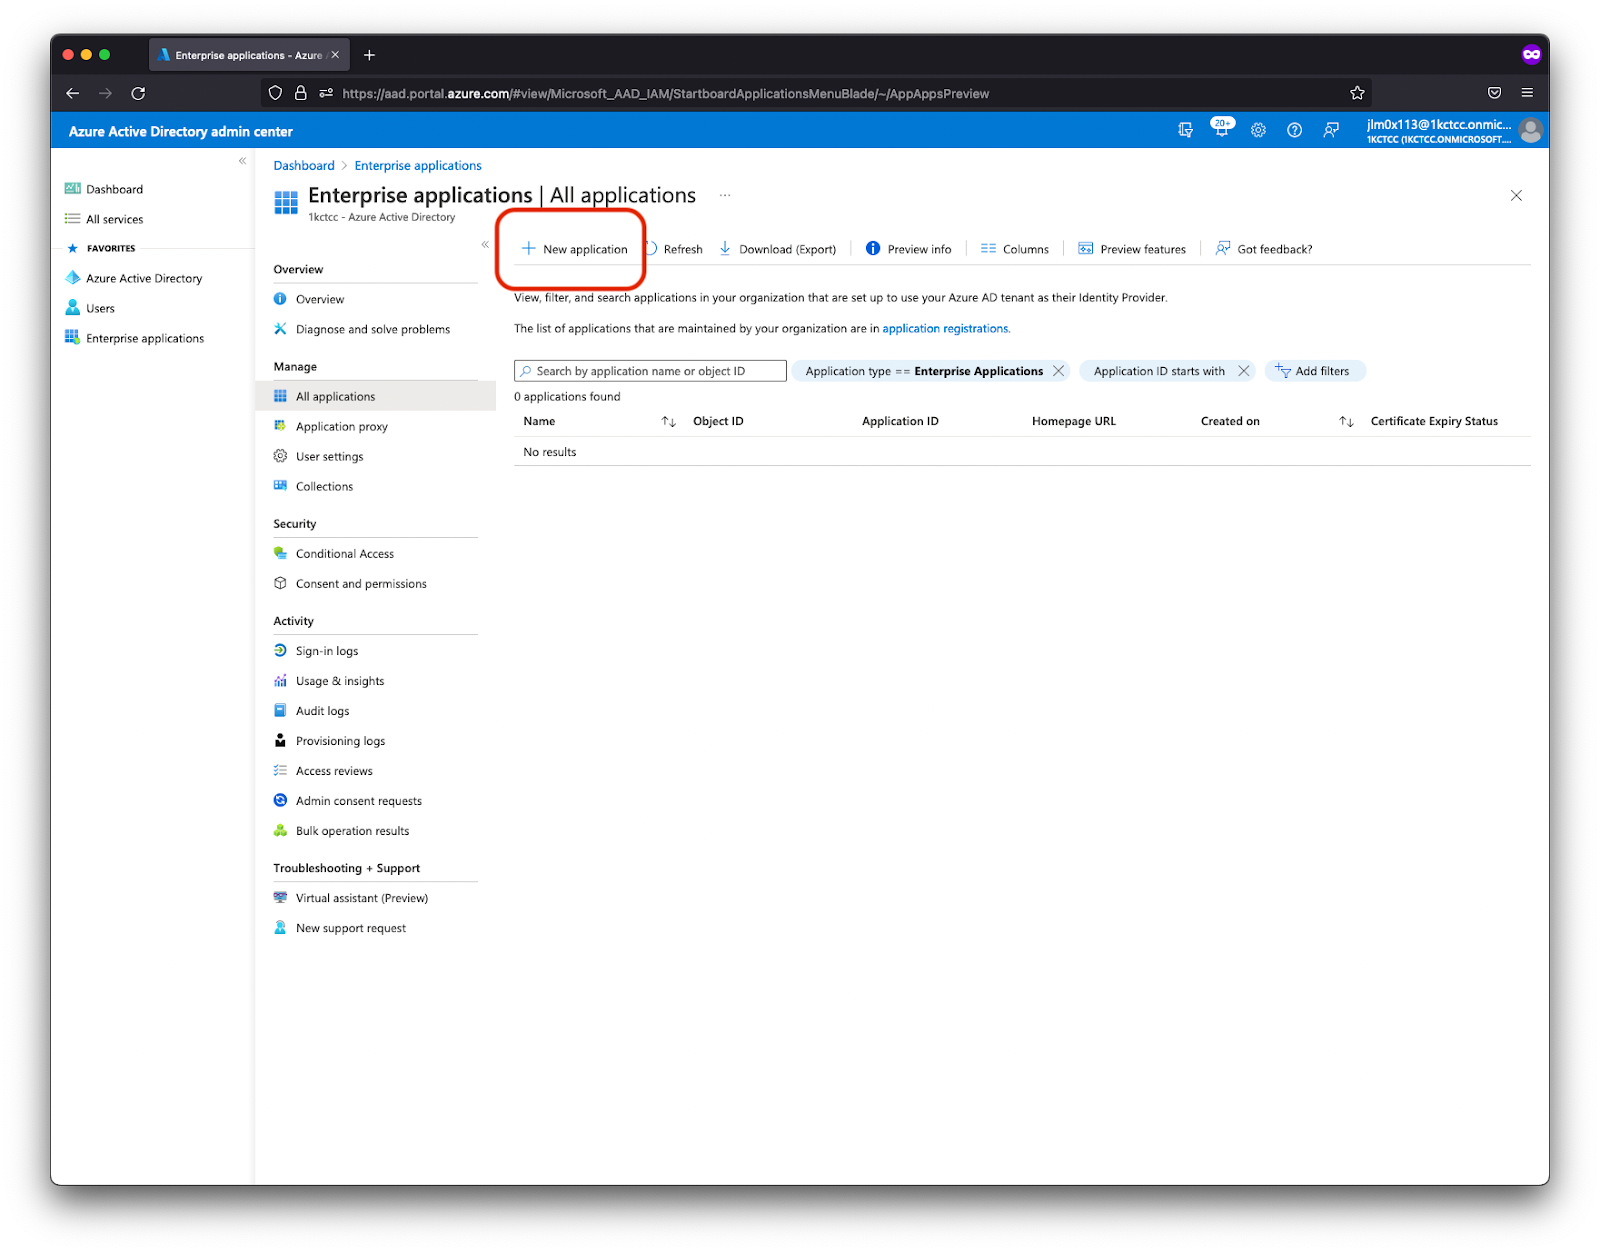
- Log into your Azure account and navigate to the Microsoft Entra ID admin center.
- Select Enterprise applications, then click New application.
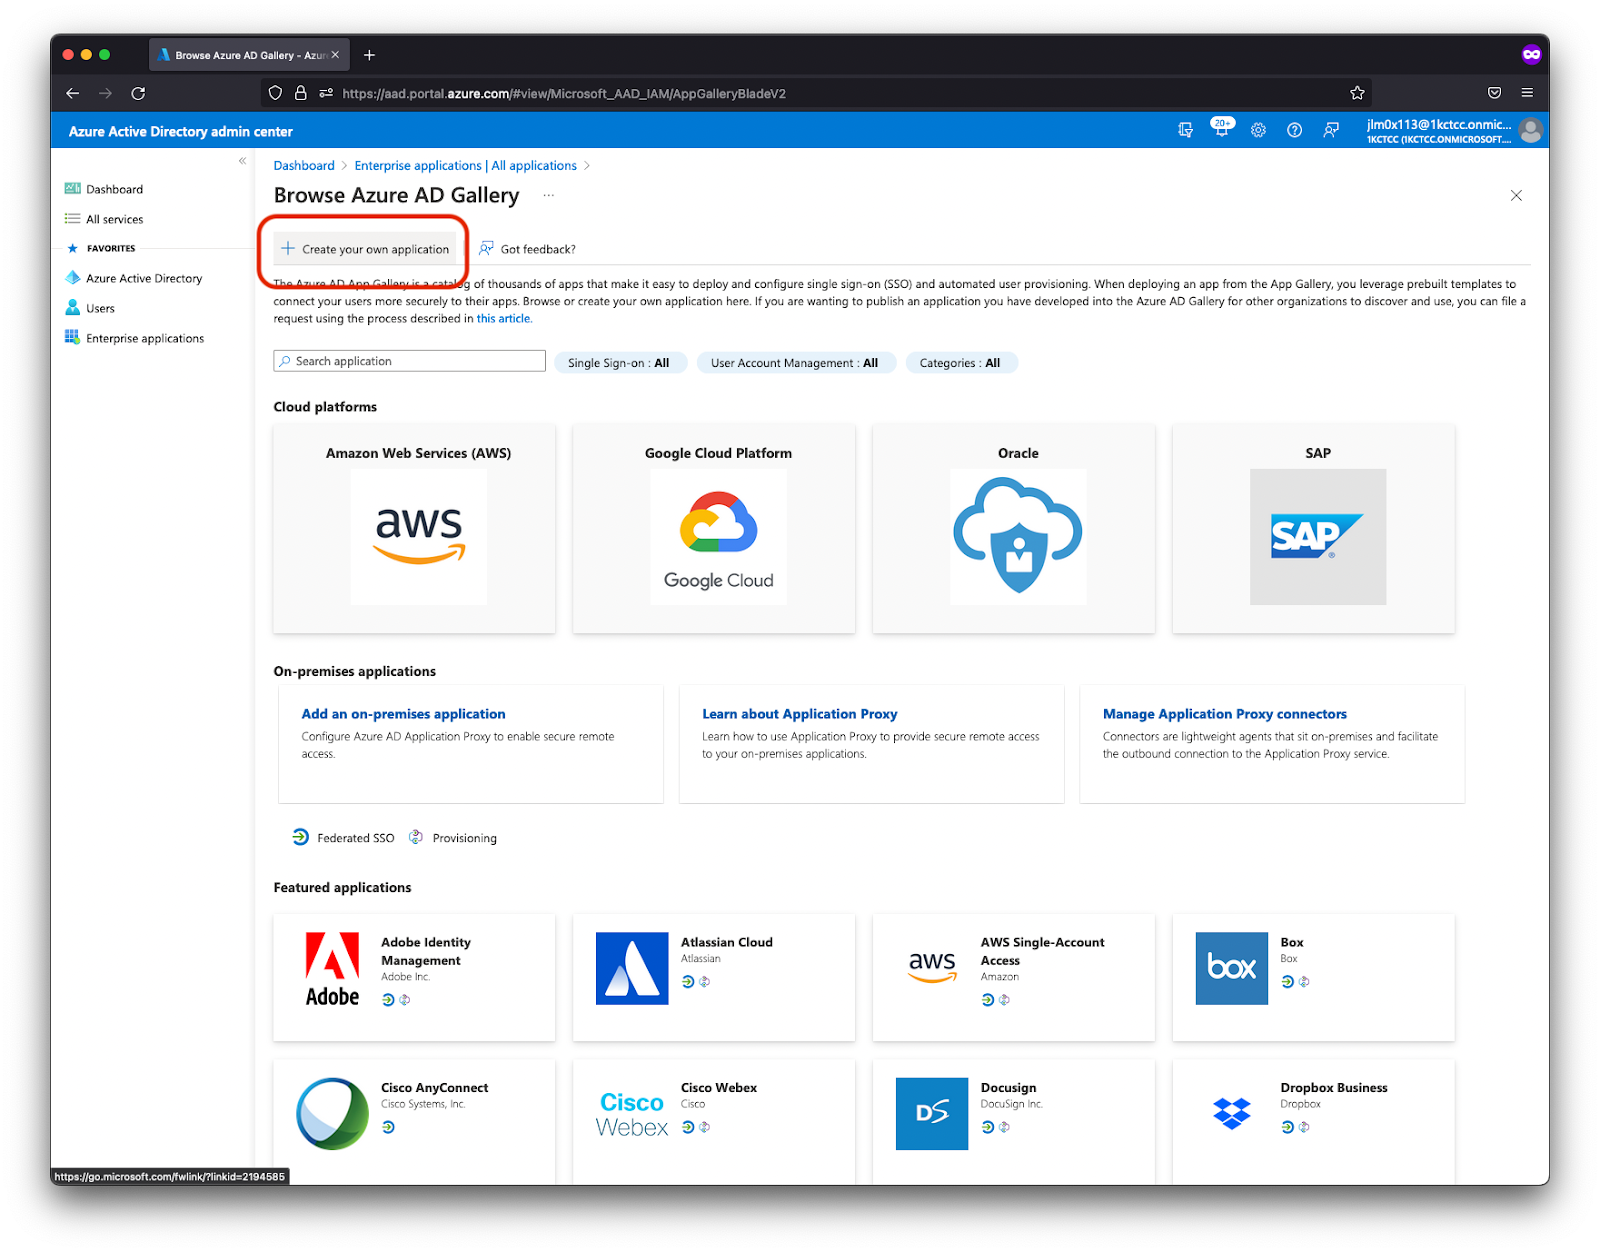
- Select Create your own application.
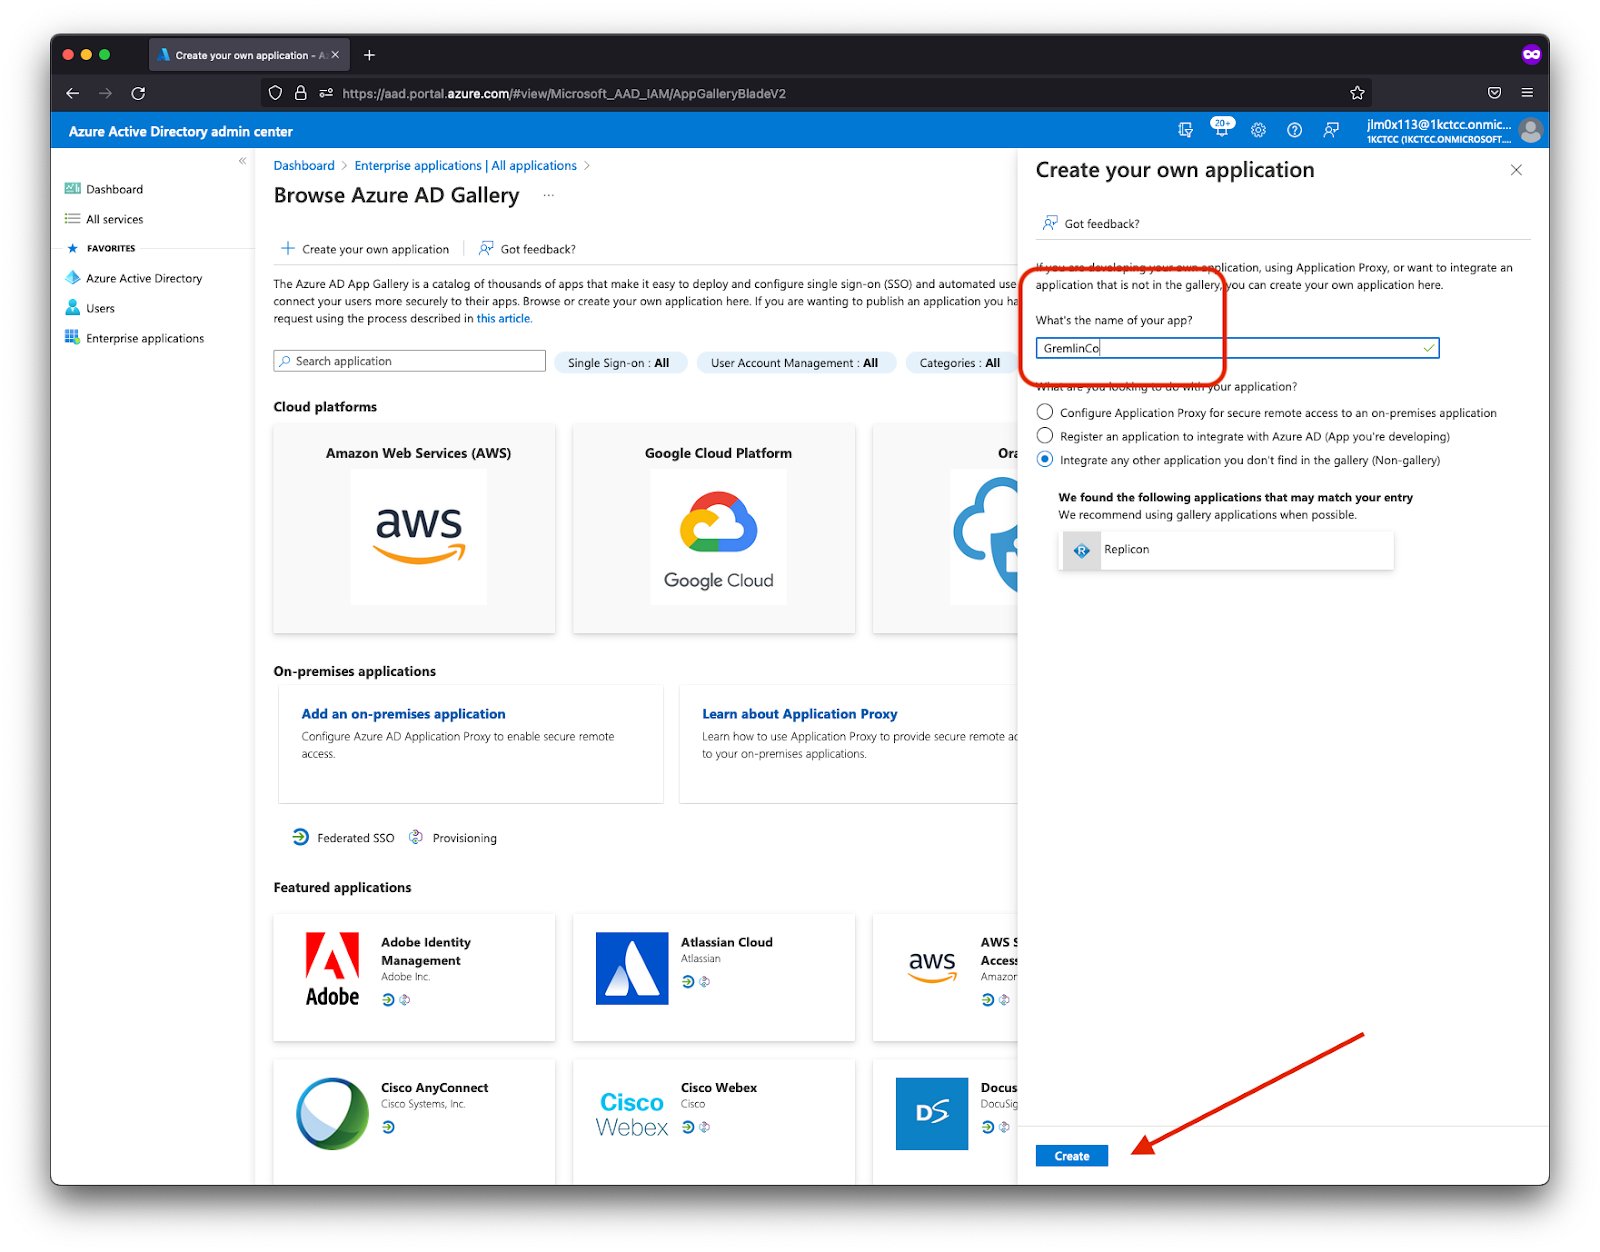
- Enter a name for your application (e.g. “GremlinSSO”) and click Create.
- After saving, select the new application from the list of available Enterprise Applications.

- From its properties page, click Set up single sign-on.

- Select SAML for the SSO method.

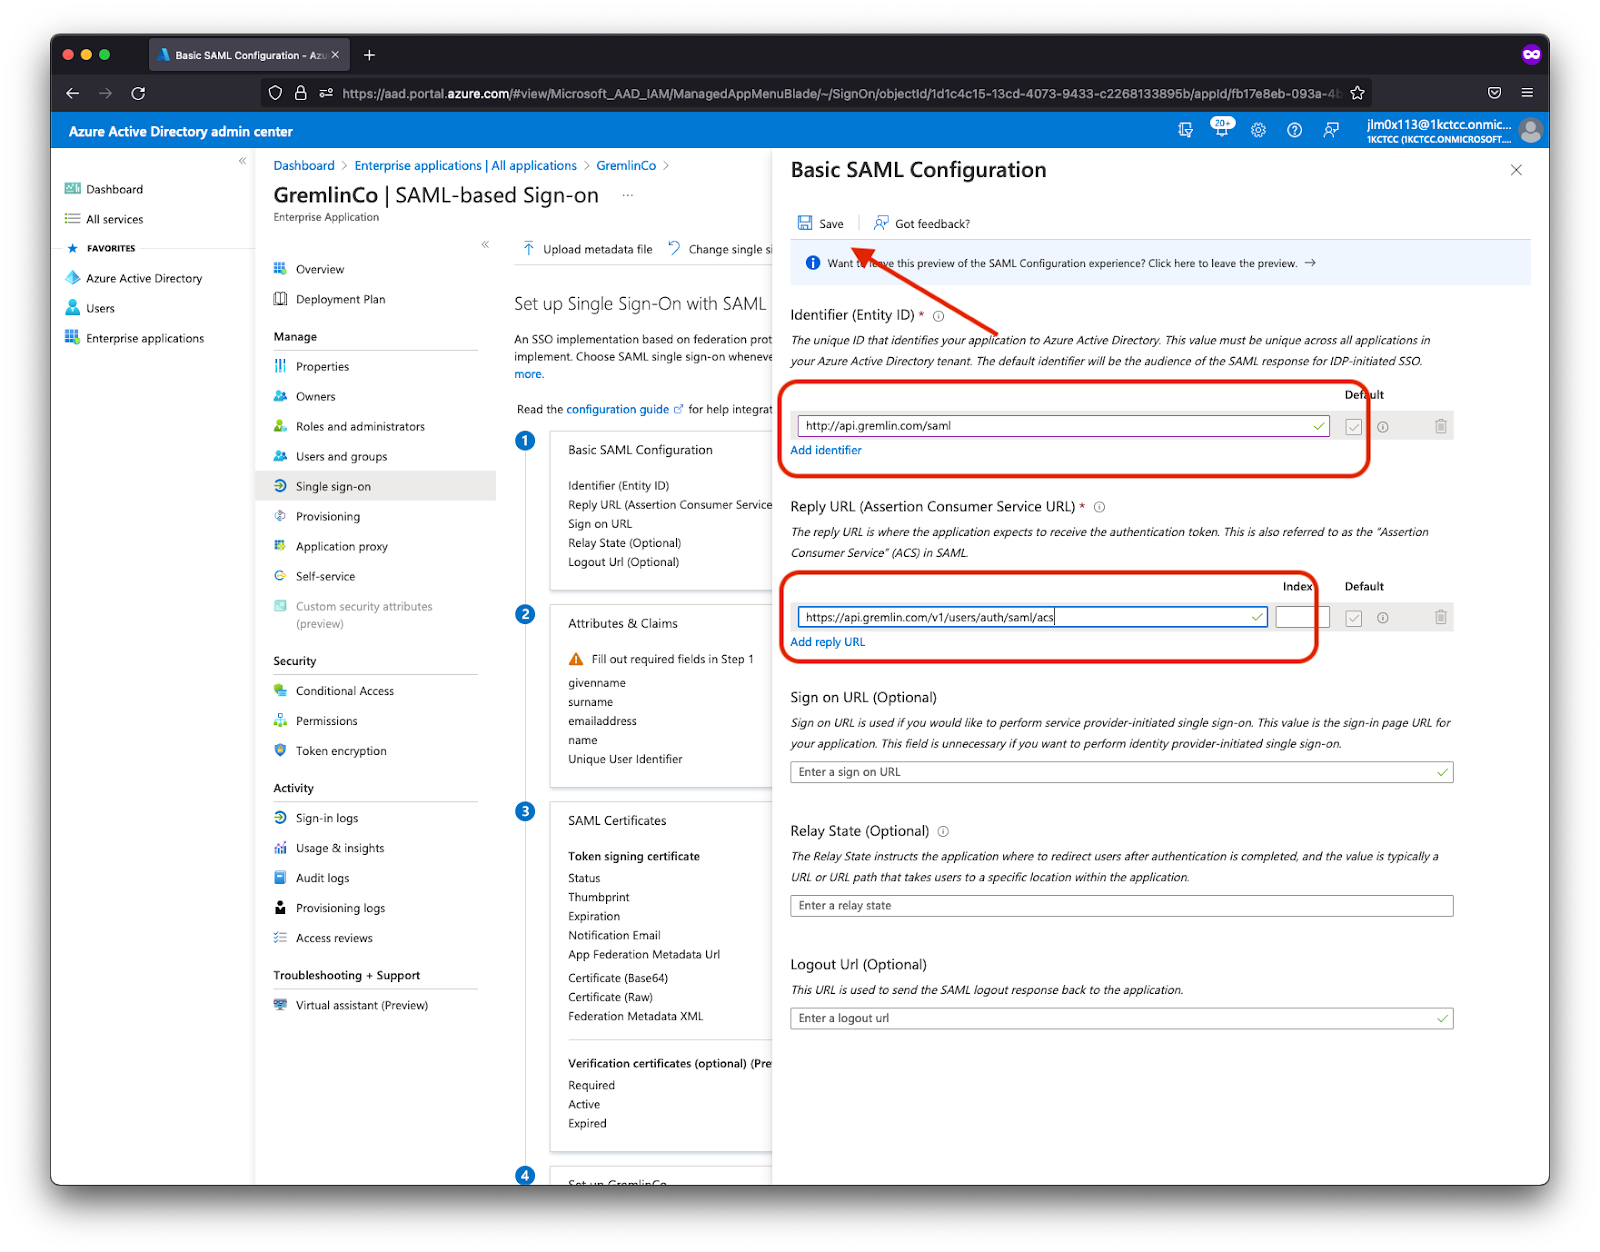
- Under Basic SAML Configuration, click the Edit button.
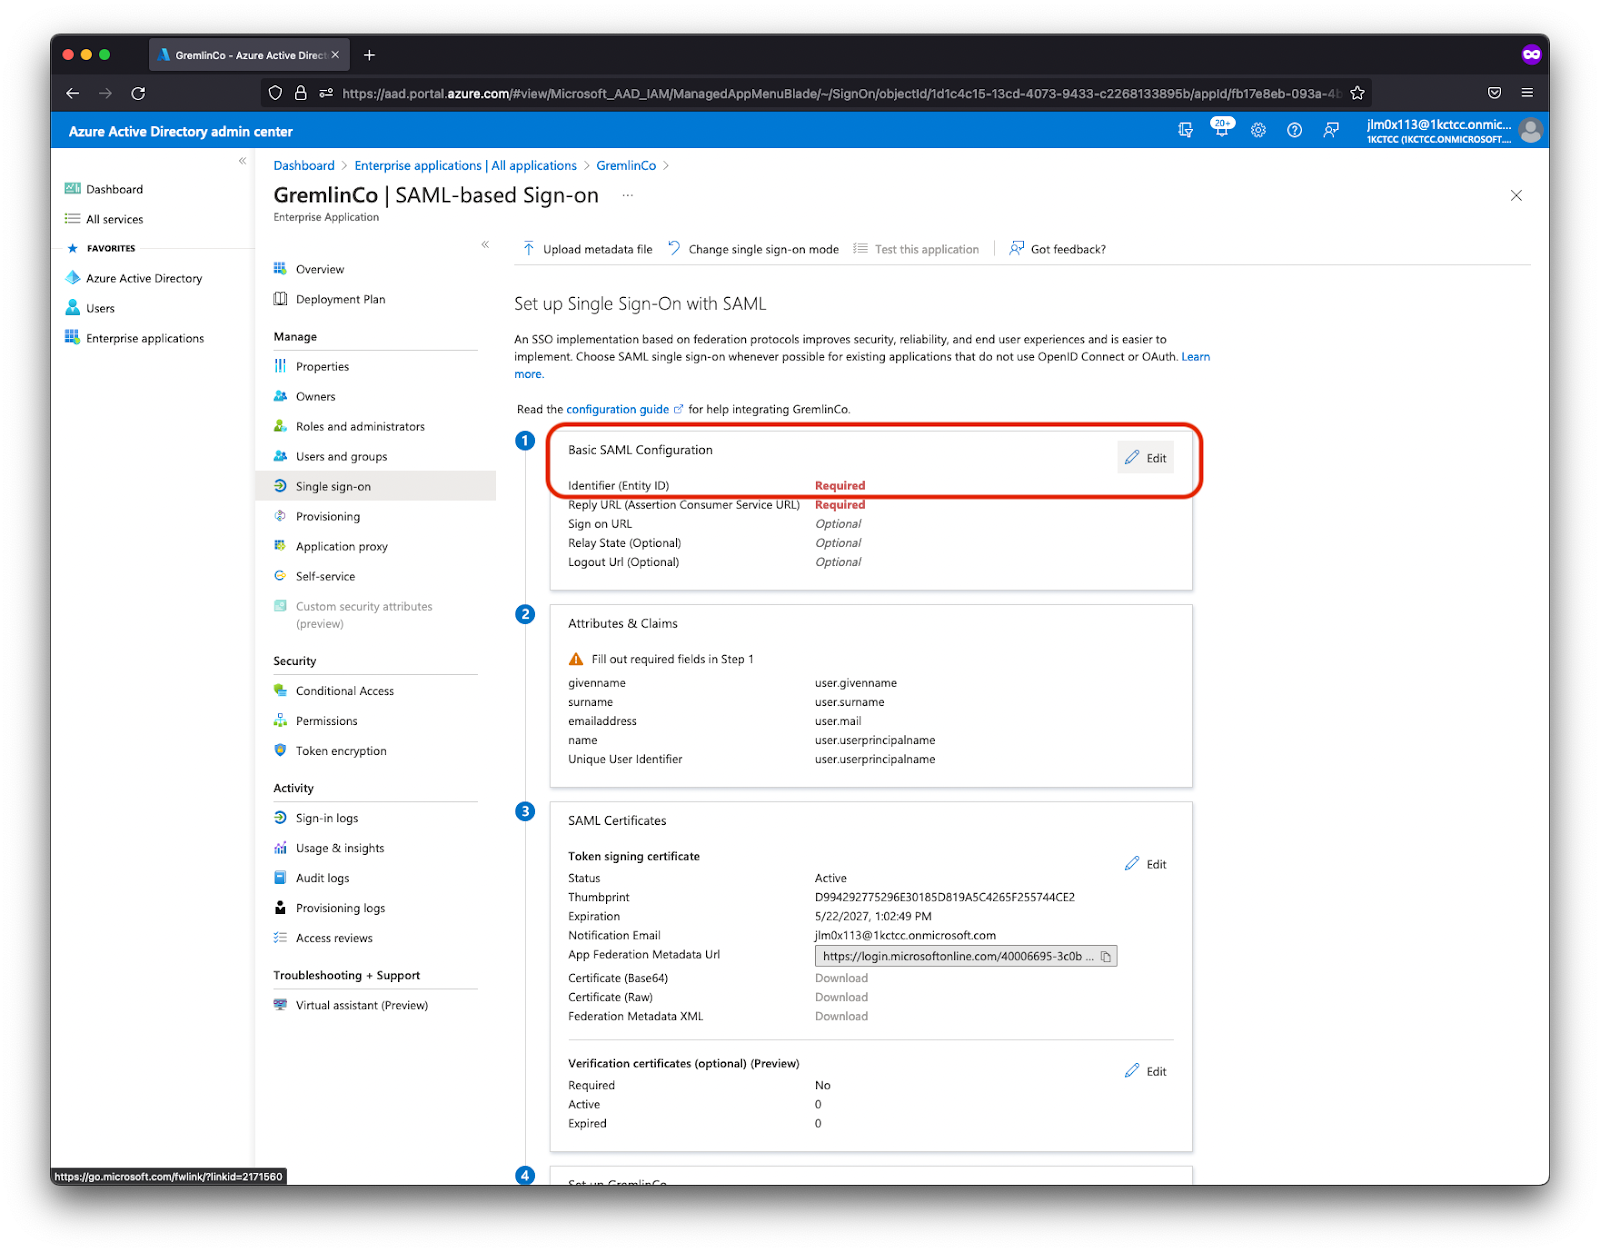
- Enter the values of Identifier (Entity ID) and Reply URL (Assertion Consumer Service URL). These values are provided in the Gremlin documentation here. As of May 24, 2024, the current values are:
- Identifier (Entity ID):
http://api.gremlin.com/saml - Reply URL (Assertion Consumer Service URL):
https://api.gremlin.com/v1/users/auth/saml/acs
- Identifier (Entity ID):
- Enter your Relay State value. This is specific to your Gremlin company, so copy it from the SAML Setup section of the Gremlin UI or API.
- After entering the required information, click Save to return to the previous screen.
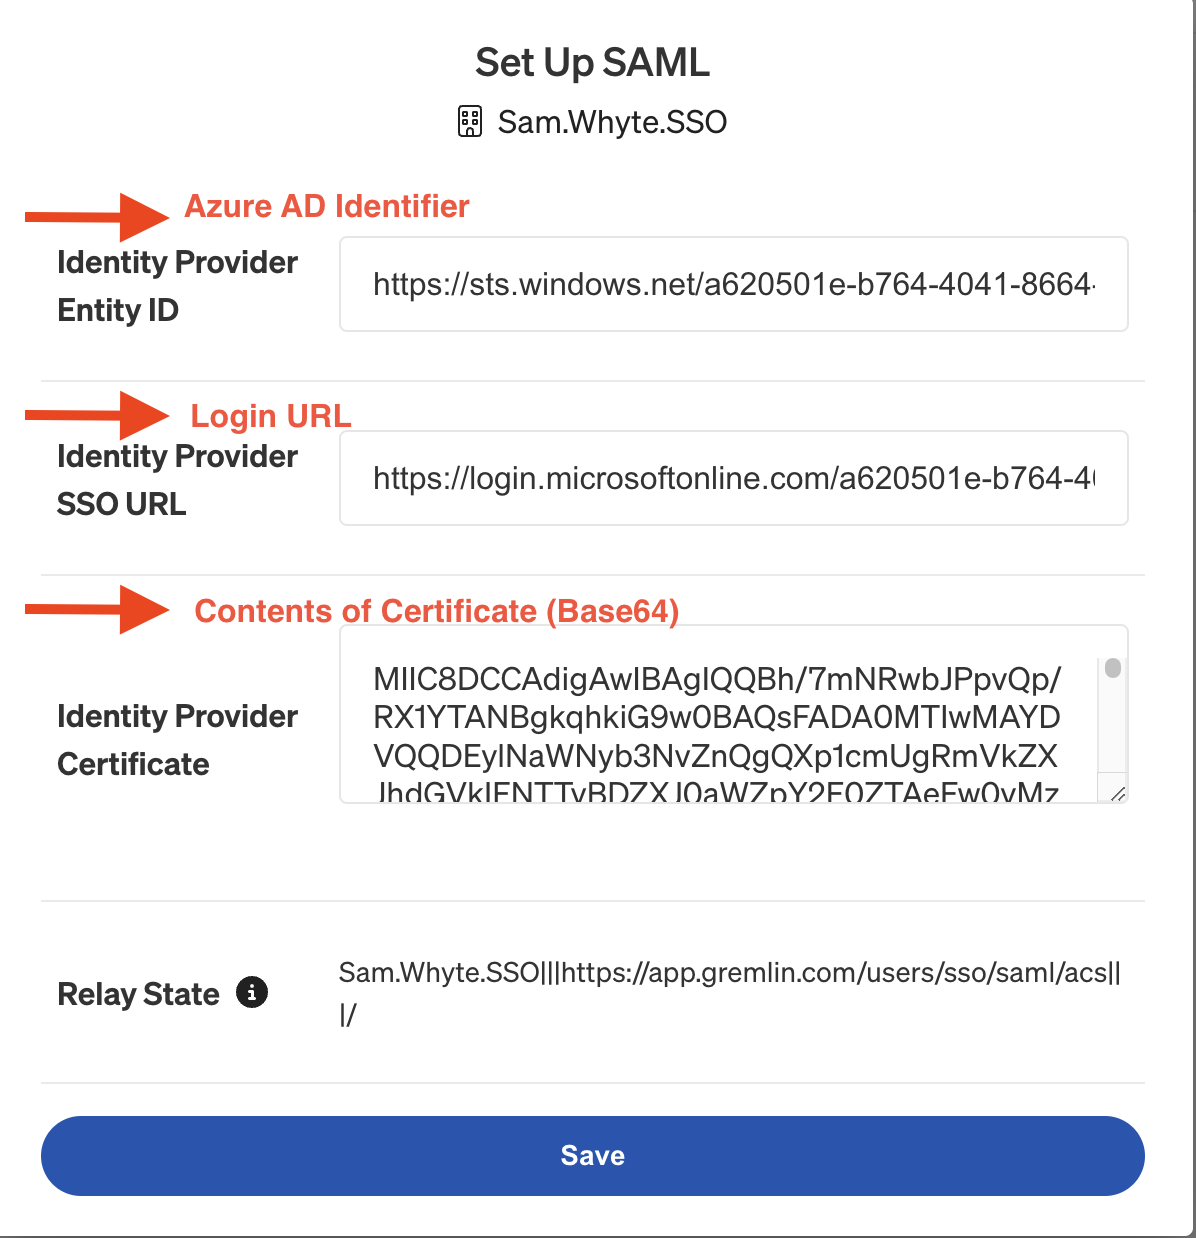
- From the Enterprise Application SAML configuration screen, note the following three values, for use in the Gremlin SAML configuration screen within the Gremlin app. Fetch the Certificate (Base64), the Login URL, and the Azure AD Identifier.
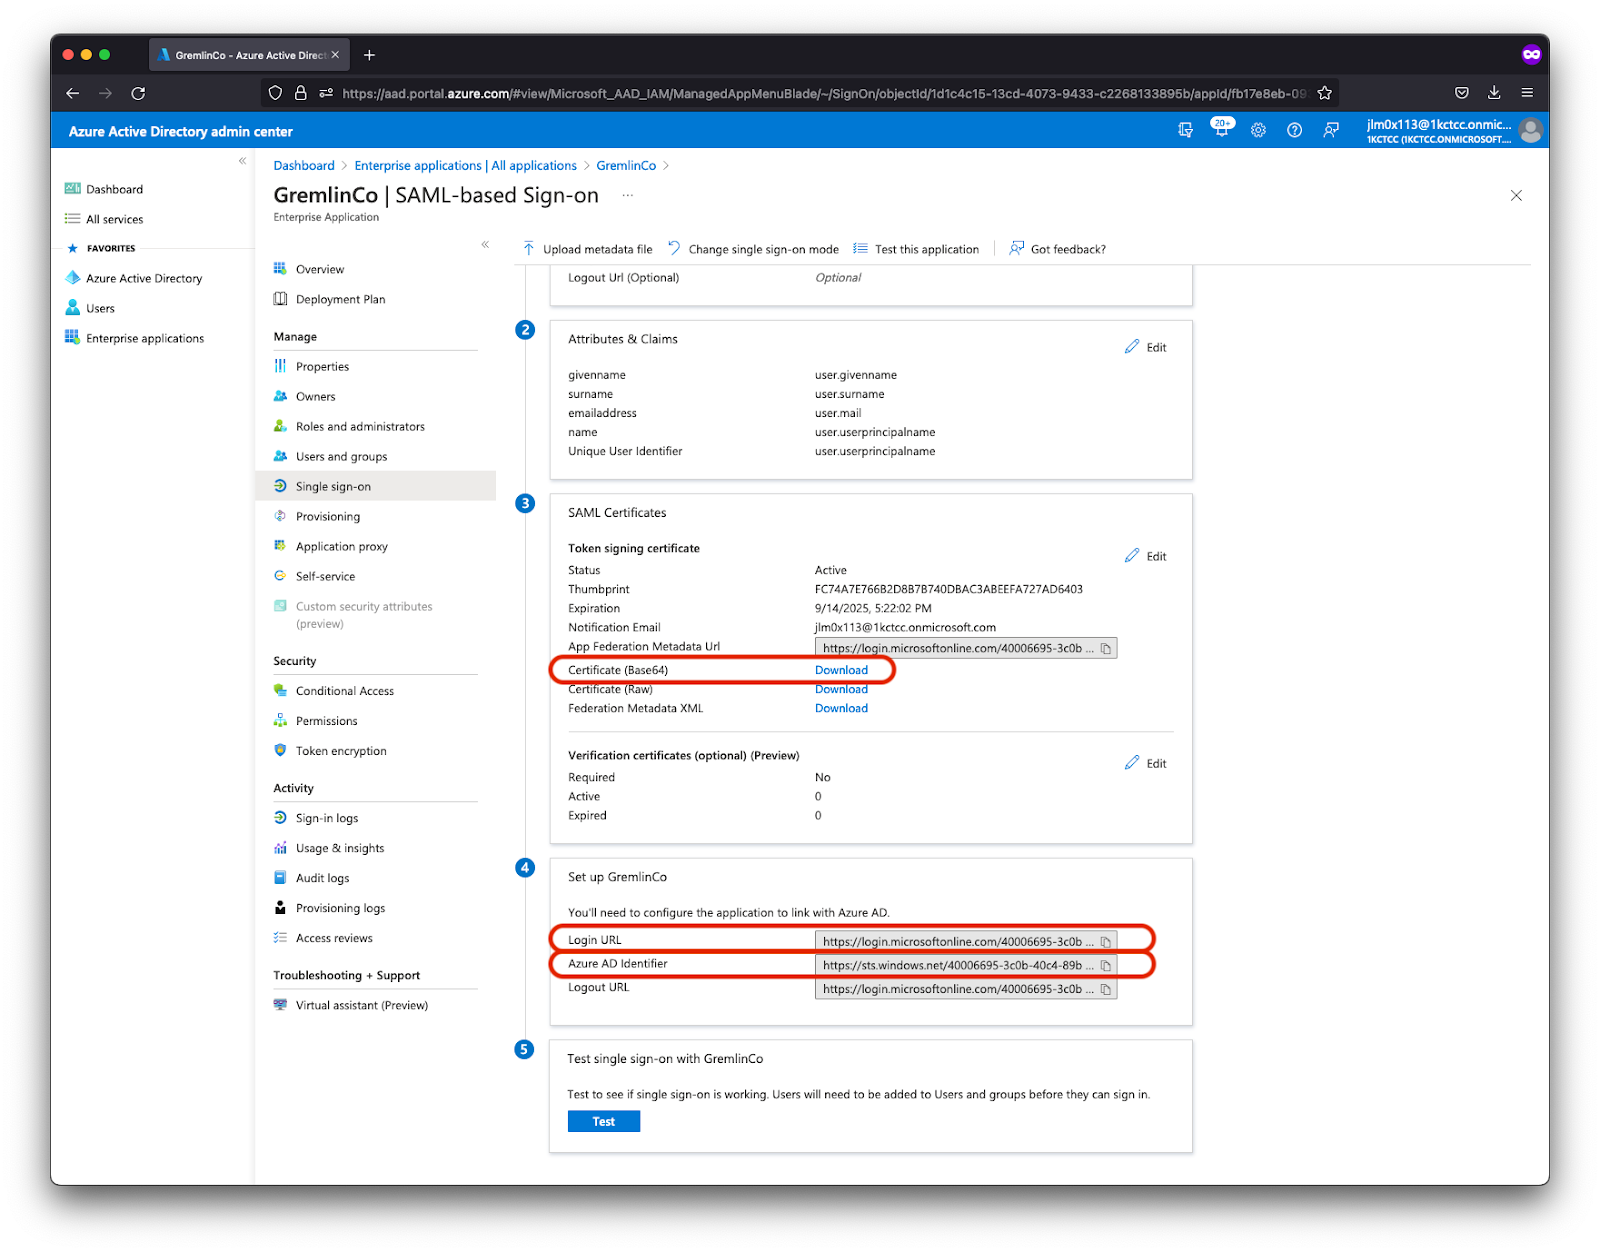
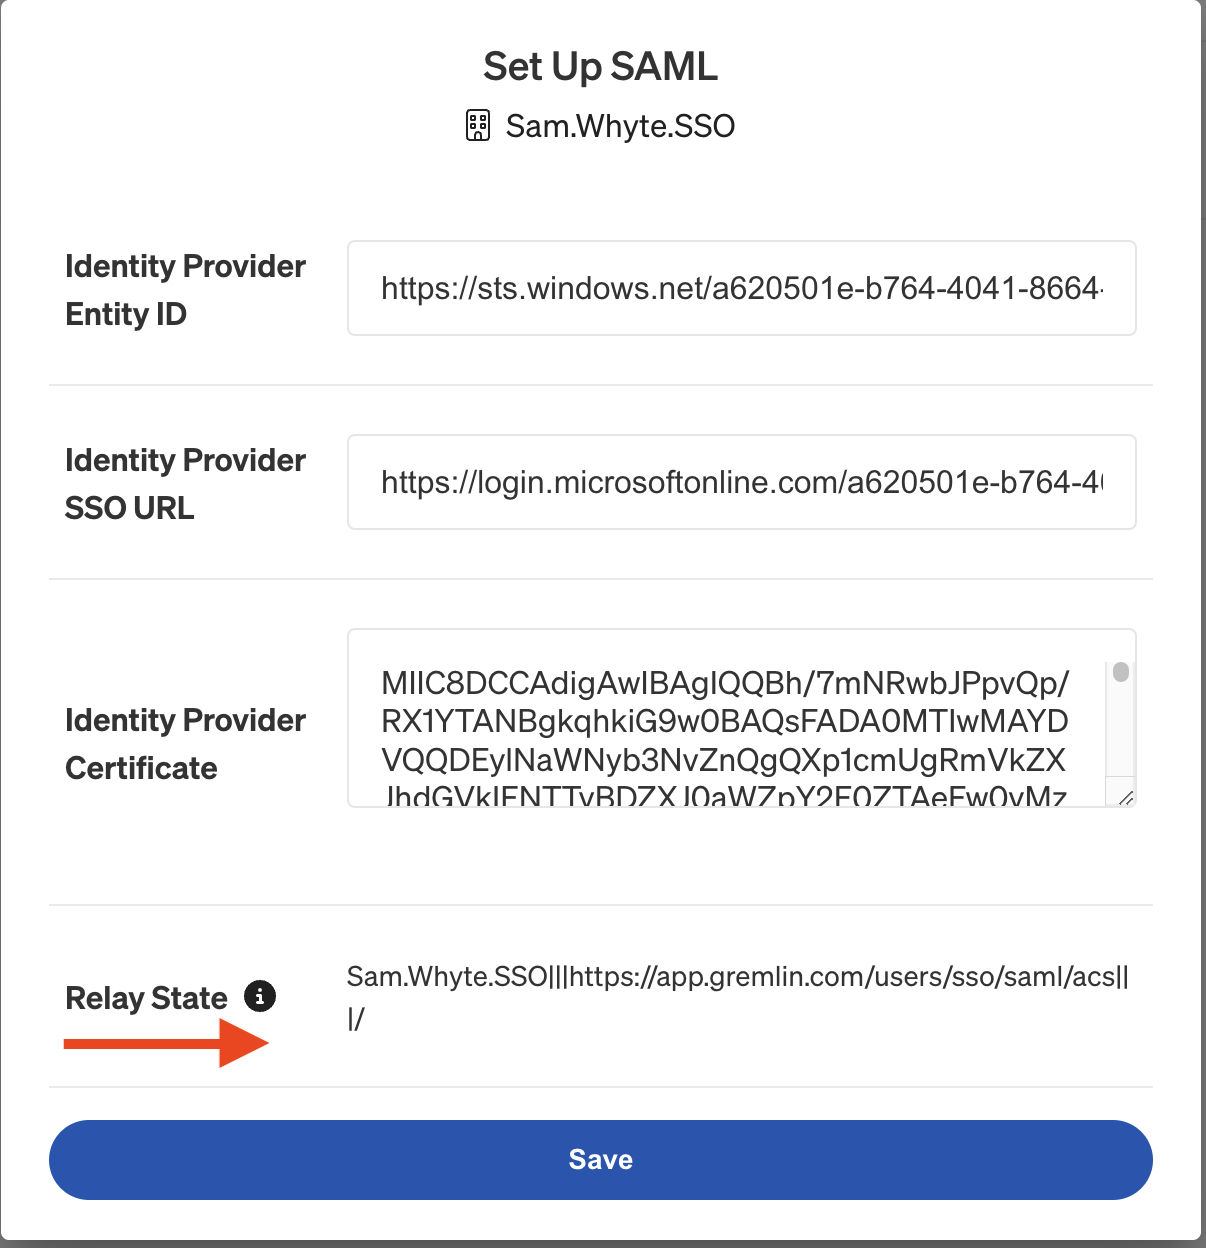
- In a separate window, open https://app.gremlin.com/settings/security and add the values from the previous step into the appropriate fields:some text
- Azure AD Identifier / Microsoft Entra Identifier goes into the Identity Provider Entity ID field.
- Login URL goes into the Identity Provider SSO URL field
- The contents of the Certificate (Base64) file go into the Identity Provider Certificate field. Note that if you are on Windows, you’ll want to open this file using Wordpad or Notepad. Otherwise, the value may not be formatted correctly.
At this point we’ve completed the basic SAML configuration. You can choose to configure your SAML claims in Microsoft Entra ID, but that process is beyond the scope of this document.
Troubleshooting SAMLResponse
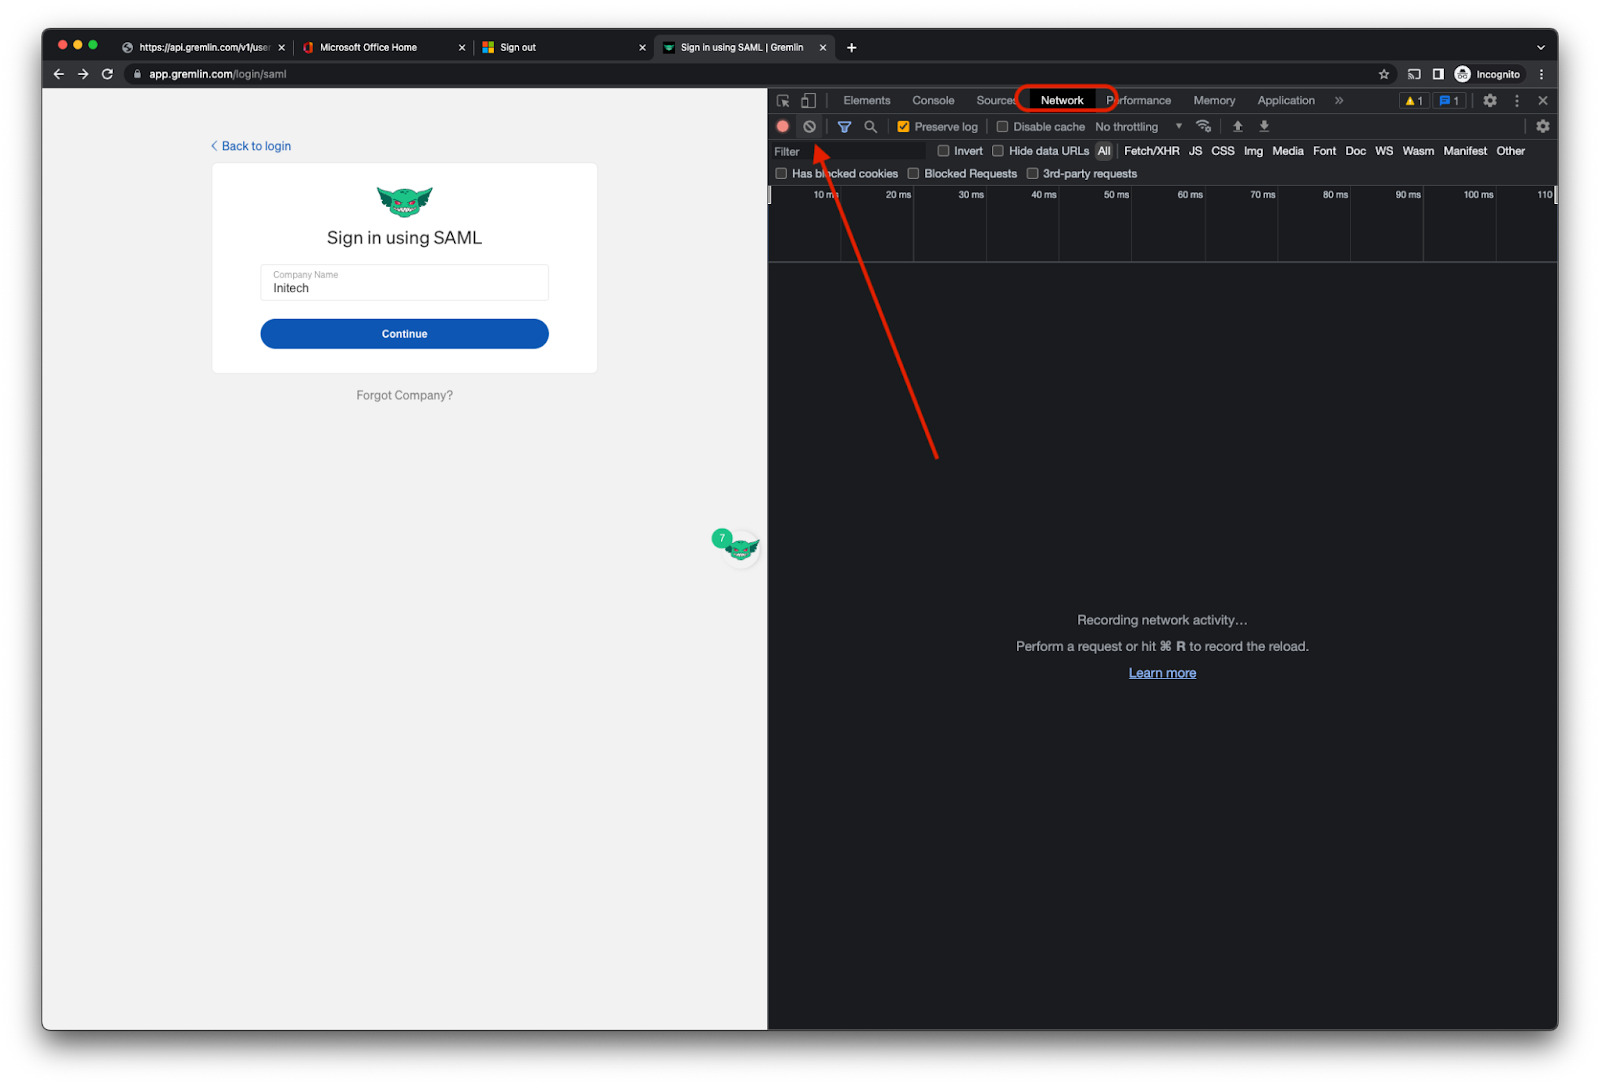
If you're getting an unexpected SAMLResponse from your IdP, try the following steps. These steps are based on the AWS Identity and Access Management user guide to viewing a SAML response in your browser.
First, open your browser's Developer Tools. In Chrome, you can do this from the View->Developer->Developer Tools Menu item. Select the ‘Network’ tab and reset the capture log with the Clear button:
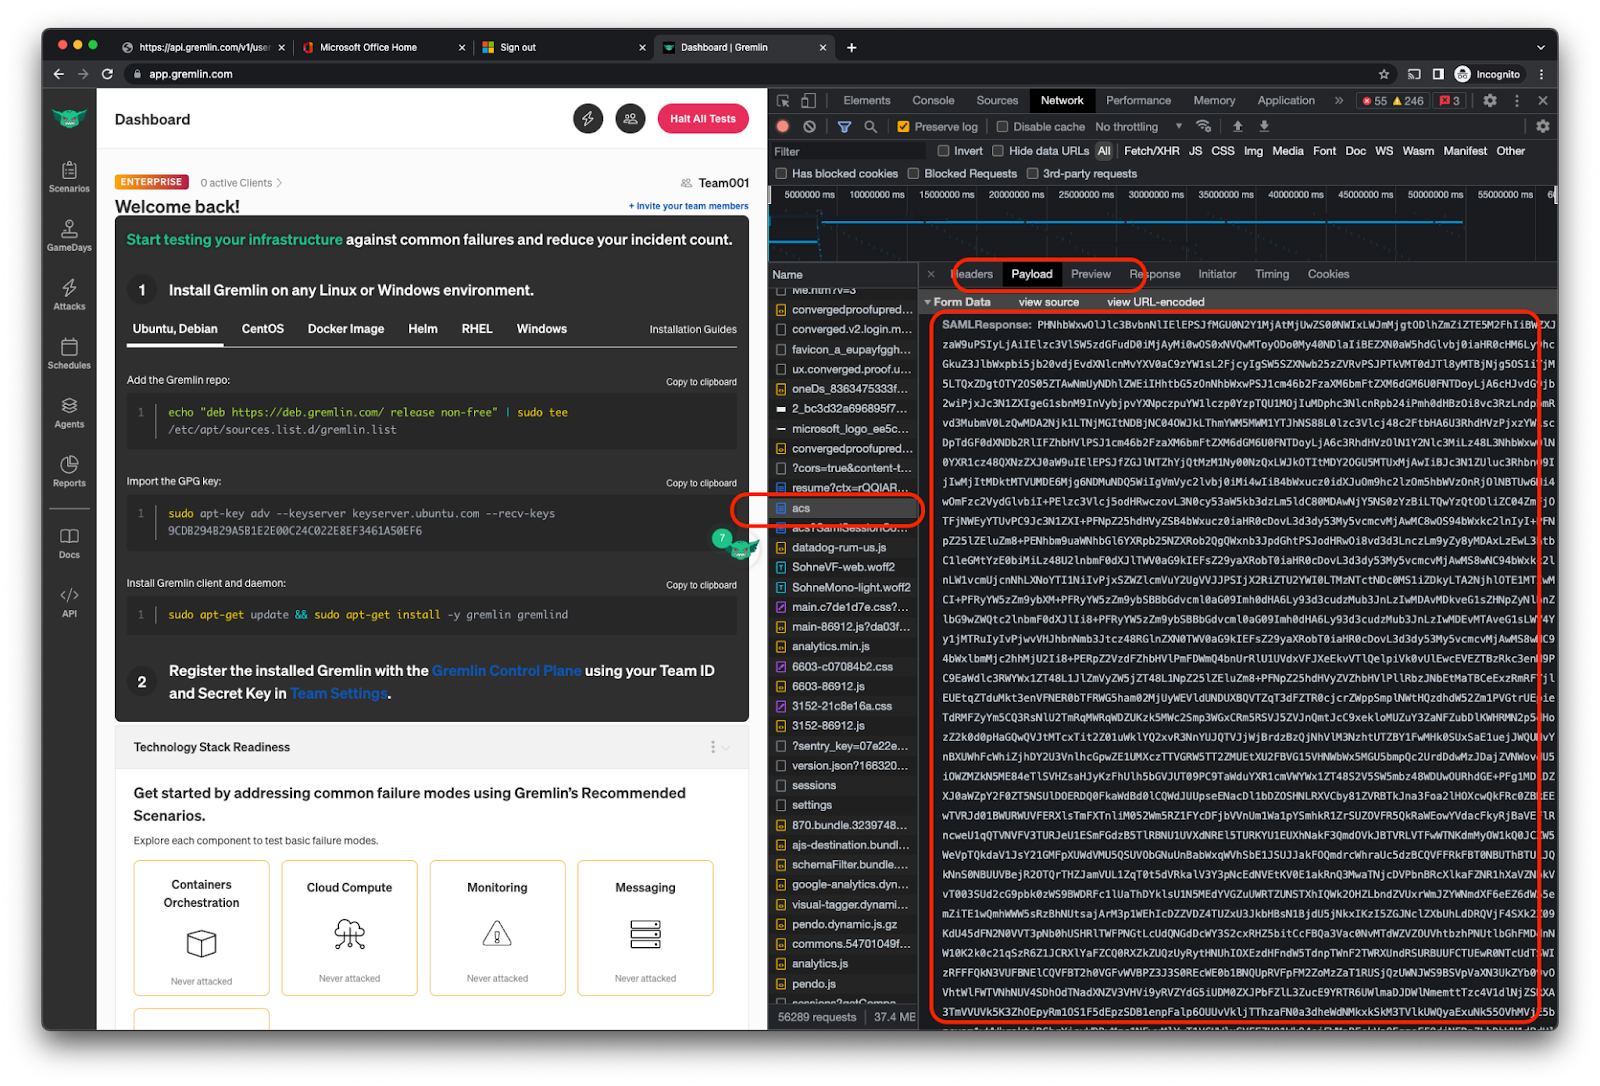
Proceed with your login attempt. After the login attempt, look for the POST request to https://api.gremlin.com/v1/users/auth/saml/acs. Here, you can inspect the payload and grab the base64-encoded SAML response from the IdP. You can right-click the payload field to copy the value to the pasteboard.
If you're using MacOS, you can read the base64-encoded value by opening Terminal and running the following command:
On Linux, you can use base64 to decode the value: